Hi Everyone - Lowri here.
We will be announcing the winners of this months Challenge in the next couple of days - so I thought I would share a tutorial that has been a few months in the making! It's also a perfect way to use up scraps of paper and make some unique gifts too.
Couple of disclaimers before I start! This would be fun to do with your kids but step one (cleaning the glass beads) is definitely an adults only activity. You can buy glass domes - but I don't know where - so if you find some let me know. At the end of the post is a cheap and easy way to make lots of magnets without all the fuss!!
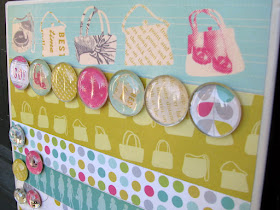
I have used the Cosmo Cricket "Upcyle" Collection which is perfect with it's bright colors and fun themes. I also decided I needed somewhere to put the magnets - so I made this fun board too!
These magnets are so much fun to make and you really only need a few basic supplies.
Now - I know you can probably buy these glass domes but I couldn't find anywhere here in New Zealand to get them, so I have "upcycled" these ones from The Warehouse.
Preparing the Glass Domes
Preparing the Glass Domes
- Buy some cheap magnets
- Carefully remove backing (definitely adults only)
- Scrape away most of the glue with a sharp craft knife
- Use a pot scourer to remove remaining glue
Making the Magnets
- Cut or punch circles of paper slightly smaller than the flat side of the glass dome
- Apply Mod Podge to the surface of the paper you want visible through the magnet and glue onto flat side of magnet
- When dry, apply a layer of Mod Podge to the other side o the paper (outside)
- Using a strong craft glue, stick a magnet to the underside and leave to dry
Here are some close-ups of the magnets. I made three different sizes here - for the largest I used a 1" circle punch.

The magnet board started life as a really ugly magnetic calendar thingy - so I sprayed the outside edges with some tile paint, glued on some paper and when the glue was dry - I Mod Podged over the top to add some shine and protection.
The wonderful papers from Cosmo Cricket really do all the work - they co-ordinate perfectly and the prints are fun and fresh.
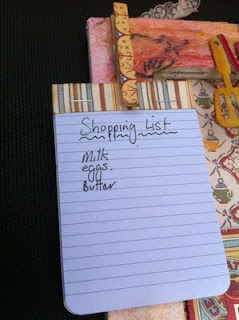
These are the magnets I made last year during our Christmas countdown.
OK - if you want to make lot of these very cheaply - buy yourself a jar of decorative glass pebbles such as these (from The Warehouse again - about $4)
Follow the "Making the Magnets" steps as shown above and you can make a lot of these very quickly. Be warned though the quality of the glass is such that the paper will not be as clear through them - but for $4 why not give it a go and see! I made a few to try- you can see these below.
Post a comment with any questions :-)
Lowri :-)


