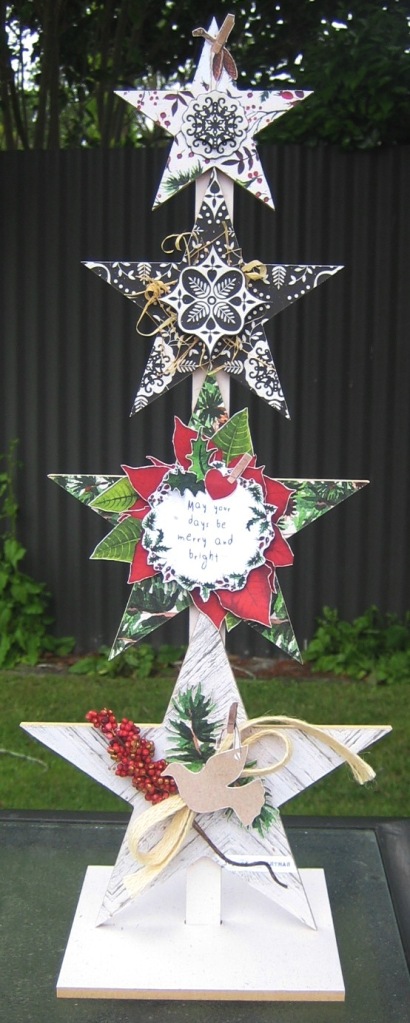
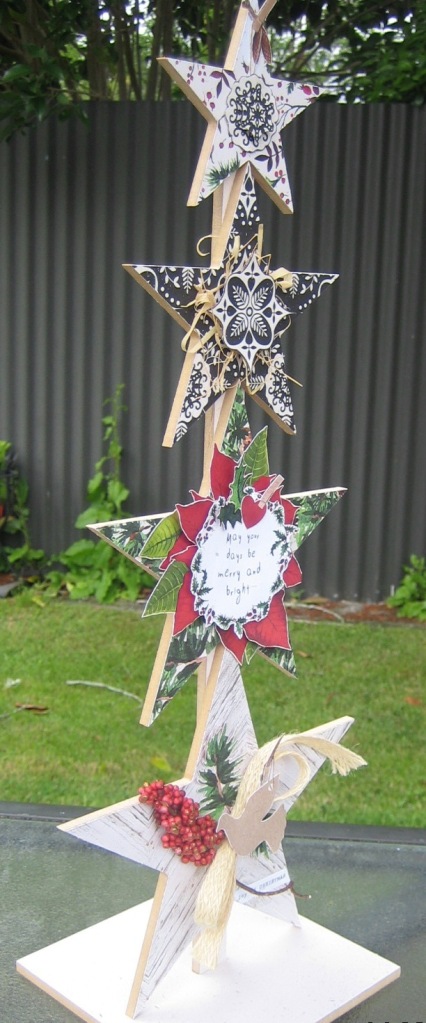
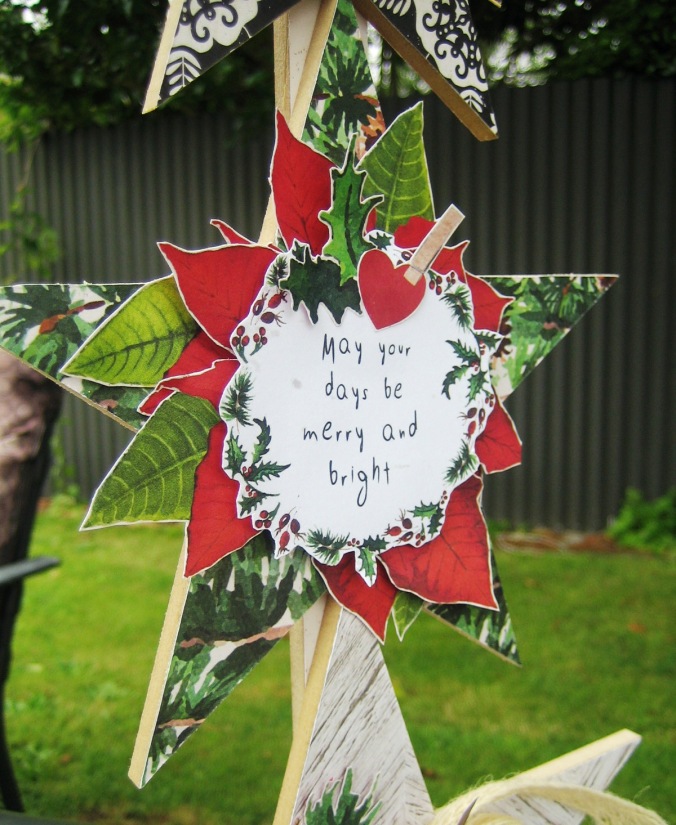
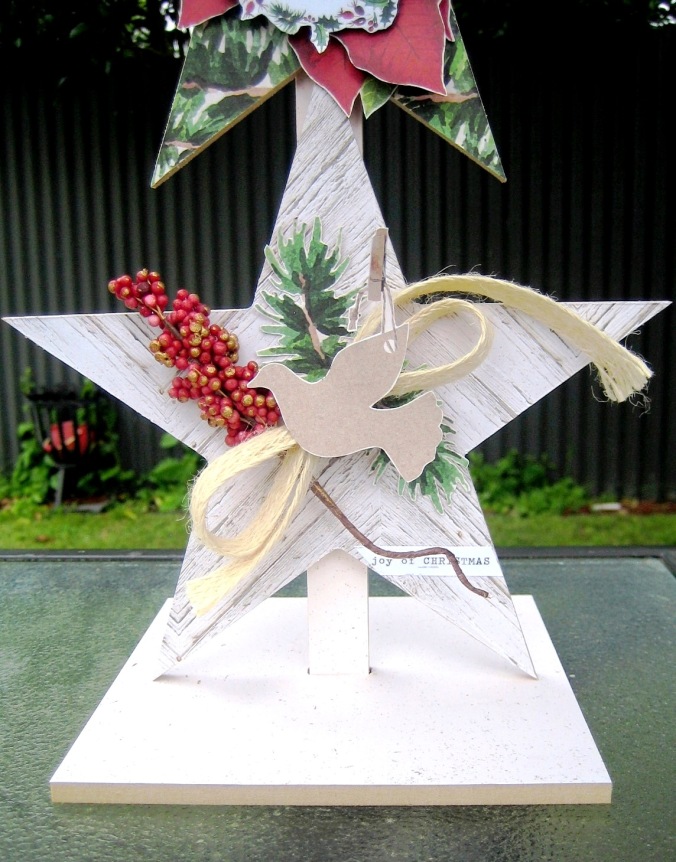
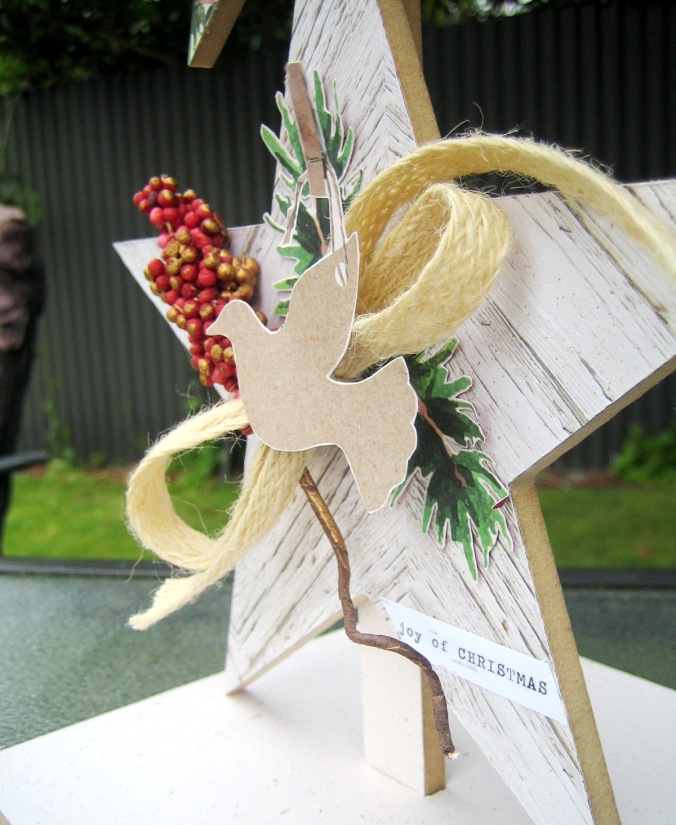
Hi there, Christine S. here starting off the third week of Artfull Crafts' Christmas Countdown. This week is all about Home/Tree/Table decorations. I made a home decoration/display with one of my favourite shape...stars! One can never have too many stars :). Let me show you what I created, & I hope you'll like it as much as I do.
I've used the Wooden Star Tree for this project & is currently 30% off at the shop, with all papers from the Home For Christmas collection.
I went for a clean & natural look, inspired by the texture of the Laurel paper. I wanted this piece to have a marriage of festive & Scandinavian look & feel. It was easy to achieve with this lovely & versatile Christmas collection. Now, let's have a closer look at each stars.
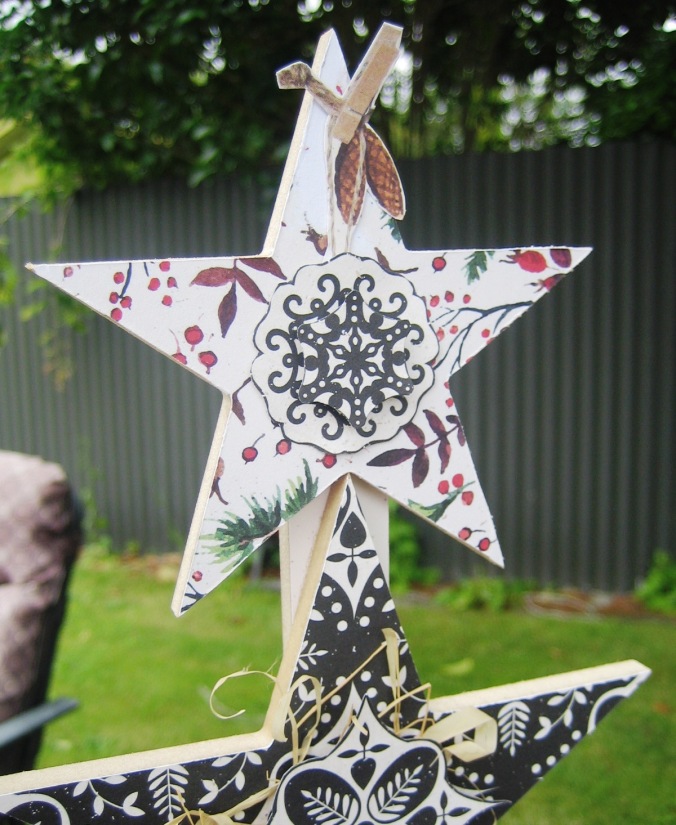
The first smallest top star has the Mistletoe paper & cut out pieces from the Laurel & Sugar Plum papers.
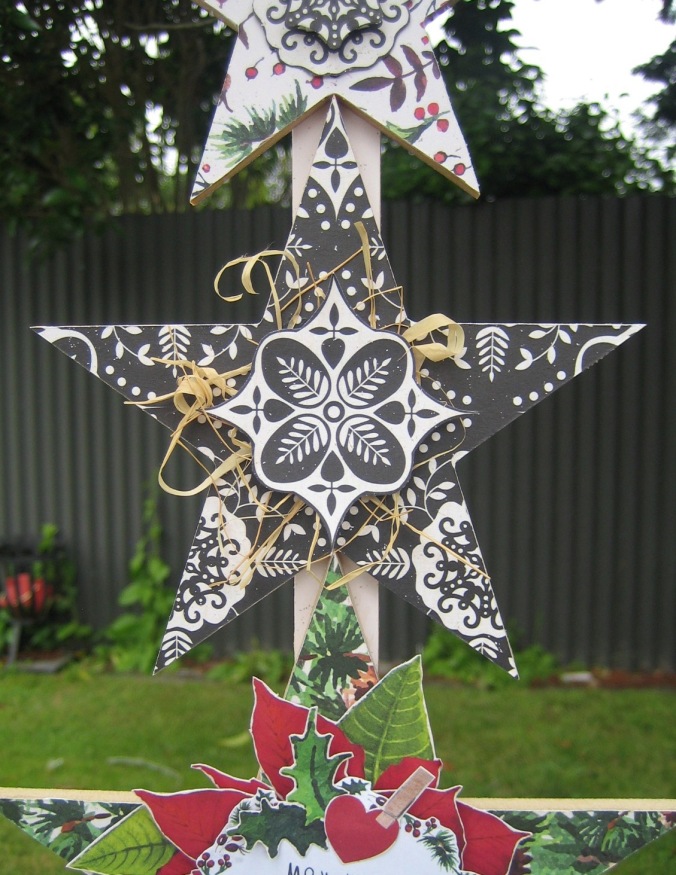
The second star has the Sugar Plum paper as well. This is one of my favourite paper from this collection, it has a lovely & versatile print.
The third star has the Pinecones paper with pieces from the Poinsettia & Season papers.
The fourth biggest star has the Sugar Plum paper too. Both sides of the paper you can pretty much use for anything & everything for your projects. That delicious vine is from Prima's Midnight Kiss Victorian Christmas Flower pack.
Don't forget, there's also 30% off all Christmas Wooden Projects & Home Décor Items in the shop, including this Star Tree Décor! It's a great deal, so why not pick up some projects & get into the festive spirit. Click here to see the range. We hope you'll join in the fun with our Christmas Countdown too. You can load your entries here. There's loads of prizes to be won!
As always, thanks for dropping by & we can't wait to see all your beautiful creations :).
Cheers,
Christine S.
Monday, November 30, 2015
Sunday, November 29, 2015
Christmas Countdown, 3 1/2 weeks to go and 30% off Advent & Decor
Keep reading to the bottom of this email for the Weekly 30% off Specials!
We hope you've enjoyed the challenges so far - Christmas Cards and Layouts/Photos. Click into the Competition Gallery to see what's been entered so far. You have until December 23rd to enter any of the Christmas Countdown Challenges.
There will be TWO winners for this challenge.
You have until midnight Wednesday 23rd December enter your projects in the Challenge. (Maximum of 3 entries per person please). Please load them up into the Gallery. It's really easy!! We look forward to you joining in the fun!
30% off Wooden Projects & Home Decor Items - including Advent Calendars!
It's time to make the house look festive. Pick up some projects get in the spirit. We've got Wall Art, Decorations AND Advent Calendars on special! Click here to see more.
Here at Artfull Crafts we love Christmas so much - we have a whole section of our website dedicated to Christmas Products. We are still ordering more Christmas Stock - so be sure to check in often.
Inspiration
The Design Team will be sharing their creations each day until next Sunday when the new theme will be announced. Here are some wonderful home and tree decoration ideas from previous year's Design Team to get you started:
We hope you've enjoyed the challenges so far - Christmas Cards and Layouts/Photos. Click into the Competition Gallery to see what's been entered so far. You have until December 23rd to enter any of the Christmas Countdown Challenges.
3 1/2 weeks to go CHALLENGE!
HOME, TREE & TABLE DECORATIONS
It's
time to put up your Christmas Tree - so why not make it look special
this year? Who doesn't like sitting at a pretty table at Christmas? It's
easy to make some simple crafty items that will brighten up the table.
Think about crackers, napkin rings, centerpieces, placemats, glass
charms etc. And how about the house? Have you thought about having an
Advent Calendar to help with the countdown, or some Festive Wall Art?
Show us your great ideas for making your table look festive and you
could win!There will be TWO winners for this challenge.
1) Overall Winner will receive a Kaisercraft Holly SilhouetteWall Art rrp $29.00
2) Drawn Winner - everyone who enters will be put in the draw to win an origami flower kit. Value $20
You have until midnight Wednesday 23rd December enter your projects in the Challenge. (Maximum of 3 entries per person please). Please load them up into the Gallery. It's really easy!! We look forward to you joining in the fun!
WEEKLY CHRISTMAS SPECIALS
This week we're offering you fabulous projects that will make perfect home, tree and table decorations.It's time to make the house look festive. Pick up some projects get in the spirit. We've got Wall Art, Decorations AND Advent Calendars on special! Click here to see more.
Here at Artfull Crafts we love Christmas so much - we have a whole section of our website dedicated to Christmas Products. We are still ordering more Christmas Stock - so be sure to check in often.
The Design Team will be sharing their creations each day until next Sunday when the new theme will be announced. Here are some wonderful home and tree decoration ideas from previous year's Design Team to get you started:
Have a great week!
Saturday, November 28, 2015
Christmas Layouts with Sharon
Hi everyone. Hope you are enjoying your last weekend of November. What that means of course, is that its ALMOST CHRISTMAS!!!!
Only a few days and those of you keen to start your December Dailies can start taking photos and recording memories of December 2015.
Today I am sharing with you a couple of layouts I have made in preparation for the silly season. (I always get super busy over December in the lead up to Christmas, and often my best laid plans are put aside and I end up with no layouts done for Christmas) This is a great way to get some layouts done quickly. I use this concept frequently in my scrapbooking, especially if I am inspired particularly by product, but don't have the correct photos "just now". I find it quite liberating to make a layout with no expectations on the embellishments or papers matching the photos. ( I think I have mentioned this before )
So, with out further ado....
This layout is using papers from the Prima Victorian Christmas line.
I love the gold foiling on this paper. It is very subtle, and just adds a little pop of glitz and glam.
This page will house a photograph taken of my tree once I get it put up (tomorrow I hope!!!)
I have layered lots of papers up and added a little bling reminiscent of christmas lights. In the background I have used my favourite texture paste, and stamped with Tim Holtz Distress inks in the background using a pine tree branch stamp.
The second page I am sharing is using papers from Graphic 45 "A Christmas Carol"
I cut the middle out of this large busy background paper here saving the elements from the background to use on another project. I placed this cut frame onto a neutral background from my stash, and added a bit of texture to the background.
The intention is to use two photos here in a collage.....a larger photo in portrait orientation under the man and up to the corner assemblage, with a smaller photo (3X4) which will tuck under the flowers on the left.
When designing pages without photos in hand, it is important to have some photo "blanks" to use in areas of your design and design around them accordingly.
Thats it for today.... hope the weather is not too wild for you wherever you are, and that you can set aside a little time for crafting. I urge you to have a go at preparing some Christmas layouts in advance. You never know....you might just enjoy it!
Cheers
Sharon
Friday, November 27, 2015
Hey Everyone in Scrappyland....Robbi here
It seems forever since I Blogged
life gets in the way of best intentions at times....But I have been busy working on some goodies for the 2015 Christmas Countdown and to make up for my lack of presence on the blog I am going to let you in on a free class lol
DON'T TELL LIZ!!!
I have used the Kaisercraft Silver Bells collection and I am thinking this has to be one of the nicest Christmas collection that have been released for a very very long time....
This Layout that I have created using the Silver Bells papers and goodies could be made from any collection for any reason....so why not have a go with the following instructions
Instructions:-
Remove all advertising banners - keep the ones from the Kaiser papers
Use 12x12 white cardstock for the base - distress
Using the Carol paper (with bauble side facing) and the left side remove a lengthways piece 6 1/2 x 12 - distress top left and bottom sides only wet the right hand edge and roll round a long paintbrush or similar object that's the same size top to bottom turn round paintbrush as shown in above pic - set aside, it will stay in position when totally dry
Using the remaining piece of Carol paper and the opposite side facing - distress the top right and bottom edges only
Using the Baubles paper and the pink side facing remove a strip to measure 5 x 12 - distress top, right and bottom sides
Add the 3 layers together as shown so when placed on the white cardstock they leave a small border of white showing
OPTIONAL - Before adding the layers to the white add chipboard between - to lift and give dimension
Using the frosty paper (possibly from the small paper pad) cut a strip to measure 3 1/2 x 6 1/2 - distress the top right and bottom edges tuck just under the pink distress edge about 1 3/4" from the top edge - adjust as required
Using the Joy paper remove the large whitish frame from one of the panels and remove the inside piece - replace with a 5x7 photo - add to chipboard
Add the photo piece but don't adhere the outside edges until you are completely happy with placement - add a small "L" shape of greenish paper to the top right side of the photo
From the Collections pack use the "Christmas Moments" tag - cut in half add the piece with words to the top as shown and the other piece to the bottom completely opposite
Use the pink arrow from the Collections pack and add to the right side as shown - add 3 little bling pieces to the top of the arrowhead
Use the "Christmas" from the Collections pack - add to chipboard to lift if you wish and add in place above your chosen word to go on the bottom right corner as shown
In the Collections pack is a small tag with a Santa on it - I have fussy cut the Santa and added him to the right side of the turned piece - add the rest of the tag to the top right hand corner of the photo - add some twine to it
FLOWERS well as some of you may know I love flowers so go on add as many as you would like - I know Liz has a lot in the shop that will work beautifully for this layout
I did remove the yellow stamens from the large Poinsettia and I added some white ones then covered each one in stickles to make them pop and give that Christmassy feeling to the flowers
I have made some come over to the right side of the turned paper so it flows a little better - do you see Santa poking out?
Lastly I have added some more stickles to the baubles on the left top of the layout to also make them pop
Easy ... so go on grab yourself some paper and create a special layout for this Christmas and with that in mind you should be able to get the perfect photos for the layout rather than making the layout suit the photos
http://www.artfullcrafts.co.nz/Kaisercraft/Collections/Silver-Bells
Here is a few extra photos to help you achieve this
There is also a card I made using the Silver Bells Collection and it is basically made the same as the layout
for this I used White cardstock as the base - Believe paper for the top and the advertising strip saying "Santa Claus is coming to town"
Create your turned piece as with the layout and add the flowers and doily as shown - along with some silver netting and some "straw"
on the inside I have created the insert piece using Good Tidings paper - cut a strip to fit nicely inside the card base and add a nice saying to the insert - whether that has been stamped or using one of the pre printed panels from the Joy paper
Make the card as large or a small as you wish
Silver Bells Paper Collection
Ok that's it for this blog post - I hope everyone is looking forward to the challenges set for the next few weeks and most of all it gets everyone excited about Christmas - remember it doesn't have to be an expensive time of year
a little thought and some amazing handmade gifts can be made - keep watching you might get some crafty ideas!
Until next time
Take Care and
Happi Scrappin'
Thursday, November 26, 2015
Another "Christmas Magic" Layout - Melissa
Hello again! It's Melissa and today I have another layout to share with you that I made with Shimelle's "Christmas Magic" collection. For this layout I decided I really wanted to feature some of the beautiful papers, and I choose a photo of our oldest daughter Azaria decorating the tree.
I started with the text paper, and then built my layers. The wreath paper is so pretty, and I had to feature a piece of it.
The Merry & Bright card is a cut apart from the collection. I added in some older Maggie Holmes glitter phrase thickers.
Lovely layers, and a bauble decoration button. The black words and phrases are from Kaisercraft's "Holly Jolly" collection, and they provided the perfect finishing touch!
The gold doily is by Studio Calico and is from my stash. The blue tag at the top is from the embellishment pack that I got from Liz.
I made a process video, and you can watch it below.
You can purchase the Christmas Magic collection in the shop here.
Thanks so much for looking!
Melissa
Wednesday, November 25, 2015
Lisa - Christmas layouts
Hello again! It's Lisa here, and today I have three layouts to share, all made using different Christmas-themed ranges. However, all three pages aren't what I'd call overtly "Christmassy", so I think they show the versatility of the papers. Have a look and see what you think. :)
The first two are made using Kaisercraft's Holly Jolly range, which features red, green and kraft colourways-- very on-trend. For my first layout below, I've added a few touches of gold as well.
The second layout also features a few gold accents, but is mostly based around the red, green and kraft. I've also added some ink splatters, and a word strip cut from the bottom edge of one of the 12x12 sheets. Quick and easy and festive, without being over-the-top.
My final layout is made using the gorgeous Claus & Co line from Simple Stories. This one's probably my favourite- I like the clean, graphic style of the papers- lots of text, polka dots and other fun elements. Again, I've added touches of gold, along with green and some more ink splatters. Washi tape and a fancy gold doily also make an appearance. :)
And that's it! As you can see, Christmas-themed papers can be used for a lot more than just Christmas pages, so they're well worth checking out. Have a look in the Christmas store, and don't forget to upload your own lovely creations to the gallery to be in to win some fabulous prizes!
Thanks for looking, and I'll see you again soon.
Cheers,
Lisa :)
Tuesday, November 24, 2015
Christine S. - Home For Christmas
Hi there, Christine S. here posting a memorable Christmas layout with the Home For Christmas collection. For 2 years in a row my youngest daughter balled her eyes out as soon as she sat on Santa. I reckon we have a very good chance of getting her to look at the camera while sitting on Santa this year. She's a lot friendlier now so fingers crossed!
Here's my Christmas layout:
I've layered a couple of papers from the Home For Christmas collection which you can buy in a Paper Pad or separately. The Wreath die cut paper is intricate & gorgeous, & is perfect for framing Christmas/festive photos.
The Lime Crystal Spray & Christmas Bauble wooden buttons are added for the cluster. You can also get the mini wooden peg, ribbon & the itty bitty flower from the shop as well.
I'm glad we bought this photo from the shop...it's absolutely priceless!!! I have to say Santa did pretty well the whole time she cried. Do check out the lovely Home For Christmas collection here. We're also loving all your beautiful card entries. Join in & upload your Christmas cards & layouts/photo gifts at the Gallery for your chance to win awesome prizes.
Thanks for popping in & keep an eye for new inspiration each day from the design team.
Cheers,
Christine S.
Thanks for popping in & keep an eye for new inspiration each day from the design team.
Cheers,
Christine S.
Monday, November 23, 2015
Shimelle "Christmas Magic" Layout - Melissa
Hello its Melissa! I'm so excited to be joining in on the Christmas Countdown, its such a fun way to get in the Christmas spirit and get ready for the school holidays!
Today I'm sharing a layout I made with Shimelle's new Christmas line appropriately named "Christmas Magic". I decided to scrap a photo from Christmas 2013 of a group of four of us singing Carol of the Bells. We sung it at our church Christmas Show, combined churches Carols on the Green and Christmas Day Service. I was 5 months pregnant with Brielle at the time.
I fussy cut a line of the presents and popped them up on foam adhesive for extra dimension.
I also fussy cut out a row of the lights, and placed them at the top of my layout. The gold doily is from Studio Calico, and is from my stash.
I just love the passion that Shimelle has for scrapbooking, and designing her own products. Here is a video of her sharing her collection.
Thanks so much for looking! You can purchase the Christmas Magic collection here in the shop.
Happy crafting!
Melissa
Sunday, November 22, 2015
4 1/2 weeks to go, Christmas Specials and new theme (photos and layouts)
What a fun start to our Christmas Countdown. We've had a
week of entries for the card challenge and you have until the Wednesday 23rd December to upload them to be in the draw to win! (Don't leave them all
to the last day. We want to enjoy seeing your ideas!!). Head to the Gallery and see what's on show!
Click here to see the specials. This week it's 30% off Templates/Stencils, Stamps, Card Packs, Dies & Embossing Folders. Only applies to items in stock (not request items). Special ends midnight 29th November.
Here at Artfull Crafts we love Christmas so much - we have a whole section of our website dedicated to Christmas Products.
WEEKLY CHRISTMAS SPECIALS
Click here to see the specials. This week it's 30% off Templates/Stencils, Stamps, Card Packs, Dies & Embossing Folders. Only applies to items in stock (not request items). Special ends midnight 29th November.
Here at Artfull Crafts we love Christmas so much - we have a whole section of our website dedicated to Christmas Products.
New Challenge theme
LAYOUTS AND PHOTO GIFTS
WOW
us with your skills! Submit ideas for layouts and photo gifts
that celebrate Christmas or would make great Christmas gifts. The
Design Team will be sharing their creations each day until next Sunday
when the new theme will be
announced. Check out below to see how you can enter the TWO Challenges
we now have running. Wednesday 23rd December. You're allowed to enter 3 projects in each category.
Here are some wonderful layout/photo gift ideas from previous year's Design Team to get you started:
Layout and Photo Challenge
There will be TWO winners for this challenge!
Card Challenge - still active (closes 23rd Dec)
WOW us with your cardmaking skills! Submit ideas for quick and easy, or complicated and time-consuming cards that you will give away this Christmas. The Design Team will be sharing their card creations each day until next Sunday when the new theme will be announced. Entries to be uploaded into the Gallery by Wednesday 23rd December. Maximum of 3 entries per person.
Challenge Prizes
There will be TWO winners for each challenge!
1) Overall Winner for Cards will receive a set of of Holly Indigo Blu Stamps
2) Drawn Winner for Cards - everyone who enters will be put in the draw to win a Kaisercraft Tree Flip Die
There will be TWO winners for this challenge!
1) Overall Winner will receive a mixed embellie pack from Kaiser's A Touch of Gold collection
2) Drawn Winner - everyone who enters will be put in the draw to win a packet of Kaisercraft collectables from their Silver Bell's collection
2) Drawn Winner - everyone who enters will be put in the draw to win a packet of Kaisercraft collectables from their Silver Bell's collection
Card Challenge - still active (closes 23rd Dec)
WOW us with your cardmaking skills! Submit ideas for quick and easy, or complicated and time-consuming cards that you will give away this Christmas. The Design Team will be sharing their card creations each day until next Sunday when the new theme will be announced. Entries to be uploaded into the Gallery by Wednesday 23rd December. Maximum of 3 entries per person.
Challenge Prizes
There will be TWO winners for each challenge!
1) Overall Winner for Cards will receive a set of of Holly Indigo Blu Stamps
2) Drawn Winner for Cards - everyone who enters will be put in the draw to win a Kaisercraft Tree Flip Die
Saturday, November 21, 2015
Holly Jolly Card - Louise
Hi, I am here with you today with another card share for the Artfull Crafts Christmas Countdown.
I have used another KaiserCraft Collection for this card, Holly Jolly, full of red & green and black and kraft, this collection is a little more contemporary.
I have used a digital image from The East Wind and is called Dear Santa. I coloured the image with Copic Markers.
The papers have been inked on the edges with distress inks in Cracked Pistachio and Fired Brick with an ink blending tool.
I diecut was cut on my silhouette cameo and it was my first time cutting with a shadow, it has taken me ages to work out how, thank goodness for youtube!
That's all from me today, thanks for dropping by,
Lou
Friday, November 20, 2015
Home For Christmas With Louise
The Christmas Countdown has begun at Artfull Crafts, each week has a different theme and the Design Team will be bringing you loads of inspiration for your Christmas crafts pretty much every day so be sure to check it out.
It is my turn today with a card made with KaiserCrafts Home for Christmas collection. I have used papers from the 6.5 x 6.5 paper pad and a tag from the same collection
I added a gorgeous sheer red polka dot ribbon and tied the tag around the bow, I then added dots around the layers showing with liquid pearls in White Opal and Ruby Red. I cut some leaf flourish corners with a die on my cuttlebug.
The image, Rory's Reindeer, is coloured with Copic Alcohol Markers.
Thanks so much for dropping by and I hope you enjoy all the inspiration on the Artfull Crafts Christmas Countdown.
Lou

