Let's start off with the easiest way to add splats: Add your desired ink pad color to your stain stamp & stamp directly on the paper. Here's a layout I made with lots of brown splats (& other inks as well):
Simple, easy, not messy!
Second tip is what I've learned from Kaisercraft DT member Rachael Funnel from one of her Teusday Tip. Simply apply some light ink pad color on the stain stamp first, then apply a darker color on the outer parts of the stain stamp, & stamp away! Here's a layout I've made with these splats:
There's lots of light & dark pink ink splatters on the background as well, along with some pink watercoloring & black misting too.
For the last tip, you'll need the same stains stamp, a small paintbrush & Tattered Angels Glimmer Glam or Glaze with your color choice (I use Tattered Angels goodies almost all the time...love 'em!). These paints are perfect compared to normal acrylic paints because it is not as thick & will give the desired result. I'm using Ladybug Glimmer Glam as shown:
Rest assured this is not going to be messy...unless you spill your bottle of Glimmer Glam (eeek!)!
Step 1
Apply some Glimmer Glam/Glaze on the stamp. No need to apply too much.
Step 2
Stamp on your page
Step 3
Stamp again without adding any paint for a different effect
Voila!
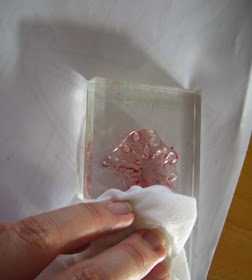
Once finished, make sure to clean your stamp straight away with a stamp cleaner & a baby wipe.
(this is important!)
Here's my first layout contribution at the beginning of the year for Artfull Crafts with these red splats:
I've also added some yellow ink splatters here as well.
Incorporating splats on you layouts/cards need not be scary & messy. With these stamps you get full control on how your splats will look like, where you want them. Leave a comment or two if you've got any questions. Don't forget to join in our March challenge here. Thanks for dropping in & I'll see you again.


No comments:
Post a Comment