My background was created by dabbing sunshine yellow and grey paint daubers on white cardstock. Then I sprayed the paper with water and dabbed it with a nappy wipe. I then used grey ink around the edges. So with some film transparencies, the following papers Buttercup and Bright Side, Collectables and Stickers I created a layered effect under my foam mounted photos. Adding flowers , star sequins and some mist sprinkles finishes the layout off.
That is my final layout using this Collection hope you have enjoyed the inspiration from me and the other Design Team ladies this month! See you next month with some new collections!
Good morning! :) Lisa here again, and this time I'm sharing a couple of layouts made using the newShine Bright collection. This has been a super-popular one amongst the Design Team, and rightly so, because it's on-trend, fresh and fabulous with lots of word art, patterns and neutral colours.
My first layout has a black cardstock background, which helps make the patterned papers I've used pop in contrast. I started with a sheet of the Canary design, upon which I then layered my two photos (coffee! I'm a fan, needless to say) and then added accents and embellishments in the form of some scalloped borders from the small paper pad, along with a couple of tags and some washi tape in matching colours.
A couple of wooden veneer pieces and some bling from my stash finish it off. A closer shot is below:
My second layout is a bright and breezy one: a burnt orange cardstock base, which I splattered with some indian ink. I then layered a selection of hand-torn patterned papers as a base for my photo (a collage of silly family selfies taken on Christmas Day.) Another patterned border from the small paper pad was used to anchor the photo.
A little cluster of embellishments was added on the right hand corner (washi, a wood veneer heart, a flower) and below that, a word art circle, and a long tag (also both from the small paper pad.) Some small glitter triangles placed randomly, and it's all done. :)
A closer look:
I loved working with this range: so versatile and suitable for all kinds of layouts and projects. The Shine Bright collection can be found here.
Thanks so much for looking, and I'll see you next month. :)
Where has the year gone???? Cannot believe it is the end of February almost!!
I have been lucky enough to be able to play with the Shine-Bright collection of papers this month.
When I first saw the paper, I was a bit dubious about the bright yellow of the collection. ( Yellow is not my go to colour by any stretch of the imagination) Therefore, I was pleasantly surprised at how easily these pages came together, and also the punch that lovely bright yellow gives to the pages.
I was working mainly with the 6x6 pad, which worked well with the designs of my layouts.
Every year, I take a photo of my daughter after her first ski for the season. Loved the yellow elements which matched well with the lifejacket, and complementary with the blue water.
I used a mask and texture paste to create a background initially, then added some spray ink and splattered acrylic ink, before adding the papers and die cuts to the background.
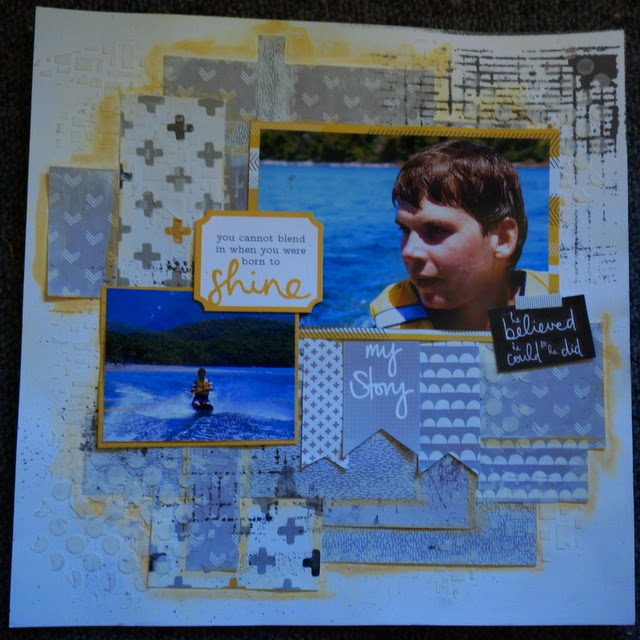
Another skiing photo!!! This time with my son. In this page I used the grey elements from the pad, and accented the page with pops of yellow.
( The die cut actually reads "SHE believed SHE could......" and obviously this was not going to work. I used my sharpie to black out the "S" to create a more appropriate quote)
Also lots of texture paste through a bubble mask, and black ink through a ledger stencil, to add dimension to the background.
Last page of the Shine Bright collection I used layers of black gesso through a stencil, and added the prima glass beads while still wet. The paint acts like a glue and the beads have embedded into the black gesso. I also used a little silver embossing powder in places as well, to accentuate the stenciled layer. Layered up papers and string to form a photo mat, and call it done!
The other collection I was lucky enough to play with was the Betsys Couture designed of course, for our very own Miss Betsy!!
I found this paper was perfect for heritage style photos. I layered the papers to make a photo mat, and used a mask to add some texture in the upper half of the layout.
The second page, saw me take a photo from over 20 years ago, and make a simple layout ( Hard to see on the photo, but the photo and quote cards are liufted up quite high with chipboard. I doodled a barb wire frame around the edge of the layout, to give it an edge, and to allude to the kiwi no. 8 wire mentality
Last but not least a layout which I have not added my photos to as yet. I have some of my mothers family photos destined for this page, but have to get them from another family member to scan first!!
For something a little different, I added texture paste to the brown cardstock, then used distress inks to rub over the top to colour it a little. I used several different shades to do this.
This page is also a little different, in that the page mat flips up to show another layer underneath, and a wee envelope to hide extra photos/memorabilia in.
That's it for me this month!
See you next time with some more new releases from Kaiser soom!
Hi there. Christine S. here today posting a layout featuring the Shine Bright collection with my take on this month's February Sketch Challenge. Here's a reminder of the sketch:
Here's my layout:
I used 3 different sizes of the same photo, making sure that the smallest one is much more saturated black & white.
I've put my own twist on the lovely sketch, while still staying close to it. The graduating photos slightly broken up by the other layered elements worked a treat for this layout.
The Shine Bright collection is available at the shop, & it's proving pretty popular. I hope I've inspired you to join with us this month from the theme, colour palette & sketch challenge. It's up to you which you'd like to create! You've got until the 27th to load your entry/entries here.
Thanks for popping in & do enjoy the rest of your month.
Betsy here this morning ladies, to share the remainder of the cards made with my VERY favourite collection! It is absolutely stunning and I so love working with it. Kaisercraft have very kindly brought out a range of papers etc with my name attached to it, Betsy's Couture - the colour palette is lovely and I do love the vintage feel to it. Again, many thanks to Kaisercraft for this prestigious honor.
This photo is to just show you the range of papers in this collection - much better in real life!
For this card I have recessed the window adding a verse from the collectables. They are so handy for making cards, does simplify the process of card making.
This collection does lend itself to masculine cards as well - so hence we had to share one with you. Tim Holtz's clock die was used for this one, some corrugated card and plenty of sepia ink.
Isn't she a stunning lady? The picture was found on Pinterest and I thought she looked really elegant and went with the collection.
Lastly, a Z fold card which I rather like making. Just a little bit different. The picture inside, is one I had in my mountain of photos which are put aside for just the right moment.
That's it ladies, hope you have enjoyed seeing what can be done with this amazing collection. I think Artfull Crafts may still have it available, some of it anyway and I do know they are ordering more, as it appears to be popular.
Hello! Lisa here again, and this time I'm sharing a couple of layouts made with a very special range of papers-- the lovely Betsy's Couture range, designed by and named after our very own Miss Betsy! The line features gorgeous vintage designs and muted colours, with a lot of intricate patterns. I especially love the various shades of blue used, and had a lot of fun putting these projects together. :)
The first layout is one of my tried-and-true grid styles, but on a larger scale this time, filling up the entire page. It's a 3x3 design, with 6 of the squares covered with patterned papers cut to the same size (based on the size of the photo in the centre) and the top right and bottom left squares left blank for the background cardstock to show through.
I used a selection of patterns from the smaller paper pad, sticking to mainly blues and browns. On each square, I added various embellishments, including wood veneer pieces, crochet lace ribbon, some of the Collectables, a doily cut in half, as well as gold glitter leaves and some other goodies from my stash.
A couple of closer shots are below:
My second layout has a sheet of royal blue cardstock as a base-- not a colour I can recall ever having used before, but it works wonderfully with the blues in this range. On top, I layered some of the Bustierpaper as a place for my photograph, along with one of the shaped borders from the small paper pad on the left. On the right, I clustered an assortment of embellishments: doilies, flowers, some of the fabulous Collectables, as well as some bling.
A closer shot:
As you can see, this range works just as well for modern-themed layouts as it does for vintage/heritage pages. Such a versatile collection-- well done, Miss Betsy! :)
You can find Betsy's Couture here-- it's been an extremely popular one!
Thanks for looking, and I will see you again soon!
This time I have not used any of the papers in the collection rather I have layered the stickers and collectables with various other embellishments.
My background was created by spraying it with Prima's Sunshine Bloom spray and then dabbed with a nappy wipe. The ribbon has been attached by double sided tape and buckle with strong glue.
I hope you enjoyed visiting the blog today - The Shine Bright collection is so versatile and suitable for many different projects. I will be back next week with my final layout using this collection see you then!
Hello all! :) Hard to believe we're in February already-- I'm hoping the summer sticks around a while longer yet, and that autumn treats us to long, warm, settled days.
Today I have a couple of layouts to share with you, made with one of Kaisercraft's new releases for this month: Wanderlust.It's perfect for all those travel photos, with lovely earthy shades and journey-related imagery.
For the first layout I used a sheet of green cardstock for the base, and splattered it with a little indian ink. I then layered some of the Adventurous paper, along with my photo and one of the 6x4 Captured Moments cards, featuring a quote I really liked. A handtorn strip from the Freedom sheet acts as an anchor below, as does another hand-torn piece along the very bottom, this time from the Wandersheet, featuring a great faux-leather effect.
To finish off, I've added embellishments in the form of some of the Collectables, some wood veneer pieces, ribbon, some travel-themed washi tape, and a few other little bits and pieces from my stash.
A closer look is below:
My second layout uses the diecut Globepaper as the main feature-- it's a stunning design, and almost too nice to use! But use it I did, figuring that it was so striking that it really deserved to pretty much stand on its own. I attached it to a sheet of blue cardstock, and used a single favourite photograph of my daughter in the centre.
I added a couple of flower embellishments on the bottom left, with two fancy brads in the middle of them. A quote strip cut from the selvedge edge of one of the sheets of paper finishes it all off. Simple yet (I think) effective.
The Wanderlust collection can be found here. As always, thanks for looking, and I'll see you again later in the month. :)
Good day, Christine S. here sharing 3 birthday cards featuring the awesome Shine Bright collection. I had fun creating these cards & I hope you’ll enjoy looking at them. The first one is for my niece:
The next one is for my daughter’s friend who turned 4, hence the 4 smiley faces on the card:
And the last one is for someone in the family:
Isn't this collection fun? I’ve used the paper pad, collectables & sticker sheet from the Shine Bright collection among other Kaisercraft goodies. Thanks for dropping by & see you again soon.
Hi everyone Bev here today to share another layout using Kaisercraft's Shine Bright Collection. I am having fun creating with this range love the pop of yellow!
I started the layout by adhering the Canary Paper from the collection to some black cardstock to give the layout some strength. The next step was cutting part of the Sunflower Paper to make a zig zag pattern to the background. I then added some strips from the Mango Paper along with my photos - one of which is on mounting tape to give more dimension. I also added the small yellow chevron strip which was off one of the cutoff from one of the 12 X 12 paper from the Shine Bright Collection.
Then using the stickers, collectables and some circles from the Sunbeam Paper I added more dimension to the layout. The layout was then completed by adding some silver spray sprinkles and Star sequins.
See you all soon and thanks for visiting. Have a great week!
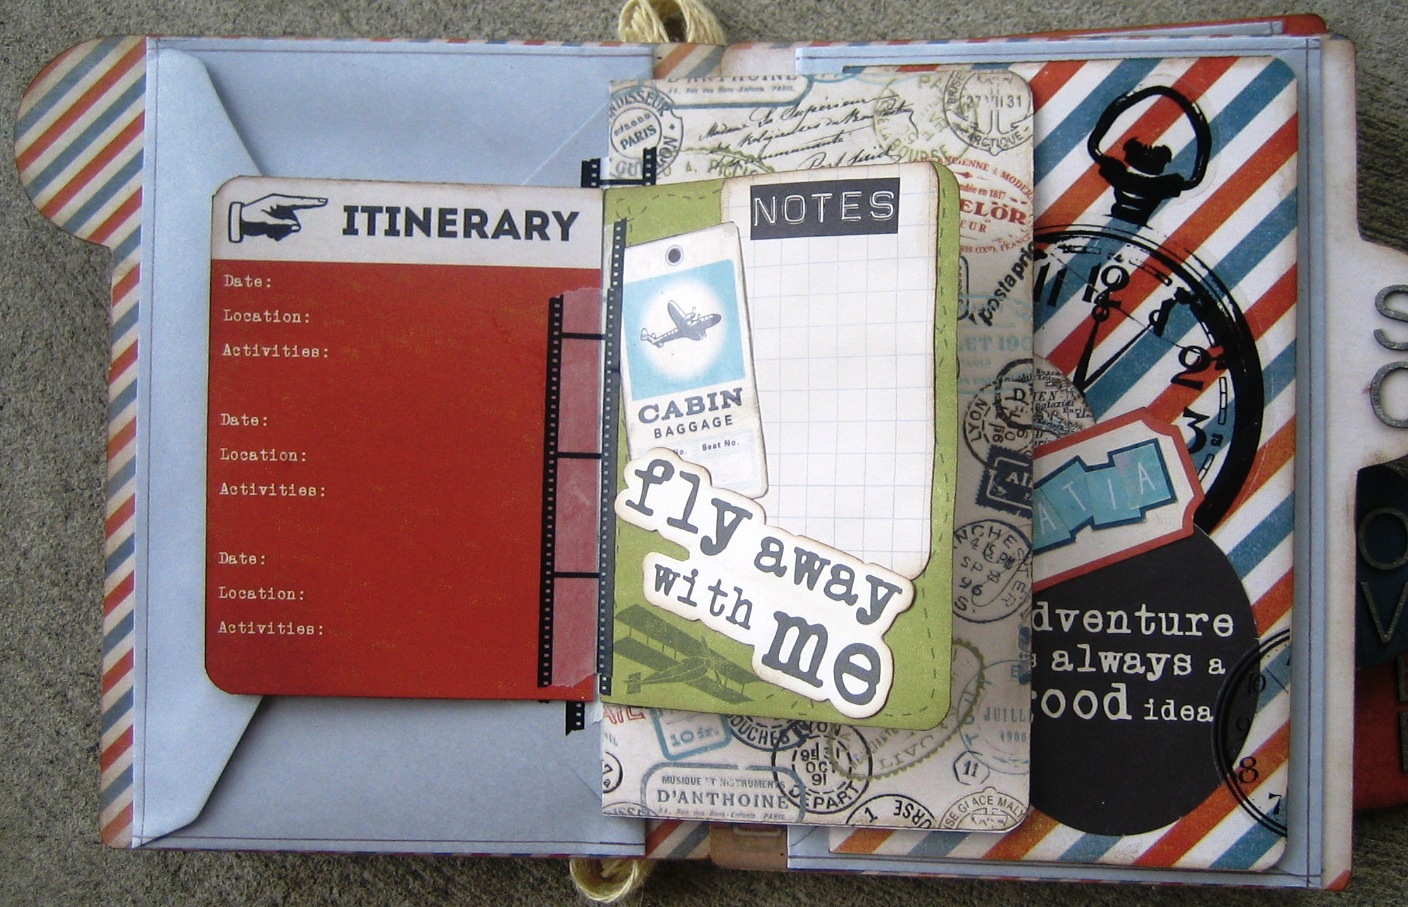
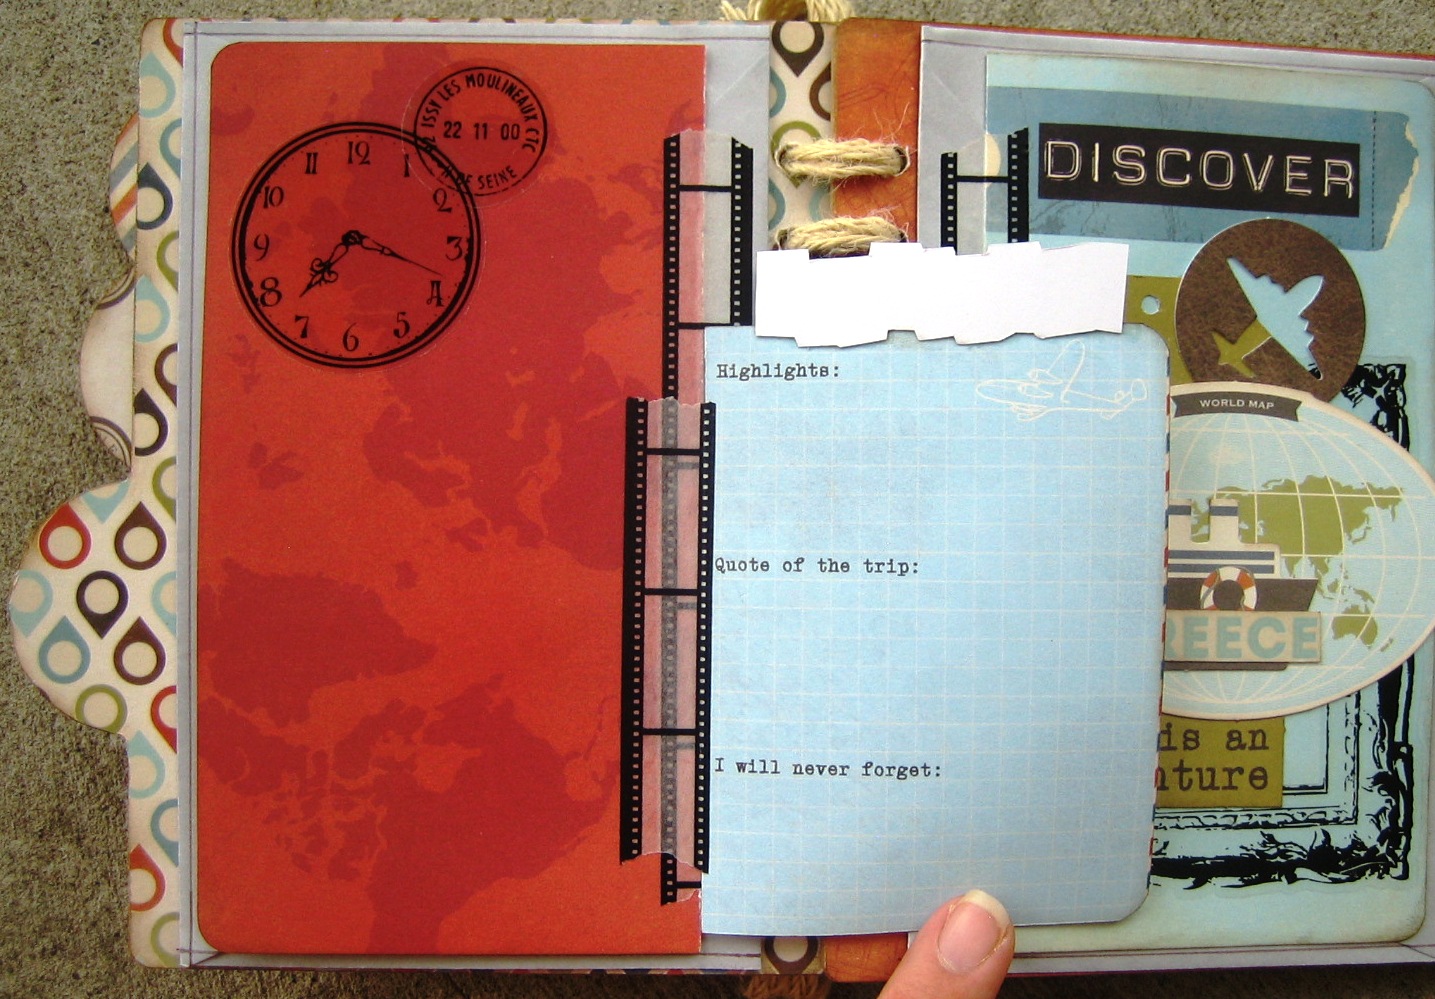
Good day! Christine S. here sharing a travel album which features the Wanderlust collection. If you've travelled lately, then this collection is just perfect. The colors are well coordinated which will make your travel memories stand out. I've made an album which I'm giving as a present for someone in the family that has travelled to Europe. The recipient of this album has told me many stories about the whole trip...the different cultures, lots of interesting food, the great people they've met, the weather changes, etc. All these got me thinking on how I should create this album. Grab a cuppa as we go through the pages. First, the front cover:
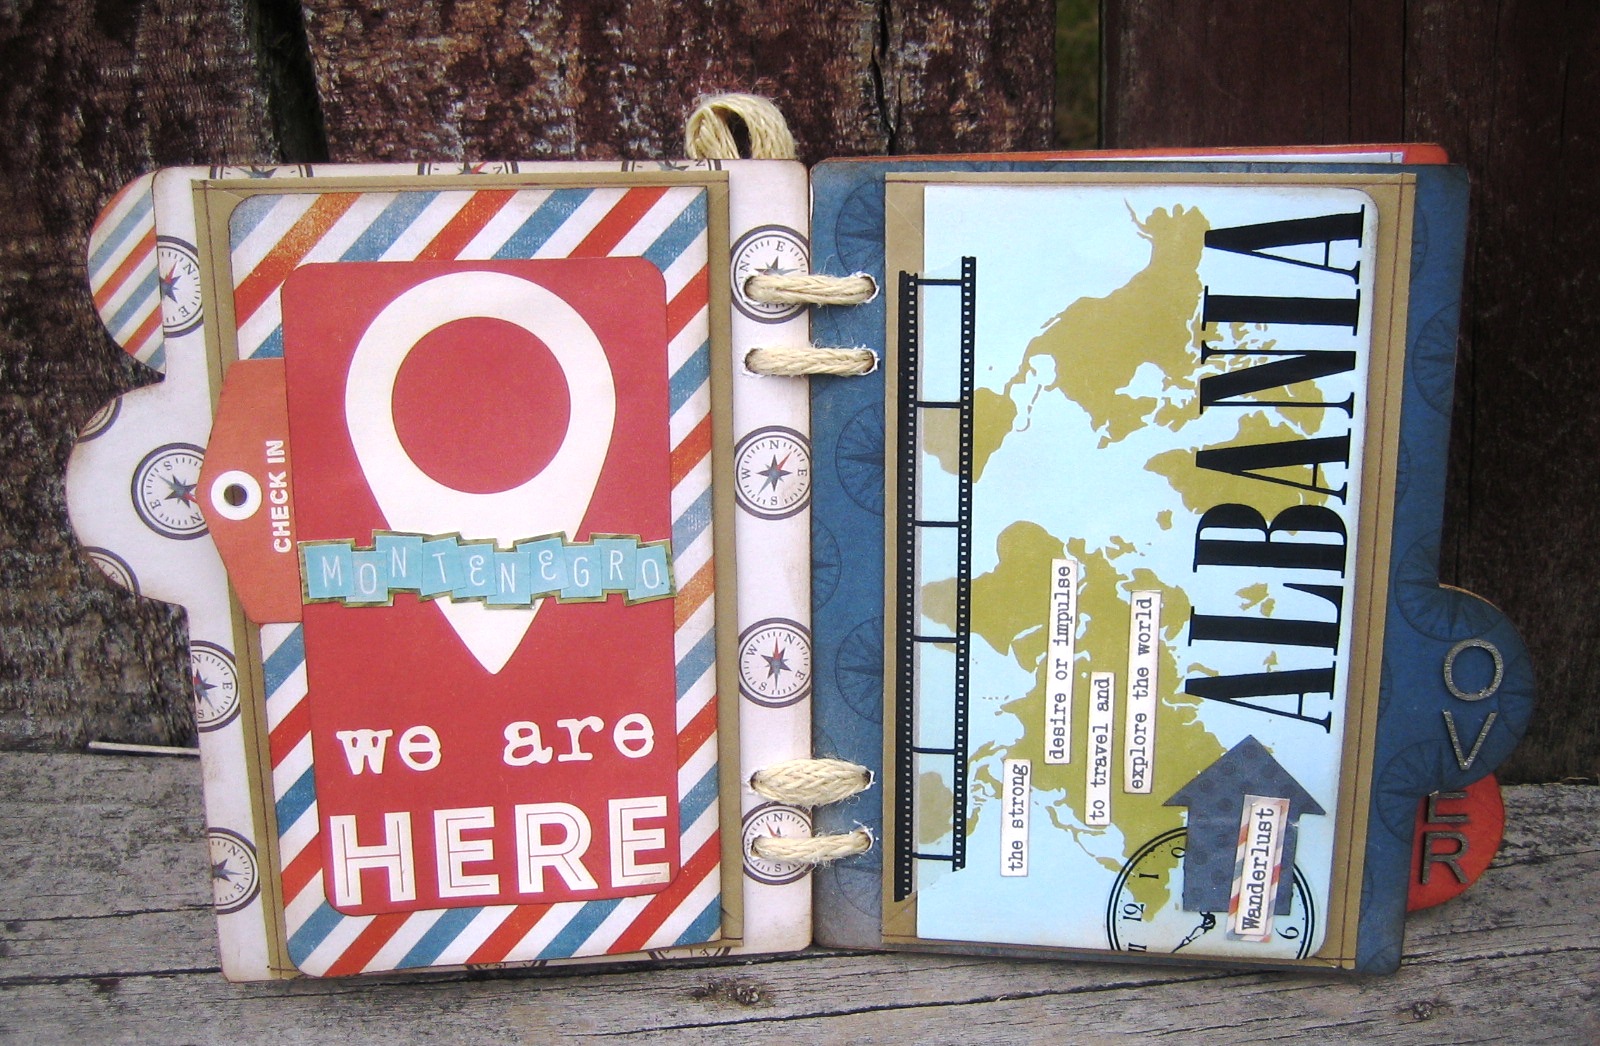
I've used Kaisercraft's file tabbed album for this, with the paper pad, collectables & captured moments cards from the Wanderlust collection. Throughout the album you'll see compasses, clocks, post stamps & frames from the Antiques clear sticker sheet. They're super versatile & so easy to use...no need to rub on! This album has 6 pages which is perfect for the 6 different European countries they've travelled to. Every page has an envelope that easily opens up to store photos from each country. On top of each envelope are open files for journaling & documenting stories & memories, which are all adhered with film strip washi tape. Here's the first & second page:
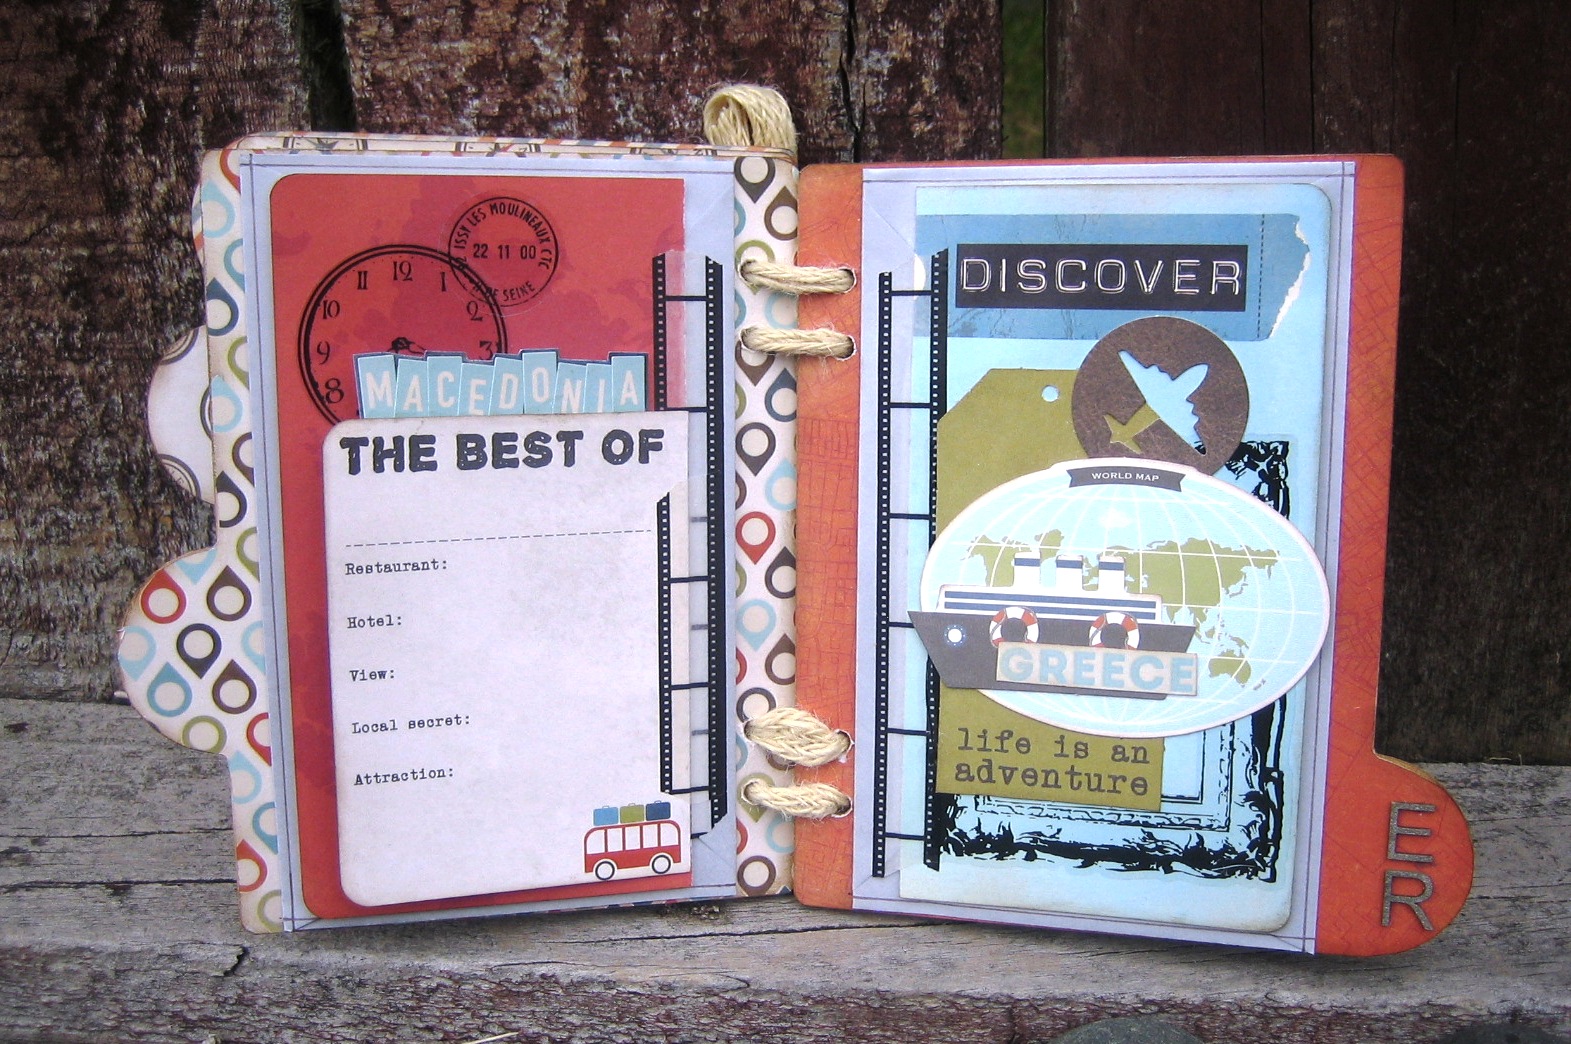
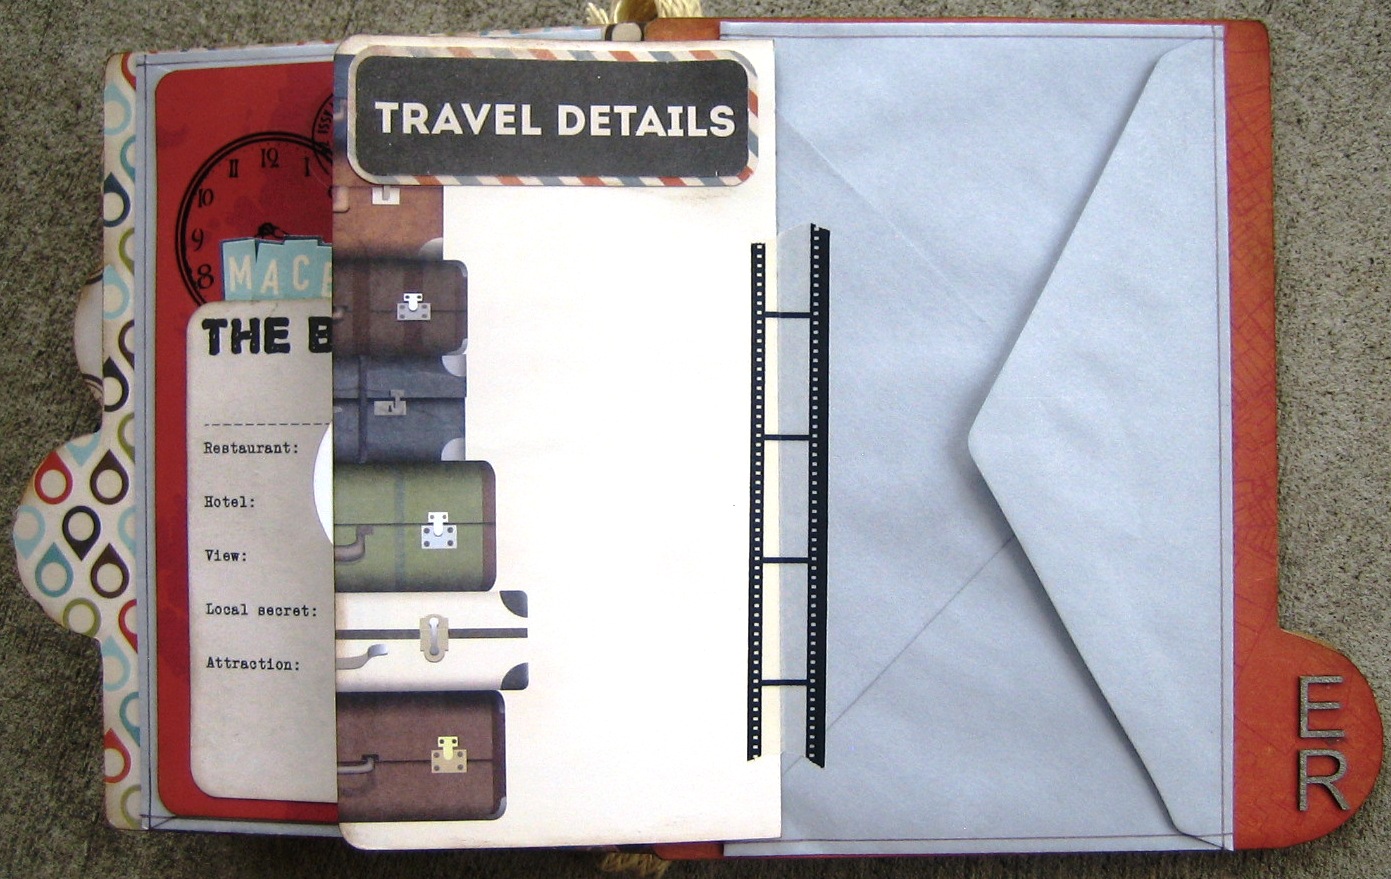
Third & fourth page:
Fifth & sixth page:
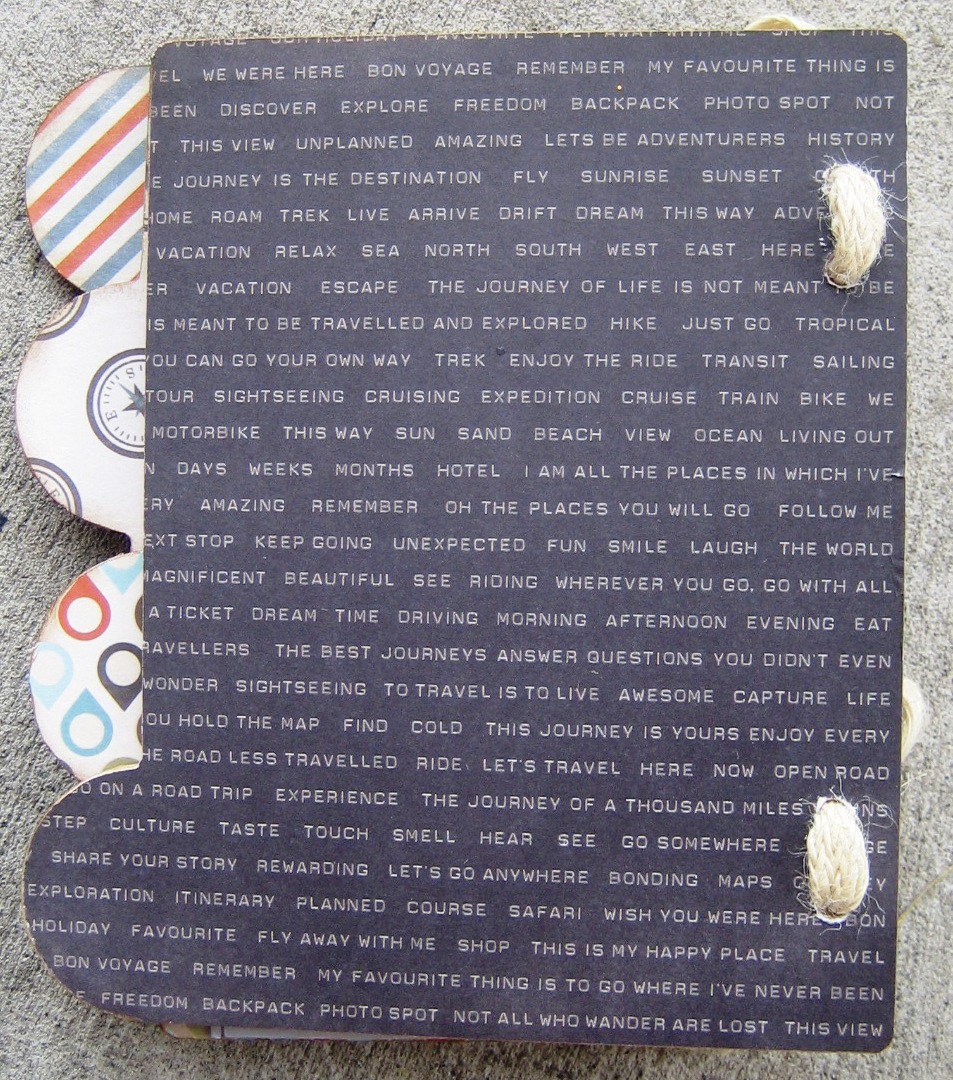
And the back of the album:
I've tied some natural jute ribbon to finish off this album. I absolutely love it, & the fact that it'll be given to someone special makes me happy. Take note, you get 15% off if you purchase the full collection, & 10% off for the full paper collection. Thanks for popping in!