Here are my projects that I have created with the new Miss Nellie Collection ( instore next week!).
Project One:
The first project is a layout using Kaisercraft's Miss Nellie die-cut paper. I looked into my growing photo stash to find Diana and I wearing red and pink - perfect for this collection! I opened up a circle in the middle of the pages and popped the photo behind it, squashing the edges of the paper into position. The Miss Nellie chipboard pieces are chunky and layered with rhinestones on top (and there are quite a few in the packet). I've added Kaiser blooms with some Diamond Dust (can't go past that stuff!!) I've also inked the Flourish Vines and then put Glossy Accents on them. Add a Bird Flourish, a title and journaling and it's all finished.
Project Two:
I often walk around the shop looking for Beyond the Page projects that look a bit tired and need to be jazzed up. I found this Kaisercraft plaque dumped in a box and decided to revitalise it. My niece is called Ayla - but I'm not sure if she'll actually ever get this!! Perhaps it can be for Christmas. I've painted the plaque and added the paper on top and then used the huge (huge) sticker on the Miss Nellie Sticker sheet. I stuck it to some Raspberry Splash Bazzill and cut around the edges - leaving a small border. I've attached it to the top of the plaque and then added the painted Kaisercraft 9cm letters. They are white on the sides and pink on top. Then I added some chipboard, blooms and organza ribbon to finish.
Project Three
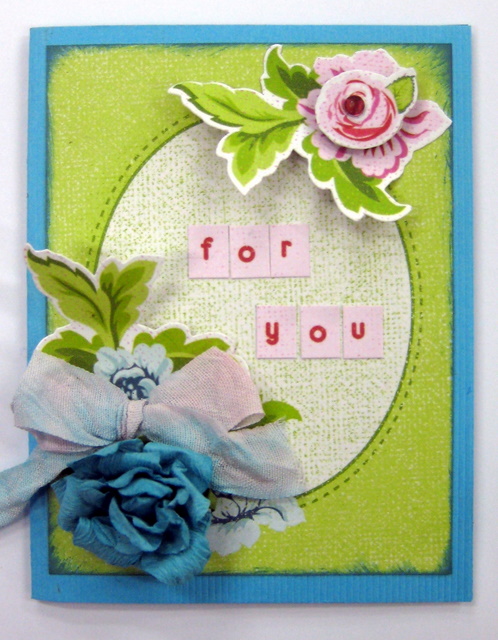
I do still love cardmaking - it's how I started out in this whole adventure (thanks Clarissa!).The 12x12 Sticker Sheets had such a great selection and sizes of designs - and two different coloured alphas (now that's clever!). I've used the stickers on the top right and bottom left corners and have put foam mounting squares under certain areas to give the appearance of 3-D. I also created the ribbon with some Seam Binding (which we are about to start stocking) and I coloured it with Glimmer Chalks (LOVE those!!)
Project Four:
This large card will fit into the new envelopes we finally managed to track down They aren't online yet - but they will be soon!! I've had a play with a Sizzix Die (leaves), doily (with some Glimmer chalk on it), and a bird flourish with Kindy Glitz. I also used the Martha Stewart Cherish Corner punch. Got to love that set!!
So there you have it! A collection of Miss Nellie projects to inspire you. Expect to see these online next week (along with a HUGE number of new Kaiser products! Exciting stuff!)
Project Five:
Another card. This time I've used the Display Frame paper and cut one of the designs out. I think this range of papers will be surperb with the Display Frames. That might have to be another present idea! I've created the flowers using the rolled flower technique (simple tutorial below)
Rolled Flower Tutorial
1) Cut circle and draw a spiral
2) Cut out spiral
3) Fold edges downwards and squish them to loosen the paper's fibres
4) Start rolling from the outer edge
5) When you get to the end glue the final circular piece to the bottom and squash flat.
6) Add some Diamond Dust for some interest!


Orsum, thanks so much for sharing
ReplyDeleteThey look even better in real life! Great to see you getting some time to craft Liz. Don't we look stoked in that photo?!
ReplyDeleteYip! Was a great night!
ReplyDeleteThese look GREAT Liz - it's lovely to see a paper collection with some colour too :-)
ReplyDeleteLowri
Nice job!! Especially love that plaque for Ayla. Yay....seam binding!....love that stuff. It's so pretty and delicate and perfect for vintage.
ReplyDelete