Saturday, April 30, 2011

Liz Gregory's Kaisercraft Design Team Entry


Here it is! My Kaisercraft Design Team entry. I've thoroughly enjoyed putting the post together - but that's no surprise! I love Kaiser products, the people and the company. I've been privileged to meet the staff on a few occasions and if you've followed my business (Artfull Crafts) you'd know that Kaiser is my favourite brand. I love their products and would be thrilled and excited to be on their Design Team.

Every time a new range comes in store I take one of everything (I now have a lovely little stash.) I love creating layouts, cards and Beyond the Page - and I can't decide which I enjoy the most - so this post has a collection of all three. I also have fun experimenting with different styles - so sit back and enjoy a mix of clean lines and vintagey projects!!!

Firstly I'll showcase an English Rose layout - one of my favourite collections.


Materials used: English Rose Papers - Estelle (P598), Lillian (P599), Frieda (P600), Pearl (P601), Thelma (p597), Florence (P596), Classic Latte Pearl Flourish (PL512), Wooden Flourish Keys (FL306), White Doilies (EM949). Other - Cardstock, chipboard leaves, lace, organza, mini roses.

I created this layout for a class of keen Cantabrians who came to Timaru to escape the earthquake rumbles. The "curtain" theme is a great way to frame a photo and the antique nature of the papers lent itself well to older photos.

Use cardstock and Lillan as the base. Distress edges and place photo onto Frieda (15cm x 20cm) and adhere to page.

To create the curtain effect, cut two pieces of Estelle paper 20cm x 15cm. Score them at 1cm intervals (lengthwise) and create two fans. Tie with organza in the middle. Adhere to the page on either side of your photo. Cut a strip from Pearl paper adhere to the top of the curtains. Cut 15cm of the lace and use ribbon glue to adhere on top of the strip.


Create a cluster on the bottom left of the layout. Colour the pearl flourishes with alcohol inks, cut out roses from Florence, spray some glimmer mist and scrunch them. Ink the edges and adhere with mounting foam. Colour the chipboard leaves and adhere. Put some gloss onto the wooden key and after it’s dry feed organza through the top. Adhere with mounting foam. Place some mini roses onto the cluster. Add doily, die cuts and roses to the top right.
******************************************
Chanteuse Layout


Materials: Chanteuse Papers - Rhonda (PS142), Marcato (p643), Soprano (P642), Vivo (P640), Eco (p641), Tremelo (P639), Stacatto (P638), Chipboard (CB125), Posies (EM960). Other - Ribbon, plastic netting.

What another great collection. I've been having some fun doing some serious ripping of paper - so I've placed the photo in behind a ripped, rolled and inked frame inside the die cut. To get this effect rip out a large circle in the middle of the Chanteuse die cut. Then make another 15 tears around the outer edge. Wet and roll back those edges until you are happy that a photo can fit inside this area. Ink the edges in pink and brown colours.

Adhere a large square of Vivo behind the ripped opening to the brown cardstock, add plastic chicken netting, photo and then the Rhonda die cut on top.


Cut out some floral elements from Stacatto to place on the top right corner. Layer up the large chipboard frame element and cut out the chandelier from Marcato to layer on top.


Place the large chipboard flower in the bottom left corner of the die cut, place the smaller chipboard floral element on top of that and then cut out the centre of two flowers and build them on top.

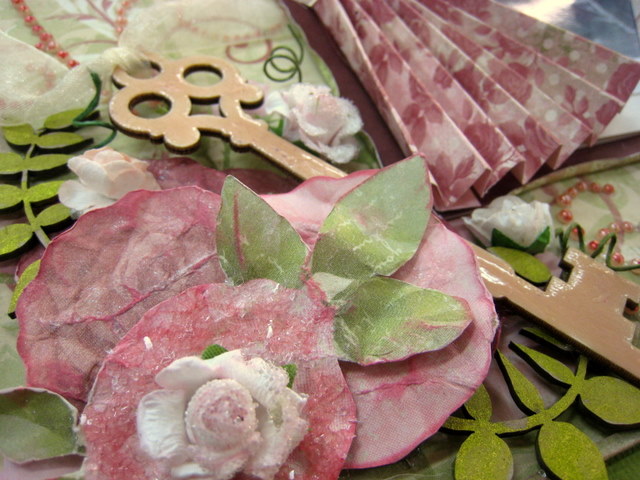
Tie ribbon around a posy of stems and tuck under the chipboard. Adhere pearl bling strips around the edge of the frame.

Cut out words from Marcato, ink them and stick to the layout where desired.


*********************************
Chanteuse Card

Chanteuse was also the feature at last week's card class. I love the way the flowers are easily able to be cut out and layered up on this Cascade card.

*******************************************

Bubble Gum Hills Circle of Friends layout

This range really sums me up - I love bright colours and I make a lot of noise too! I've been creating this layout for a special class (I'd better not reveal it here) - but let's just say we're going to have a lot of fun and entertainment in this class...


Materials: Bubble Gum Hills Paper - Tropical Twist (p630), Blue Lemonade (P631), Orange Pop (P634), Nectar Blast (PS139), Berry Surprise (P363), Fruit Galaxy (PS140), Printed Chipboard (CB124), Mini Journal Tags (JT615), Classic Island Lagoon Rhinestones (RS462). Other: Brads, diamond dust, mini roses, alphas.

I've created a collection of flowers with Kaiser doilies, scallop punch, Kaiser blooms, glubers and more and adhere them up the side of the die-cut paper.


**********************************
Bubblegum Trinket Box
I've used some of the left-overs to create a "Make Up" box from the Trinket Box. My dresser will look a bit tidier now! I've used a Kaisercraft wooden leaf flourish and have painted Smooch on it to make it sparkle. I really enjoy Kaiser wooden flourishes. You can paint them, ink them, smooch them, add dimensional magic, glitter them and put embossing powders and opals on them.


Materials: Bubblegum Hills Paper Collection - Fruit Galaxy (PS140), Tropical Twist (P630), (Trinket Box (W238), Leaves (FL301), Printed Chipboard (CB124), Journal Tags (JT615). Other Ribbon, paper gerbera.

*******************************************

Timeless Album


Timeless Papers (P652, P653, P654, P655, P656, P657), Occasion Planner, Kaiser Blooms (F635), Twin Lamp Post (FL325), Mini Alphas, Black Album Rings (M020), Alphas CB108

What a classy set of papers. They look awesome with the new paper blooms and wooden flourishes. The Kaiser blog showcased some wonderful projects and I was inspired to create a Heritage Album. I have the photos for the project - but I need to go and chat to an elderly aunt and get the stories written down. At the end of the day I think scrapbooking is a fabulous opportunity to capture memories whilst indulging in an art form. This lamp post was too long for the album, so I took the top off and worked with the one lamp. The grain of the wood comes out quite clearly when you ink up the flourish. To create a scroll, simply rip your paper, wet the edges, roll and then ink. Add mini alphas.

**************************************

Love Notes Layout and Cards


This range came out around the same time as our Wedding Anniversary - and the layout was an attempt to do a fairly clean-line layout without too much fuss. It's great what you can do with just a piece of Kaiser paper! A variety of hearts have been cut out, glossed and some have had diamond dust added on top. The journal tags are a brilliant idea for adding important and memorable details.

And of course you can't give a gift without a card. But I liked these cards so much I didn't want to write in them (is anyone else like that?!). The chipboard designs were stylish and a great size for these 6x6" cards.


************************************

Secret Bird Society Tissue Box


Materials: Secret Bird Society Paper - Mystery (P544), Shh (P546) Conceal (P549), Chipboard (CB112), Leaves (EM921), Vintage Crochet Doilies (EM951), Lace Cream Doily (EM948), Pearl Latte Brads (PL505), Peachy Keen Embellishment Pack.

Hubby has taken up hunting and so this range seemed perfect - plenty of tissues might be needed if he comes home empty-handed...!

To recreate this project glue Shh paper to the top of the box and trim off with a craft knife. Glue Mystery paper around the sides and create a landscape by clustering elements around the sides - forest, leaves, birds, trees with deer etc. Ink the leaves, colour the chipboard stems and cut out two butterflies and layer them on top of each other to give the effect of motion. Layer up a mini doily with a Peachy Keen fabric embellishment on top.


Finally slit a vintage crochet doily in 6 places and stretch it under the top of the box, leaving a hole in the middle for the tissues. Add pearl bling strips around the edges.


Use when necessary!

*********************************

Up, Up and Away Cards
The 6x6 Kaiser paper pads are one of my favourite products. They are filled with interesting papers and useful die cuts. This set of cards features the matching chipboard and some good old fashioned twine.


Materials: Up, Up and Away Paper Pad (PP826), Chipboard (CB111), Journal Tags (JT602). Other: Twine, alphas, stickers

I hope you've enjoyed the application. Best wishes to all the entrants - there is so much talent out there!

:-) Liz

18 comments:

  1. Fabulous projects Liz.
    You have an awesome variety here which really shows how versatile the Kaisercraft Collections are.
    GOOD LUCK!!
    Lowri :-)

    ReplyDelete
  2. Great collection Liz. We're very proud of you.Hope all goes well for the team. Betsy

    ReplyDelete
  3. So many great ideas, Liz! The Timeless album is stunning, I love how you’ve used the die-cut on the Circle of Friends page and the doily ontop of the Tissue Box really is thinking outside of the square – its so cute! Good luck with your application :)

    ReplyDelete
  4. All the best, Liz. You sure have used a good range of Kaisercraft products - well done!

    ReplyDelete
  5. Super work there Liz - I really love the range of layouts you have done. Fingers crossed for you!!!

    ReplyDelete
  6. Wow all I can say is Kaiser would be mad to not have you on their side (team) with all those amazing ideas and the amount of work you have put into the projects....Good luck.

    ReplyDelete
  7. all your entries are beautiful
    goodluck!!!

    ReplyDelete
  8. Beautiful work. Just lovely. Good luck and fingers, toes and everything else crossed for you.

    ReplyDelete
  9. Lovely work - I adore the Time Goes By Mini Album. Good luck!

    ReplyDelete
  10. Oh my goodness...so many wonderful projects! Absolutely love your English Rose layout, such a clever idea with the "curtain" effect. Awesome work! Godd luck with your application for the design team, they'd be mad not to pick you.

    ReplyDelete
  11. Wow Liz, you're amazing!!! You totally rock paper and scissors :)

    ReplyDelete
  12. Gorgeous projects Liz, wishing you all the best for the competition.

    ReplyDelete
  13. I like the circle of friends lo and the timeless album best, but they are all great. good luck!

    ReplyDelete
  14. I loveeeeee what you have done,love the vintage feel of your work.......best of luck :)

    ReplyDelete
  15. What fantastic kaiser craft projects LIz. All the best with the DT

    ReplyDelete
  16. This comment has been removed by the author.

    ReplyDelete
  17. These look awesome! You should own a craft shop!!!

    ReplyDelete
  18. Thanks for all your lovely comments. Didn't make it through to the top 25 - but Lowri did! A great reason for Artfull Crafts to celebrate!!

    ReplyDelete