Showing posts with label Layout. Show all posts

Saturday, March 30, 2013

KaiserCraft Bundle of Joy projects

Hello! Teresa here to show you some porjects I made using the beautiful range of papers from KaiserCraft called Bundle of Joy. I think I'll be stocking up on this range - it's so nice to have some on hand for those exciting occasions when a new life comes into our world.

First up is a layout:

 
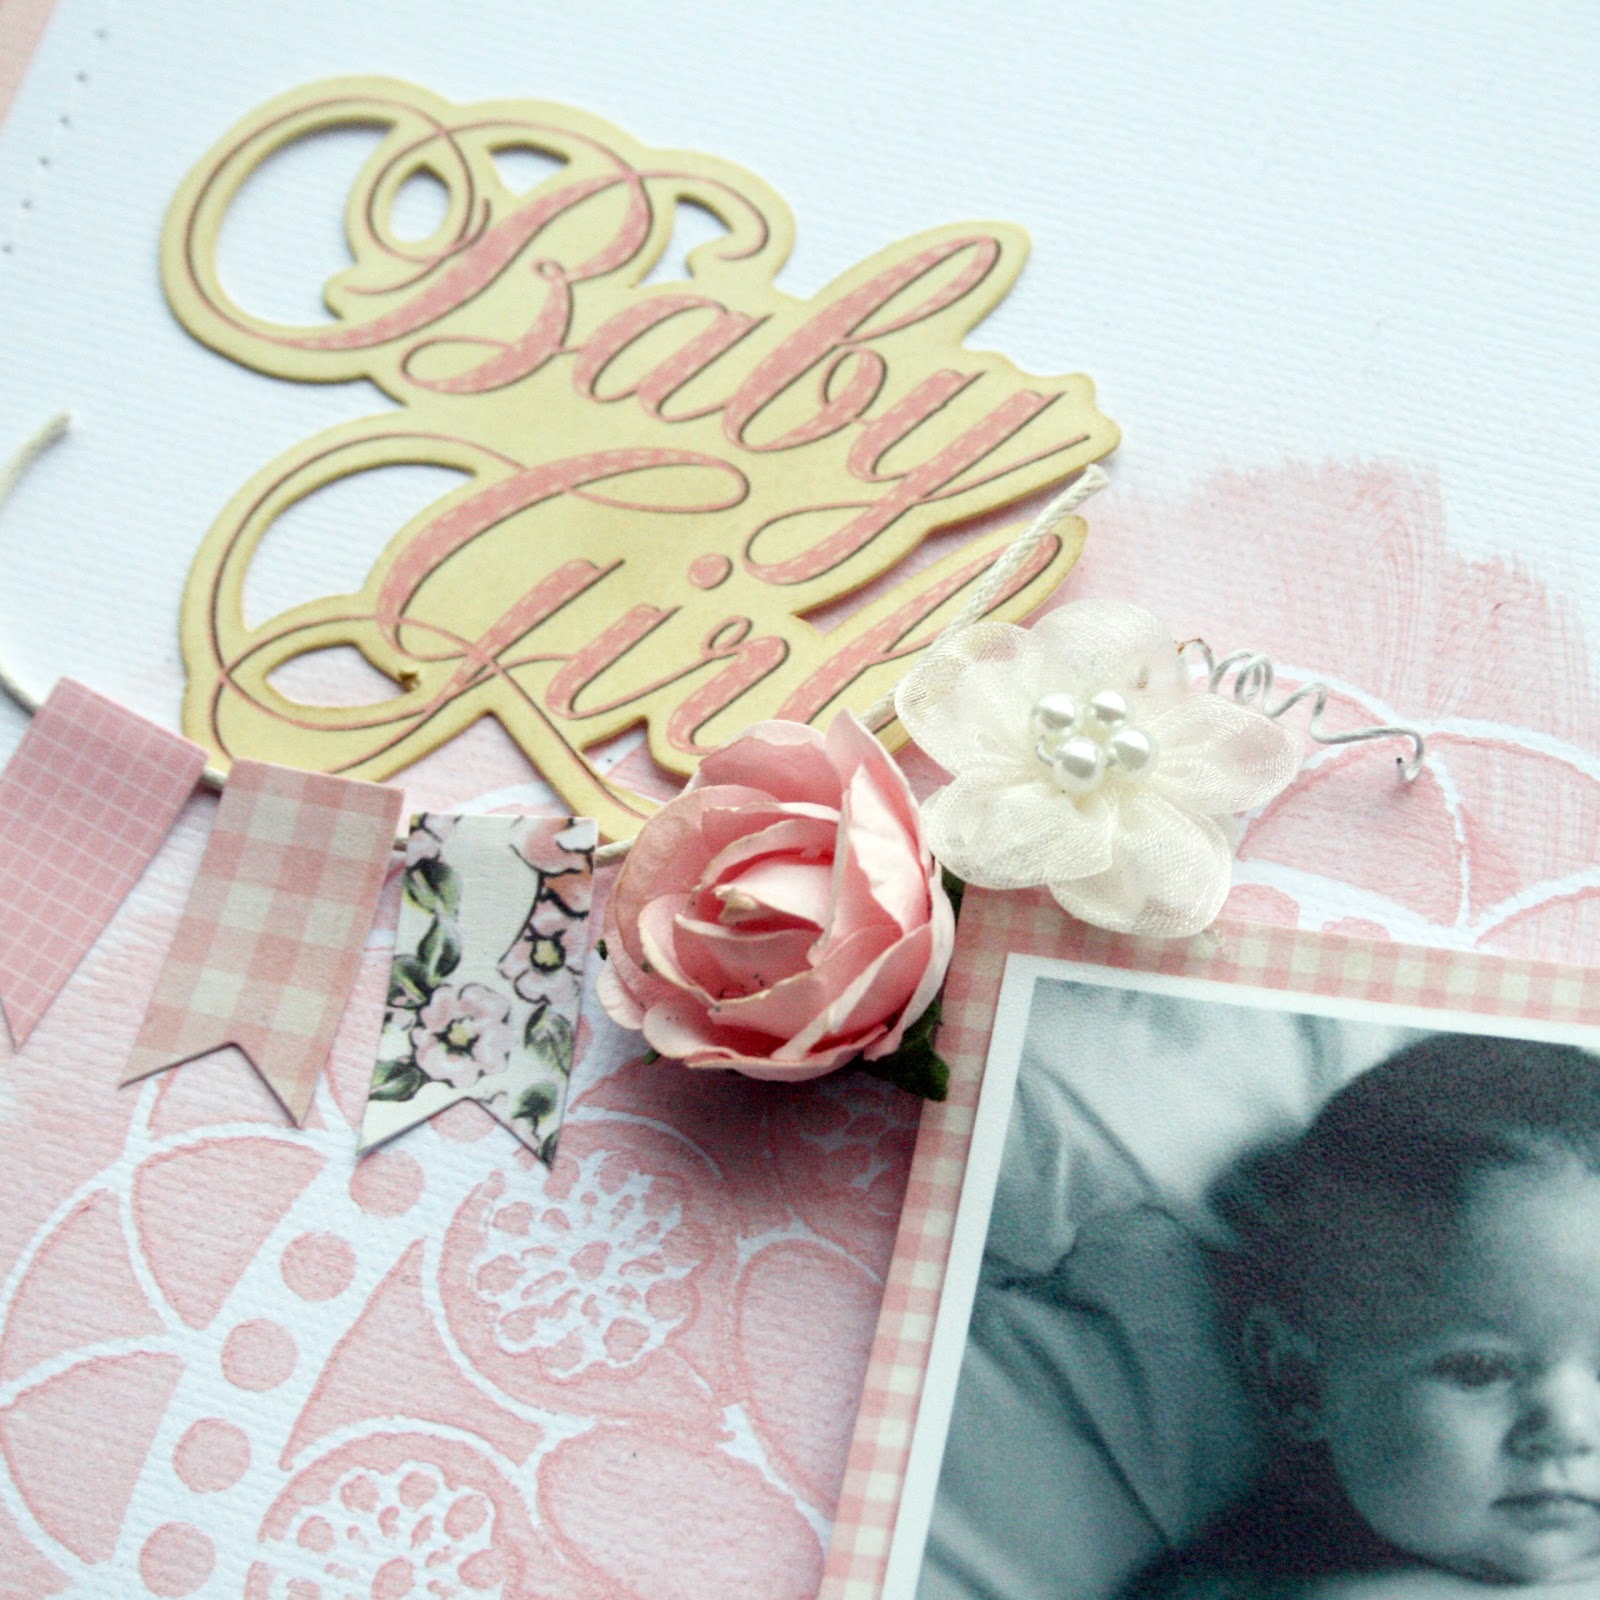
This is my daughter Rachel when she was just six weeks old. I have used these photos over and over again for layouts - in classic black and white they match anything.
 
I started this layout with a KaiserCraft stencil and some pink paint. I cut about 1cm from the edges of the white piece of cardstock and machine stitched it to a piece of pink cardstock. Then I used pieces of patterned paper from the Paper Pad to mount the photos, and bits and pieces from the Collectables pack to embellish here and there. This range also comes with Sticker Sheets - that's where the pennants for the banner came from. The wooden embellishments for this range are just too cute! All they needed was a little brown ink sponged on them to help them pop.
 
 
All the layout needed to finish it off were some flowers and a title (from the Collectables pack).


I also made a card for a friend of mine who has told us she is having a boy:


but because you never can be 100% sure, I thought I'd make a pink version as well, just in case:


I hope you're all enjoying the Easter break. I'm loving the extra time with family for sure!
 
Thanks for dropping in today.


Friday, May 25, 2012

Lisa with a layout using Kaisercrafts' Great Southern Land....

Hi Everyone. Lisa here. Today I have a layout to share using Kaisercrafts' Great Southern Land range.
If you haven't seen this range yet, you should really check it out! It is such a versatile range. It is ideal for Australian themed projects, travel projects, masculine projects to name just a few. In my last post I focused on the gorgeous greens & browns in the range to team up with my Rain forest & flora photos. Today I focused more on the rich reds & browns to work in with my Autumn themed photos & the absolutely gorgeous leaves from the shop.


I have used a rich red/brown patterned paper from the range as my base paper. I gently distressed the edges then inked with Tim Holtz distress ink.
I then chose a lighter piece of patterned paper & created a large scalloped circle die cut using my new toy...a Lucky 8 punch from We R Memory Keepers. Basically these punches allow you to create a large die cut just by punching each corner or your page, you then flip your page & punch four more times.
At this stage we don't have these in the shop, but I can tell you Liz loves them too! So, watch this space! 
I used Tim Holtz Distress ink -Walnut stain & Antique linen to darken the die cut to help bring it all together.

I kept this layout pretty simple, I added my photos, a journal tag, a rub on, some pearls & the gorgeous Autumn leaves.
I also gently sanded the edges of my photos. I like to do this sometimes, as the photos can look to crisp against all the warm tonings. 


I have made a couple of gift tags using the tags from the Specialty paper die cut sheet. Sometimes you need a little tag for a gift that maybe for a male or someone who isn't in to pretty or fussy bits & pieces. So these are perfect. I just layered the die cut tags on to patterned paper, some more distress inking, some gorgeous ribbons, pearls & staples.

Thanks for stopping by, have a great day.

Lisa


Wednesday, April 4, 2012

Lisa with some 'Authentique - Genuine' goodness...

Hi Everyone. Lisa here. This month at Artfull Crafts 'Authentique' is taking Centre Stage. WOW - what fabulous paper, the quality is amazing!
Today I have a layout & decorated gift bag to share using the 'Genuine' range lots of blues paired with yellow in this range. It reminds me of denim in fact.The range is great for feminine or masculine projects, due to the varying prints.


The colours & style of this layout are very different than my usual style. It was fun to do something completely different - to challenge myself. I love this photo of my son with our cat. Blue & yellow are apparently the 'in' colours this year...however I can find yellow hard to work with (I'll have to work on that..lol). So, I put some red in the mix & this is what I came up with. A bit of stamping, doodling, layering & embellishing. My journalling is hidden on the little note peeking out from the top of the photo.


Well, by now you probably know that I have to make something else whilst I have a range of goodies out. So this time I decided it would be fun to decorate a plain Kraft gift bag. A few layers - of punched edged papers, some ribbon,string & bling & your done.

Make sure you check out the full range in the shop. The sticker sheets that are in the range are a fabulous way to get those projects done quickly!

Have a great day.

Lisa

Wednesday, March 28, 2012

Lisa with some Echo Park This & That Graceful...

Hi Everyone. Lisa here. Today I have my last post for the month focusing on Echo Park. Oh how I have enjoyed working with Echo Park products. Today is no exception in fact I will go as far to say that the 'This & That - Graceful' range comes very close to be some of my most very favourite paper to date! I love the soft, vintage feel of the range & the colour combinations are fabulous.

Make sure you scroll to the end of this post to see how you can WIN a new Echo Park Mini Theme Collection Pack  or  the kit used to create these projects. 
                                            

First up I want to share a layout with you. I had this layout planned out in my head as soon as I saw the papers...dreamy...Yes obsessive, I know. I used a Chocolate brown piece of Bazzill card stock as the base of the layout. Hard to photograph! lol. Looks lovely in the flesh though, dramatic yet soft with the softer greens & pinks.
Lots of layering, inking & prettiness.


A couple of pretty cards...I have used the fabulous Bazzill card stock that Liz put in the kit as the card base. The colour is called Flamingo - so pretty!


I also made this project with contents from the kit. You may have seen this mini album/card on our recent blog hop we did with Echo Park.


I have still lots of bits & pieces left over from the kit - even after making all of these things! This kit was so well put together, I only added a little bit of string from my stash & used some punches & inks! We are hoping to be able to have this kit in the shop, watch this space. If not we have lots of other great kits for sale.


YOU COULD WIN a new Echo Park Mini Theme Collection Pack or the kit used to create these This and That Graceful projects by leaving us a comment on either this post or on Guest DT Linda Auclairs' post - telling us YOUR favorite Echo Park Collection of all time! (Please comment by Midnight NZ time - this Friday to qualify for the draw)


Have a great day!

Lisa

Monday, June 20, 2011

Party Animals with Joanne

Hi Everyone, Joanne here with a couple of very simple scrapping ideas!

What I really love about the Kaisercraft Party Animals range is how it could so easily work for a boy or a girl. It would be great if you were preparing a baby album in advance (either for yourself or as a gift) and didnt know if the baby would be a girl or boy!

First up I have a super simple layout to share with you.

(Sorry about the badly lit photo - I quickly photographed it then dropped it off at the post office to send to Liz for SENZ without checking the photographs first, whoops!)


And a little close-up of the animals all handcut from one piece of paper.


Lastly here is a party invite that could very easily be mass-produced. The Giraffe is this stamp stamped onto patterned paper and handcut.


The invite is one piece of cardstock, on the back there is room to put all your party information which could be done by printing on a normal printer and cut to size.

Joanne :)

Friday, June 10, 2011

Lowri - June Kaisercraft Collections!!

Hi Everyone- Lowri here.

Thought I would share with you today the projects I made for the final round of submissions for the Kaisercraft Design Team.

Pink Gelato Trinket Box


I wanted to create a very light and whimsical look for this box so I have sanded all the edges with a very fine grit sandpaper before painting with pale blue acrylic paint. To create a slightly aged look I have stamped a text pattern onto the edges using first white and then brown ink. This highlights the subtle text in the paper and breaks up the solid look of the wooden edges.


After covering all the visible sides with paper I have then used the stickers and rubons provided to decorate. The top has been left very simple to allow the lid of the box to be easily opened. 

To create the buttons on the front I have punched circles of plain chipboard and then added a circle of paper on top, insert a pearl brad and a little handle is made! 
We have all of this Pink Gelato collection in the shop - so please take a look here.

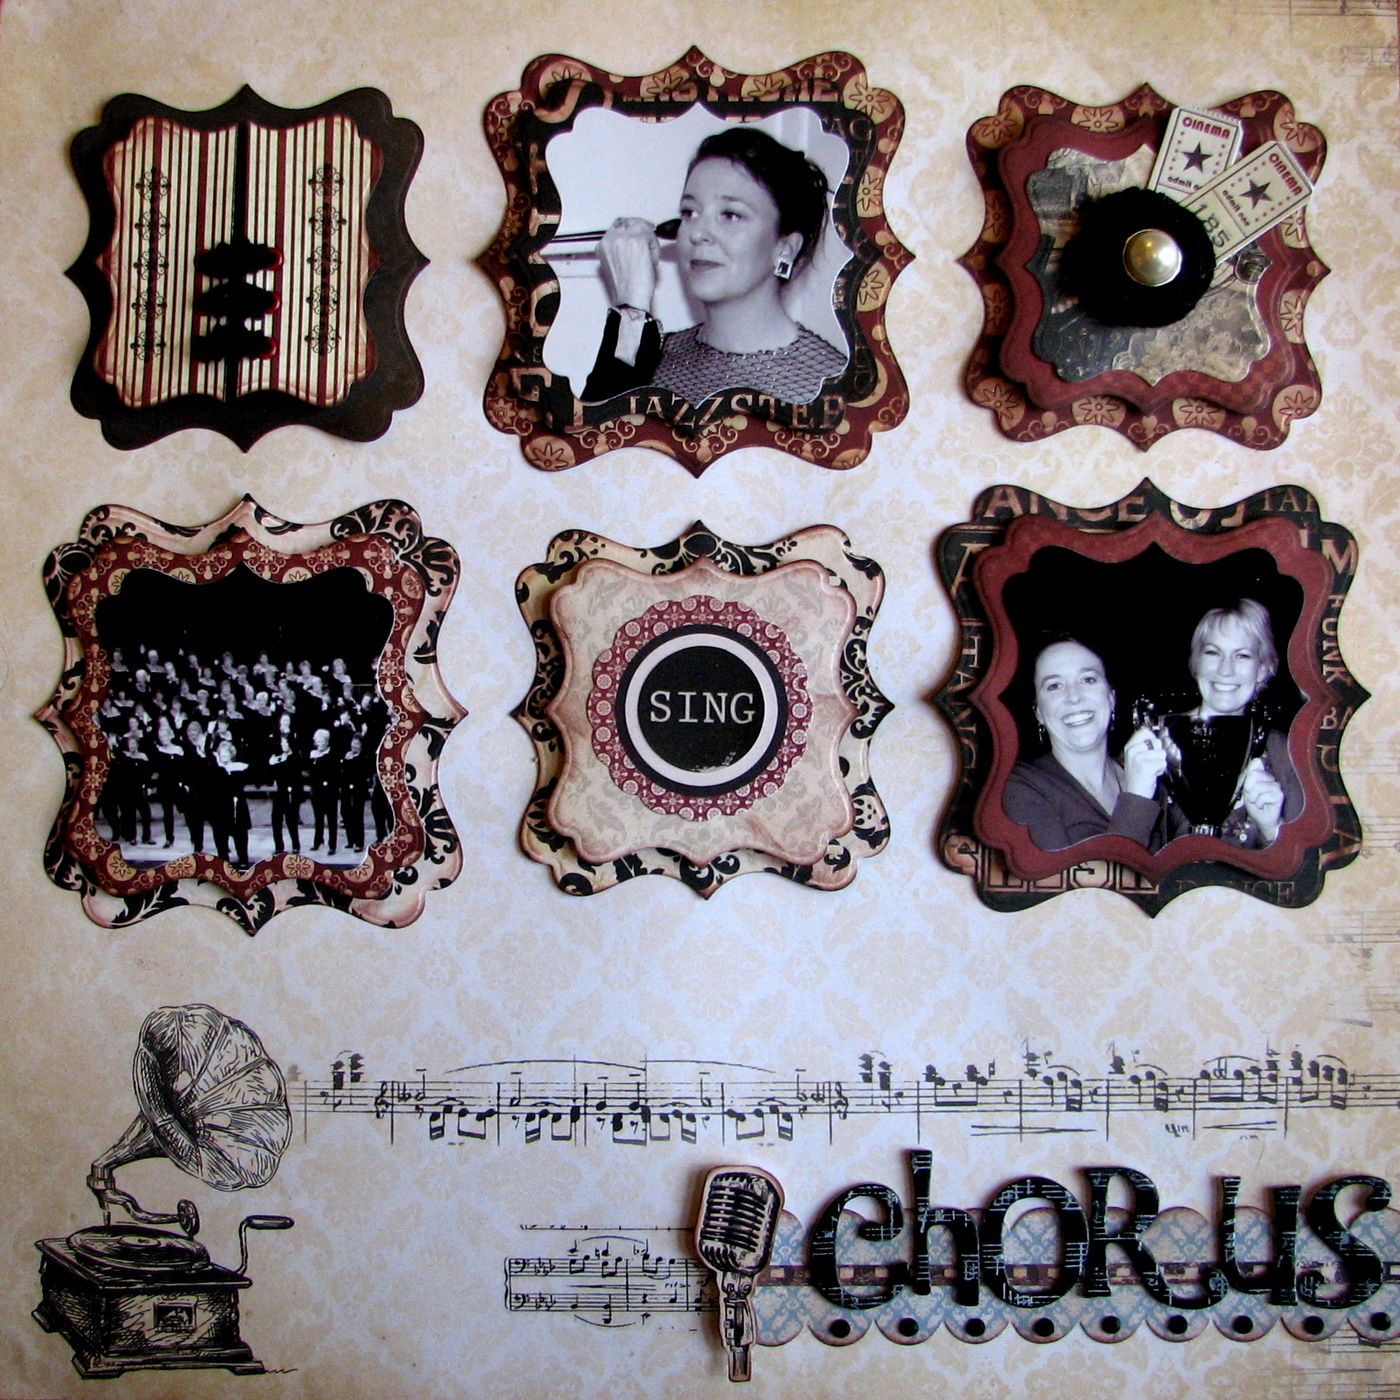
Velvet Ensemble Layout


There are some wonderfully rich colours in the papers for this collection but I still wanted to keep the overall look of the layout very clean so I have used the simple colour scheme of cream, black and burgundy.  The Performance paper is the perfect background to use as it already has lots of interest with the music and gramophone print.  
For the “dress” square I have used eyelets to form a corset and used lace to complete the ornate look.
The sticker sheet offers many options for decoration, and here I have put some together to form a background for my “Chorus” lettering. For the letters I stamped onto then with white ink for extra depth, using the Kaisercraft Sheet Music Stamp.To make the lace "button" I have used a simple technique which can be seen in my mini tutorial below. 

We have all of this Velvet Ensemble collection in the shop - so please take a look here.

Rolled Lace Button Tutorial
 
  1. Cut or punch a circle of paper the same colour as your lace
  2. Make it super sticky all over(I used glue dots but you can use double sided tape)
  3. Starting at centre, roll your lace in a circle, twisting as you go
  4. Press down firmly to ensure lace sticks to glue
  5. Be sure to roll tightly as you get to the end and secure the end underneath with another glue dot
  6. You can now decorate as you choose!
Now - I did not make the team - but you can see who did here. There are some really talented ladies there - so please take a look as we will be seeing a lot of their work over the next year..
Lowri :-) 

Friday, May 6, 2011

Quick and Simple Layout - Joanne

Hi Everyone, Joanne here. Today i've got a very quick and simple layout to share with you using the Echo Park Little Girl collection kit.

Once again, please click on the photos for a larger, clearer view. Im not sure why only my photos show up blurry when smaller...


My journaling will be typed, cut into strips and put opposite the title - once I get our printer set up again!

And heres a little close-up:


All products used apart from the white Bazzil cardstock and the Kaisercraft rhinestones were from the Little Girl collection.

Thanks for looking, hope you all have a great weekend :)

Saturday, April 16, 2011

2 Layouts with Monthly Sketch

Hi Everyone - Lowri here

This month our theme is "Travel and Treats" and we have had a couple of really great entries into our challenge! The prize this month is a guest spot on the Design Team and the winner will receive a package of goodies and your work will be featured on our blog, online gallery and facebook page.  I have re-capped all the information (including a copy of the sketch) on how to enter at the bottom of this post.

We have 2 layouts to show you today using the sketch. One is from me and we have one from our upcoming Guest Designer Michelle Hernandez who very generously offered to create a new layout just for us! She has some great work on her blog and those of you who love fresh and bright colours are going to really enjoy our feature this Sunday!

Layout - Michelle Hernandez
This layout was created specifically by upcoming Guest Designer Michelle Hernandez.

I love how she has used the photos. Such a great way to showcase a large number of pictures which we all gather while traveling! There is so much detail to look at in this LO and the inking really gives the white space some texture and interest.
Make sure you check into the blog on Sunday for some more great work from Michelle.

Layout - Lowri McNabb
Now - I don't normally do LO's but I liked this SKETCH from Tanya so much I thought I would give it a go. I am such a novice - I didn't even really give it a title - so we will call it March 2011!!  The photos are a series I took of my kids and their 2 cousins on my Father-in-Law's birthday - I am going to frame the LO and give it to him.


I have used one of the latest collections from Cosmo Cricket - Social Club. You can find the whole collection in the online shop. 
I have used a piece of "Jazz" paper for the base and then strips of and "Manhattan" and "Blue Eyes" to add some colour.  I am really pleased with my leaves border (see below..)


I used the 6x6 paper pad and scraps of larger paper to punch out some leaves and glued a base layer onto a strip of paper using Glue Dots. I then used foam squares to add some dimension and bent the leaves for extra texture. Her are some close ups of the details.


I have used the Bling Bling, Buttons and Butterflies and Doilies to create these flowers. The embellishments match perfectly!


Challenge Information
We are running our "Travel and Treats" Theme until the end of April.  Once again - this theme is designed to be VERY broad - we want to see anything and everything to do with travel or treats! This theme also encompasses Easter - so put on your thinking caps and start creating.
What about....
  • a LO based on your holiday trip
  • an Easter card
  • a project using some supplies you bought on holiday
  • some little treat bags you made for your kids
Here is our sketch for the month from Tanya Leigh to help inspire you. I LOVE the fact that this is a multi-photo layout - and remember that the sketch can be interpreted in many ways - as a card, you can rotate it, use it as a cover for a mini-album - your imagination is the only limit! During the month we will see what wonderful projects the Design Team come up with using the sketch.


Special Prize for Challenge Winner
This month the prize for the Challenge Winner is very special!

You can win a Guest Spot on the Design Team for a month.
You will be sent a package of goodies and asked to write a blog-post or two to feature your creations on the Artfull Crafts Blog and we will also feature them on our webpage and facebook page. (Don't worry if writing is not your thing - we can help out with that!)


Your entry to the challenge can be either along our theme of "Travel and Treats" OR it can be using the sketch OR of course it can be both!

To enter the challenge - send a picture of your project to the Design Team. You can send us as many entries as you like. We will be featuring all entries later in the month. Did you see the entries for last month's challenge here? There were some beautiful creations and congratulations to Valerie on winning!

Any questions - please leave a comment :-)

Lowri

Saturday, March 5, 2011

My take on the Sketch - Joanne

Happy Saturday everyone, Joanne here with my take on the sketch designed by DT member, Tanya.

To refresh your memory, here is the original sketch:


Because I had a verticle photo I rotated the sketch.


And heres what I came up with:


Ive had the white doilies stiting on my desk for a couple of months now and was too aftraid to use them. I thought I had read somewhere that you can cut them and they wouldnt fall apart - but I was wrong (or maybe it was the way I cut them...). I cut this one so it wouldnt be so bulky underneath my title block and it did start to unravell - so to easily fix this I just put tape on the part I had cut since it wouldnt be seen :)

Theres one more doilie sitting on my desk, I might just have to try using some mist on it to give it a different look.

Hope everyones having a great weekend!

Monday, February 28, 2011

Shirl - Princess Shianne - Sketch Layout

Hi Everyone

Yesterday we launched our new blog/challenge theme - "Birthdays and Blooms" and we also shared a sketch from Tanya Leigh with you to help inspire you to enter the challenge.


Our first Design Team layout using the sketch comes from Shirl - and isn't this just gorgeous.

Shirl has used the Magic Happens Collection from Kaisercraft along with some of their beautiful new Paper Blooms which come in 17 different colours.

This layout is just adorable, and a wonderful use of Tanya's sketch.

To enter the challenge - send a picture of your project to artfullcraftsdt@gmail.com You can send us as many entries as you like. We will be featuring entries and there will be a prize for the Challenge Winner!

Your entry to the challenge can be either along our theme of "Birthdays and Blooms" OR it can be using the sketch. (OR of course it can be both!)

Have a great evening :-)


Sunday, February 13, 2011

Sunday Scrapping - Meet Tanya

Hi Everyone - hope this Sunday finds you rested for the week ahead.
Our Design Team have been busy! Did you see the great posts this week from Shirl, Joanne, Tina and Lowri


Plenty of inspiration there for lots of LOVELY projects using the new Kaisercraft Collections!  We also have heaps of other new products and tools in the shop - so take a look here.

We have already had a few entries into the challenge - please see our Challenge Launch for details and send your entries to artfullcraftsdt@gmail.com. We love to see them and the week of February 20th we will be featuring all the wonderful entries to our challenge.

You can win some wonderful goodies from the new Kaisercraft Collections!


SUNDAY SCRAPPING
Meet The Design Team
For our feature this week we are meeting another member of our Design Team - Tanya Leigh.

Tanya is a very talented scrapbooker from Christchurch who uses products in wonderful ways. Here she shares with us three of her favourite projects, and tells us more about her scrapboooking style...


How were you introduced to scrapbooking?
I started making cards 13 years ago and was introduced to scrapbooking at a card class 8 years ago. I always said I would never scrapbook...what did i know!

What inspires you for layouts, projects, cards?

I get a lot from the internet and mags but also can be inspired by reading Home and Garden or NZ House and Garden Mags, signs around town, pretty much everything in every day life.
Class of 1980
This would be my favourite layout so far. My class photo from 1980, don't laugh..LOL!! I love making flowers and made these flowers using my punches. This layout was also done using a sketch but not one of mine.

What other project types do you like to work on besides scrapbook pages?
I used to do OTP and loved doing them but not so much anymore. Pretty much just do layouts now.

What is your favourite scrapbook brand and why?
There is so many brands out there and with new ones coming out all the time it's so hard to have a favourite one but I do LOVE Teresa Collins products. She has a large product range so it fits pretty much anything.

What scrapbooking tools/products can you not do without?
Can't do without my paper trimmer, patterned paper and my pinecone ink. I pretty much use pinecone ink on everything.

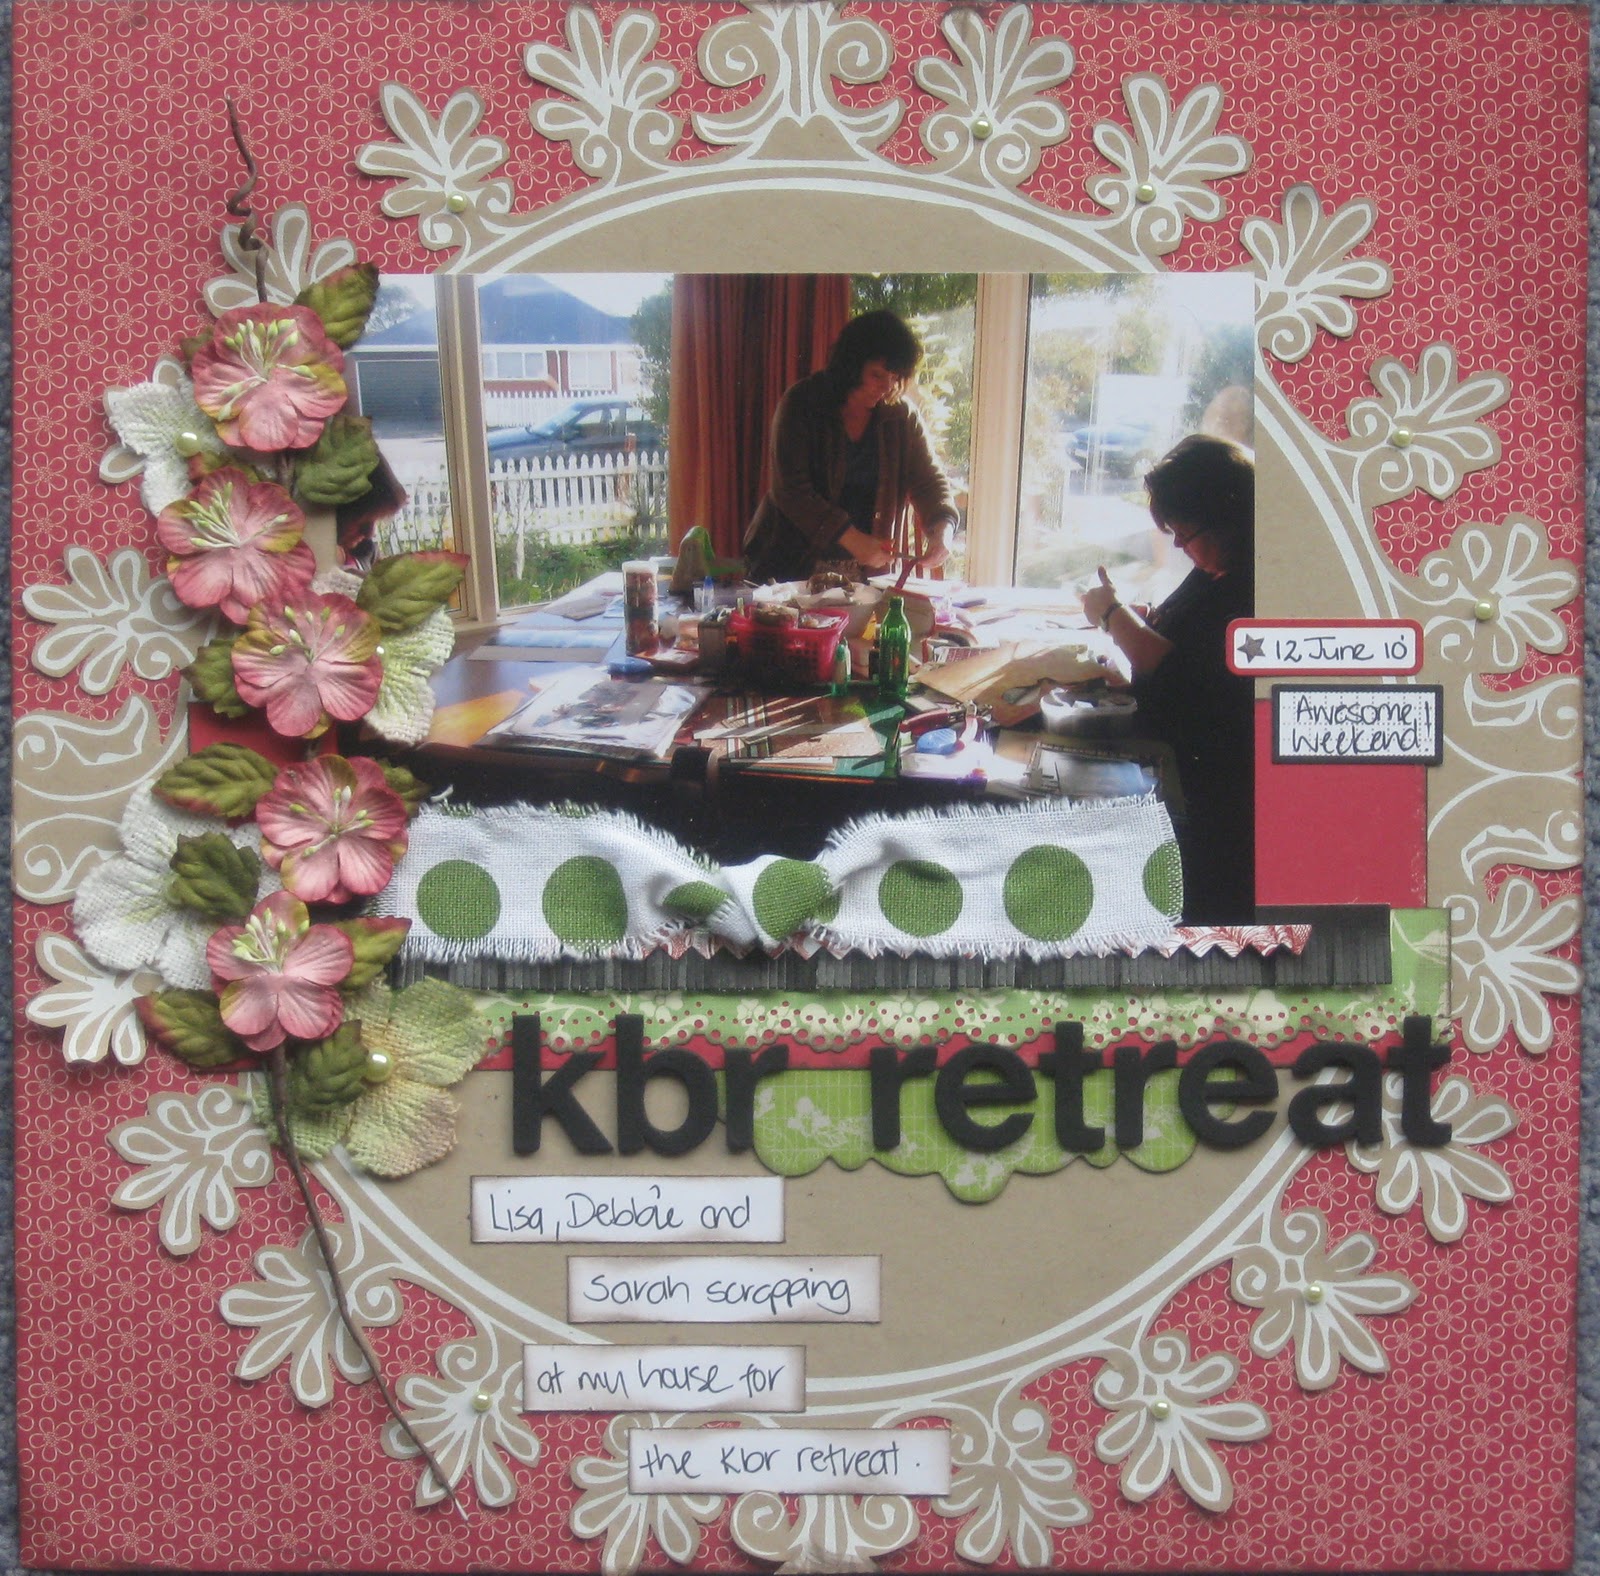
KBR Retreat
I love how this layout came together. I loved doing all the cutting, layering etc. I even used prima packaging as part of the layering. My friends came and stayed for the weekend and we had a mini retreat and scrapped all weekend. Was bliss!

What is your current favourite technique or embellishment?
My favourite embellishment is the flower, I love flowers and I love making different ones. I have been making different types of flowers lately for my layouts. Flowers look great on those male layouts to.

What do you hope to try or improve on this year?
I love shabby chic and would love to do more of it on my layouts. I want to take more photo's this year so I brought project life, the perfect thing to take more photo's. At least one a day..LOL!!

"Perfect"
This photo of my wee Noah was taken when he was a baby and has taken me until last year to scrap it. I used one of my sketches from my sketch blog for the layout of this. I have used glimmermist and diamond dust on this. I also made the flowers for this layout with packaging from a paper pack


What advice can you give to people just beginning to enjoy scrapbooking?
I would say start small. There are so many things to look at and buy and you can be given so much info, tips and techniques it can be so overwhelming. If I was only just starting to scrapbook now I would do a project like a mini album that I could start and finish....like a mini album that Lowri has been showing on the blog. It's nice to start something and see an end to it.

Do you have a blog?
Yes I do, you can find me here http://tanyaleigh.wordpress.com/ 

Thanks Tanya for sharing your wonderful projects and a little more about yourself.

Don't forget to e-mail your challenge entries to artfullcraftsdt@gmail.com and check out all the latest wonderful products in the shop here. This is going to be another busy week on the blog - so stay tuned to see more great projects from the Design Team.

Saturday, February 12, 2011

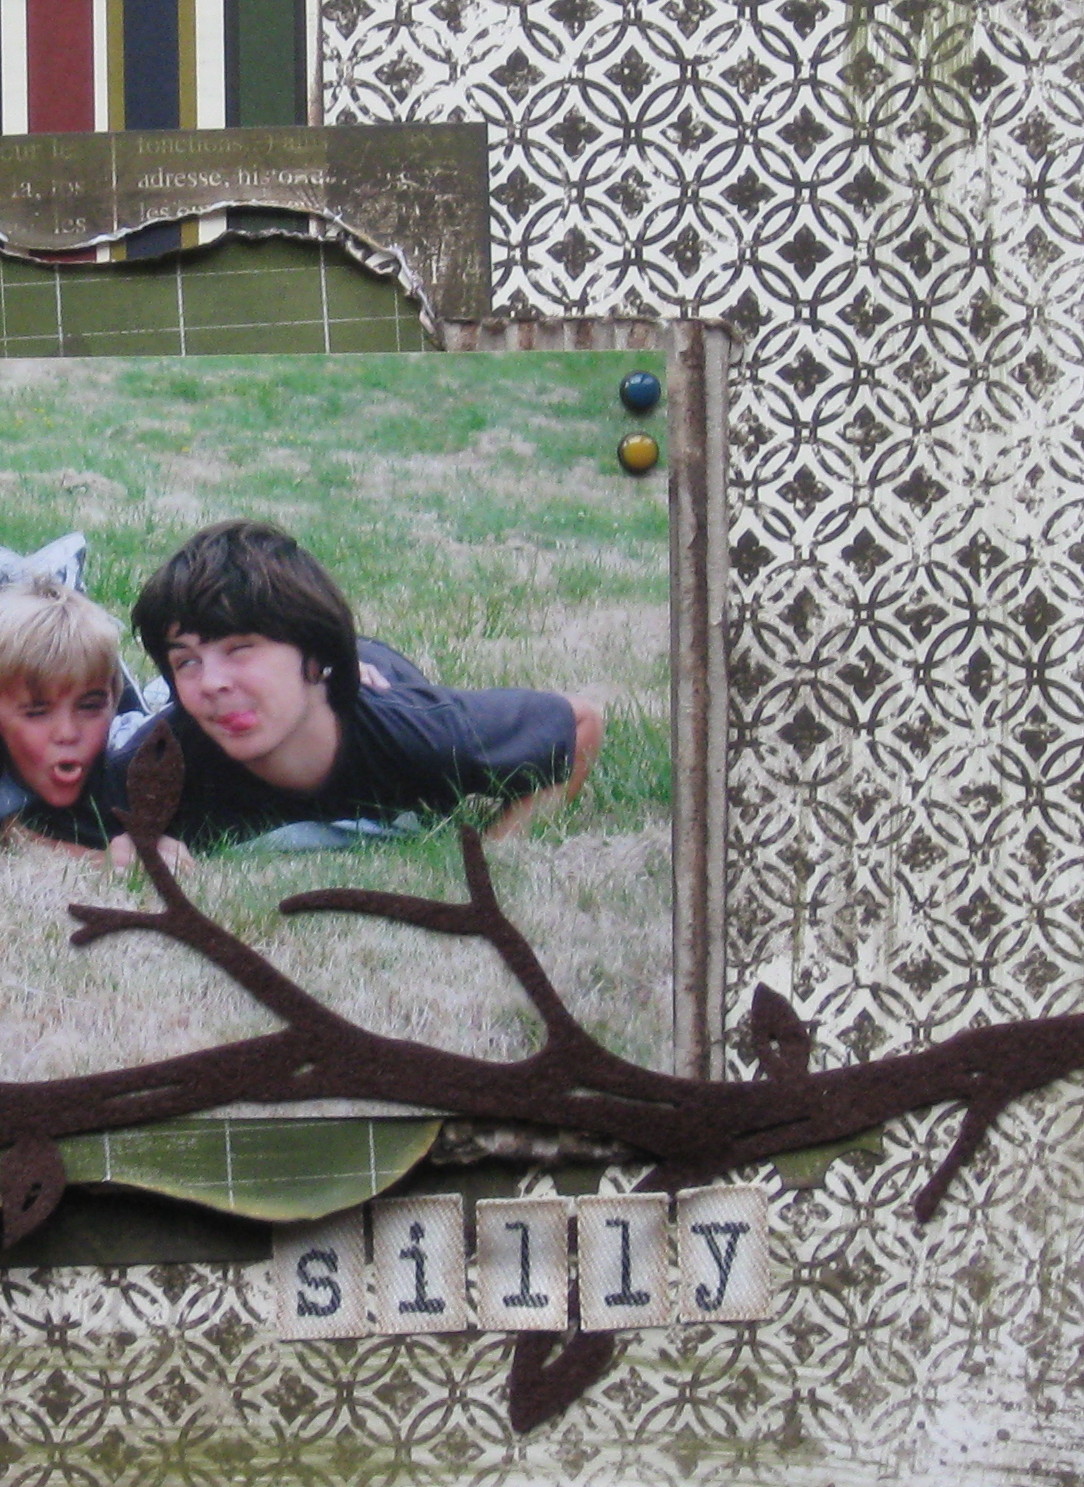
Silly layout by Tanya Leigh

Hi guys, Tanya Leigh here, 

I have a layout to share with you that I did using the Scrappin' Sensations Layout Kit - November. I LOVE this photo of my boys that I took while out at a park here in Christchurch.  All 3 of them thought that being silly for the photo was a good idea when I said a nice photo, but that is my boys for you...LOL!!!


Don't forget to check out the kits that Liz and the team put together and book yourself one today.

Tanya Leigh


Tina loves.....Glimmer Mist!

Hi, It's Tina here with my "love" blog post!  I'm not really one for too much lovey dovey stuff, so I thought I'd tell you a bit about a product that I absolutely love, Tattered Angels Glimmer Mist.  This is seriously gorgeous to work with, plus you can get messy (which is half the fun!)
A few tips...
* It's very easy to clean up, just rinse with water (but the darker/stronger colours will stain your fingers)
* You don't need to use alot.  The glimmer starts to show as it dries, so you don't need to soak your paper (which is a common mistake, and wastes alot of the product)
* You can wipe off the excess, but this also wipes off some of the glimmer.  This comes down to personal preference.
* Use a cardboard box as a spray booth.
* Holding the Glimmer Mist bottle close to your item will give a strong concentration of colour, holding it approx 20-25 cm away gives a light mist.
* Use it to custom colour your flowers (see below), doilies, and laces (as on the layout above).


* Works extremely well on absorbant materials such as paper, chipboard, & fabric, but it will eventually dry on other materials.
* Spray over stencils and masks to create your own patterned paper.
* Custom colour white cardstock for a unique effect.  Stamp with the Glimmer Mist as I've done with the butterfly on the layout below.
* You can also use the "left-overs" from Cricut cuts, or chipboard letters as stencils.
* Press the nozzle quickly for a finer mist or slowly to create more "blobs" when spraying.
If you're wondering which colour to try I'd suggest gold (which goes with everything), or chosing a colour you use often in your scrapping.

Now to show you some of the new goodies Liz has at Artfull Crafts. I painted the Twiddlybitz Filagree shadow box with gesso, then Kaisercraft white paint, then added some Tim Holtz Crackle paint to the front.

Once dry I applied Distress ink to highlight the cracks and then spritzed with Glimmer Mist

I used the Kaisercraft Wooden Flourishes "Magical Butterflies" and sprayed them with Glimmer Mist.

I also used Glimmer Mist on the Kaisercraft Paper Blooms, Sullivans mini roses,  and Kaisercraft English Rose paper.

I added Diamond Dust and Distress Stickles to the flowers
There was lots of diecuts to choose from, and this saying totally suited my project.

The Kaisercraft rub-ons added that little bit extra, and are a really nice quality.
The final result.....
Let me know what you think!
Happy scrapping,
Tina