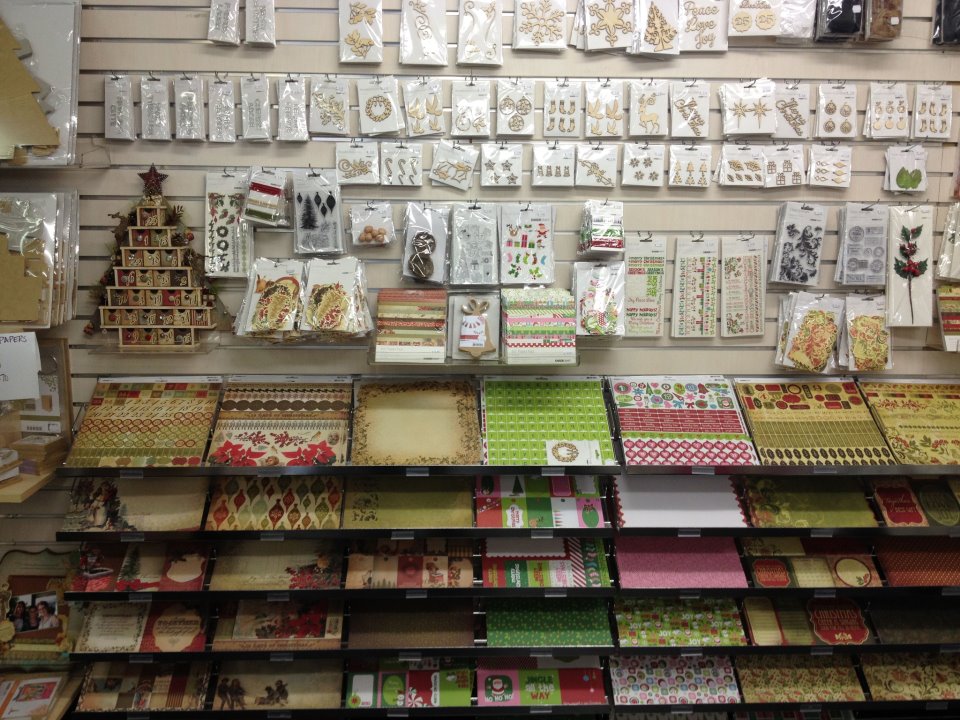
Hello Tracy here with a card to show you from the Kaisercraft collection - Twig & Berry. I had such fun using all the goodies that Liz sent me, I can see there will be plenty of more cards made using this collection that has real earthy distressed colours. Here is a list of what I have used:
What a good excuse to start some Christmas cards! I will be back next Tuesday to show you another card from the same collection.. until then.. happy crafting!
Hi there Christine here. Today I have a couple of easel cards to show you, after making Butterfly ones the other week I decided to try a Christmas Ornament one, so here it is...
It's Robbi here today and here is my first kit for Artfull Crafts and I have thoroughly enjoyed getting really creative with it. Orange is not one of the colours I use very much (along with red) but it kinda worked in this instance. Here is the sketch that I have created from the LO:
Here is a wonderful pic of the little Granddaughter of a dear friend - Amelia Jane. Amelia has helped me create this layout for you and with her in mind I also created the card
She definitely is a real little honey (and I have more special photos to bring you in the future of her)
The papers from the kit were from the Authentique - Delightful collection and they were absolutely awesome to work with and combined really well with the Kaisercraft cardstock that Liz sent me and of course a lot of other goodies from Making Memories were included ...
Hopefully this layout and sketch will inspire you to try out using some of the Authentique Papers
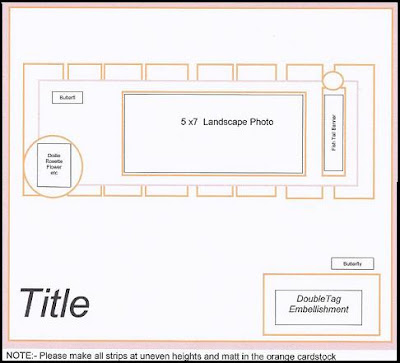
Here is the card I have made from the left over pieces, it is a little longer than a normal card so there is a little more room to play!
Thanks for looking and checking out the goodies I have for you, and If you would like to purchase one of these kits then click on the link and head to the shop
A very good morning to all.
Betsy here today to share some cards I have made with the lovely Prima, Romantic Novel Collection. Another range I am very fond of. ( No one is mentioning the addiction I have!!)
The collection is very versatile and I love the vintage look it has. This is a very simple design, the labels were cut using the Spellbinders Labels 5. I have used glimmer mist to colour the seam binding so as to get it matching.
A Mo Manning stamp coloured with my copics - isn't she cute?!! The ribbon at the bottom of the card was purchased at Artfull Crafts and again I sprayed it with glimmer mist.
This is a Marrianne Die that I have used to cut out the scalloped circle. The flowers on the card are from Prima whereas on the previous cards, they were Kaisercrafts. The flourish was cut using another Marianne die. The little trinket was purchased from Artfull Crafts.
I have just included this one to show how versatile the collection is. It is a tag card with a message included inside. It is all from the Prime range, except the clock which I cut using the Tim Holtz die.
Well ladies, all from me today. I am a little under pressure at the moment but am enjoying it all! We had a fabulous weekend at Artfull Craft's 'Get Away Weekend' with Trina McClune and Lowri - lots of great projects were completed and some very satisfied ladies.
Happy crafting, have an enjoyable day and many blessings,
I just love flowers so it was no suprise that I went a bit mad with embellishments on this one.
My inspiration for the frame came from a little saying that was in Prima's Romance novel papers which said "10 things I will never forget" so with that in mind Hubby and I came up with "10 things we will never forget" about our children.
1. We will never forget the days that each of our children were born and how on each of those days our lives changed completely & forever.
2. We will never forget that you will never know how much we love you until you have children of your own to love.
3. We will never forget your favourite blankies as you needed these to comfort you and you loved them so much they all wore out.
4. We will never forget how we say “i love you to the moon and back infinity times infinity, infinity times”
5. We will never forget the times that each of you have cried and you have needed a cuddle from mummy and daddy to make it all better.
6. We will never forget the pitter patter of little feet into our bedroom at night and the cuddles we have until the morning light.
7. We will never forget your favourite toys that became part of our family just because of you.
8. We will never forget the times when you have been sick and even though we were doing everything we could we felt helpless to help you.
9. We will never forget your smiles and laughter as those are the days that it felt like the sun was shining – even though there could have been a storm outside.
10. We will never forget that you are our children and whatever you do we will always be there for you – we will never forget as you three are the reason for our lives.
So that was that - tears all around the place followed by the biggest hugs :)
And before I forget - here is a photo of the finished creation :)
Christmas is just around the corner and a perfect time to get started on Christmas Cards. What better way to make a convenient way to display cards than to have them hanging from the Christmas Tree?
This card was constructed using a single A4 piece of white card stock, scored and folded in half. From there, the card stock was adhered with temporary adhesive and was cut on a Slice 12x12 Glass Cutting mat using a circle cutting tool using a 5" circle. The perimeter was stamped with snowflakes in Tsukinkeo Memento Ink in Bahama Blue.
The card can hang from hooks or pins, and can even be hung on the Christmas Tree or from the fireplace! Last year I gave hanging cards to all my family and close friends and they enjoyed being able to display the card with their ornaments.
Thanks for looking and reading. Hope the start of your Spring has been a great one! Remember that Summer and Christmas is just around the corner.
Hi everyone, here we are ready for part two of the Advent calender for Artfull Crafts.
Time to decorate the whole project. I started by thinking about my Christmas tree and what I put on to it, as I decorate it ready for the festive season. As with the rest of the project I only used Kaisercraft Turtle-Dove paper
I started with making some presents.
The presents I made needed to be very little. I cut six little squares of cardboard about 1.5cm x 1.5cm, and taped them as above, on the reverse side of the paper I wanted. I made sure I left an extra piece of paper on the sides as shown in black above, so I could tape the boxes together. (The picture was crooked so i couldn't make them look square, sorry). You fold them up into a box shape. Once they were together, I put a piece of paper strip, as if it were ribbon around them. A bow on the top, and a a couple of red Mini-Paper-Blooms and some leaves for colour.
Next I decorated some reindeer. I wanted them to be bounding up the sides of the tree, like they were running up the steps. This is last years reindeer.
I covered the Reindeer with paper, and inked around the edge of him. I then distress stained his antlers and legs. But I still wasn't happy, so i distress embossed his antlers to give a furry look. I used ranger distress embossing powder vintage photo embossing powder. I then heat set it. I made a small chain for around his neck, but the bells were all to big that I had, so I left them off. I made two of these reindeer, facing opposite ways.
In the photo above you should be able to see the red circle and cream rose by his tail. I cut strips of paper and then quilled a loose circle. I glued this on to every point on the tree, as I felt the edges were just to hard for the look of what I was trying to achieve.
I also added the white paper on the sides of the tree as above as well.
It is a little hard to see, but I also put lime tulle behind the presents and I ran a string of hand knotted acrylic crystal like beads down the side.
Then lastly I added some mini pine cones that i added some Kindy glitz and stickles to, and then I carefully made holes in all the boxes and added brads onto every one. I was careful as some numbers are quite big and I had to make sure the numbers would fit - so some brads are not centred. I used different sized and different coloured brads on the different coloured boxes. I then added the numbers from the Turtle Dove Numbers stickers sheet, a few wooden flourishes from Kaisercraft, and then for the star, I put paper on the back, and then bling stips to brighten the front.
Then it was finished. It got to sit on my bench for a few days, and then I packed it up so very carefully and couriered to Timaru, where it is sitting in Kasiercraft section of Artfull Crafts.
Hi there - Christine here. Today I have some Christmas Butterflies to show you!! Not sure if Christmas and Butterflies go together, but I have decided they do! I love Butterflies all year round.
I have made some Butterfly easel cards using Kaisercraft's Turtle & Dove Collection...
I have used the lovely 'Shiny' papers from the 6x6 pad. The Butterflies are the Spellbinders Wonderful Wings die set and the Card to create the base is Kaisercraft Burgundy and Khaki.
The idea for the Butterflies came from Bronwyn at addINKtive designs, she makes fabulous easel cards using a different die. She has an awesome
tutorial, to make these Butterfly Easel cards, that you can purchase .
The sentiment is from the Kaisercraft's Turtle & Dove Stamp set. I have used a Kaisercraft Sparklet in the center of the butterfly.
Here is a smaller butterfly one, which I thought would be good for a place name.
This last photo shows the size compared to the bigger butterfly card.
Over on my Blog I have some more Butterflies made using the My Minds Eye - Market St papers.
Hi there
It is Vicki here to share with you some creations using this fabulous kit that Liz has put together. You can purchase this Artfull Sketch kit for only $25! There's at least that amount in product, plus colour photos of the layouts that you can create and the sketches to help you along the way! (No full instructions or titles with sketch kits).
So first up I completed this layout with the kit. I especially loved the chipboard accents from Echo Park.
Everything I used for this layout was in the kit with the exception of the chipboard alphas which I used for my son's name. Did you spot the little coiled paper clips - they are just so cute - and guess what - you get them in the kit!
Another favourite of mine in the kit is the little envelopes which hide my journalling - perfect for sharing those private little memories. So if you didn't spot it - here is where I have hidden the journalling.
To get you started here is a sketch I have made to go with this layout.
There was a lot left over in the kit so I have used it for this layout as well. I added in some more flowers and trinkets from my stash.
I just love the neutral colours of this kit and the chipboard accent title was just perfect for this layout.
Again the little envelopes in the kit came in handy to hide my journalling:
Here is the sketch I have made up based on this layout.
I am not a cardmaker but with the little bits left over from the kit and some flowers and material from my stash I made this little card.
With the creation of two layouts and a card it is easy to see that these kits are packed with yummy goodness and such great value - so head on over to the ARTFULL CRAFTS SHOP and check them out - you won't regret it!