Hi there, how are you? Can you believe we're more than halfway through January already? How's the start of your year going so far? Christine S. here today posting 3 different creations using the lovely "XO" collection. Let's start off with a layout I've created called "A Little Girl's Kiss". This is the sweetest moment captured ever, so I really wanted to document it. The XO collection is perfect for this...a mix of sweet & pretty colors, prints & patterns. Here's my layout:
Isn't the My Heart glossy specialty paper just gorgeous? When I got my hands on this paper, it got my brain flowing with ideas straight away. Lots of subtle layering here, as I wanted the photo to stand out from the lovely papers.
Onto the second one which is...a Valentine's card of course! The collection name speaks for itself, so it's a no brainer for me to make one. Here's my card:
The message in a clear bottle really added a gorgeous touch to this card. I've simply trimmed the P.S. I love you from the XO sticker sheet, placed it inside the corked bottle, then twisted some mini rosebuds on the top. The black heart at the bottom left of the card is simply the left over from the sticker sheet. You know, the ones most of us don't use & throw away. Simply cut it out, & voila! I've said this a couple of times before but I'll say it again...nothing must go to waste!
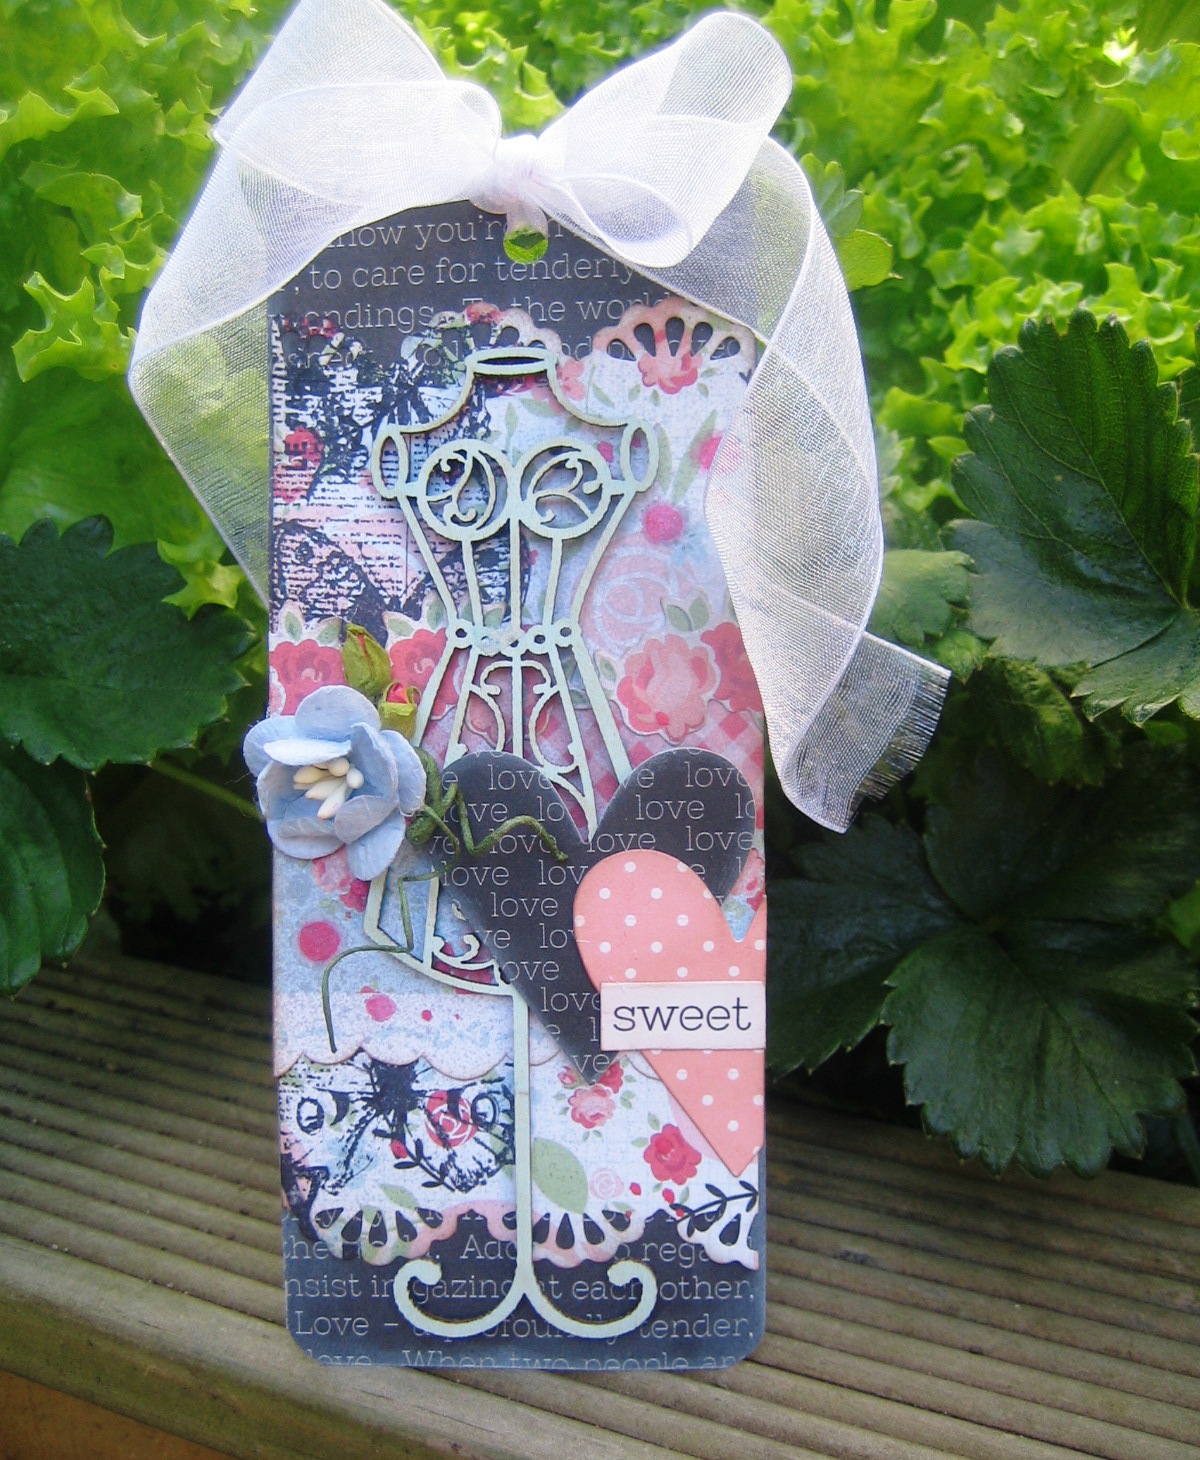
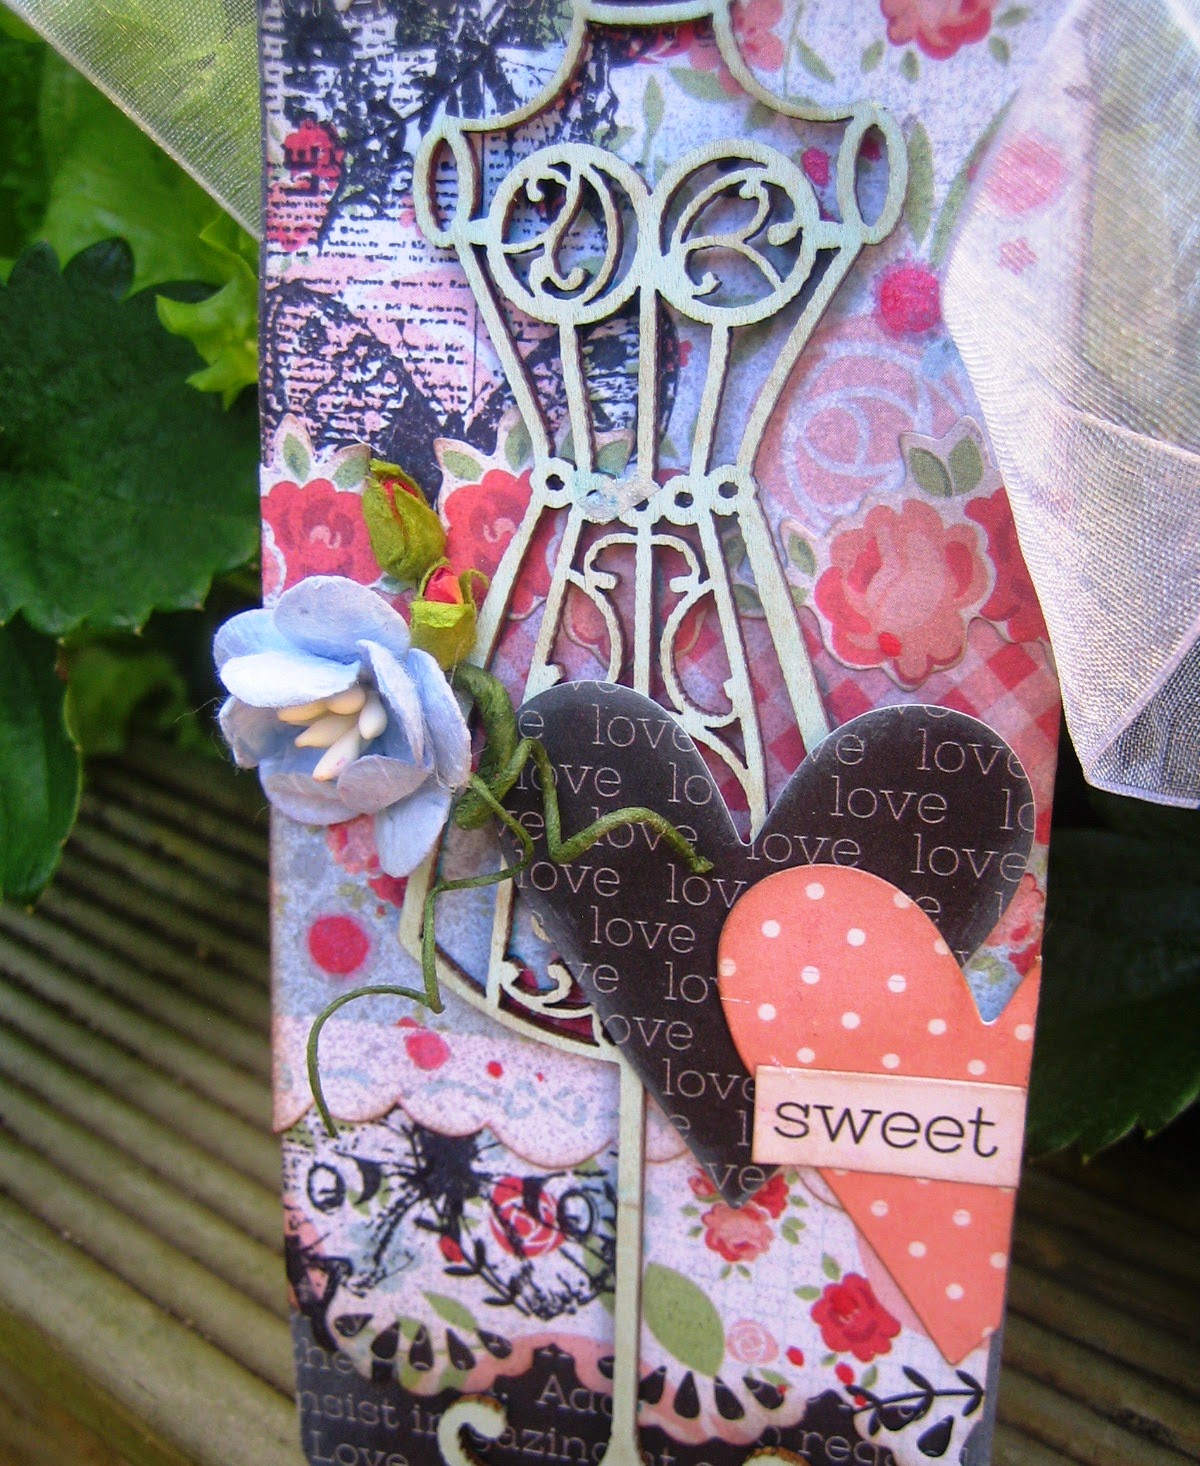
The third & last one is a tag I've made for my daughter. She loves all things girly & pretty & reading stories, so that is enough inspiration for me to create this tag:
If this isn't sweet & girly enough, then I don't know what is! I hope you enjoyed the variety of creations that I made from the beautiful XO collection. Thanks so much for dropping by & for making it at the end of this post. Have a super week!
Hi there - Christine B here with a layout and a card using Kaisercraft's Hello Today Collection. This was one of their December Collections, but with Christmas stuff last month I didn't get around to posting it , so here it is......
I made my own 3x4 cards out of patterned paper and rounded the corners and placed the six of the together. I followed a sketch from Scrapbook Generation which you can download for free here.
Kaisercaft have brought out their Captured Moments 3x4 cards - Right Now -which go with this Collection.
And of course a Card.......
An easel card made using Spellbinders Radiant Rectangles.
Hi everyone Beverley here with a couple of layouts to share using the POP! collection by Kaisercraft.
This is a fun party filled collection that is very bright and cheerful.
My first layout I created a birthday layout using the less brightly coloured papers in the collection.
The main paper used is the Bunting paper and have added stickers and other embellishments. The background has been sprayed with Heidi Swapp Colour Shine sprays - Citrus and Teal
My second layout today was a trickier one for me with the Lollipop paper. It is a rather "loud" paper and a bit too busy for me to use the whole piece with the photos I had. I still wanted to have the circular effect so decided to cut a circular shape out on my cameo. A similar effect could be done by cutting circles with circle dies and or circle punches. I also cut out my title on the cameo. My background is Heidi Swapp Colour shine splatters. I then added stickers and enamel dots to finish off.
So if you would like a fun and Cheery collection POP! is definitely for you!
Thanks for looking.
Good morning, its Melissa here! I hope you're enjoying Summer as much as I am! Today I have three layouts that I made with Kaisercraft's beautiful XO collection. I loved this one soooo much that I couldn't stop!
XO is a Valentines Layout with gorgeous colours, patterns and chalkboard print, and I decided to use it to scrap my gorgeous girls.
For my first layout I used this speciality wreath paper, and I backed the smaller cut outs with patterned paper from the collection. I left the larger flowers open to provide contrast. The photo is of my baby girl in June when she was 2 months old. I completed the layout with some collectable die cuts and stickers. The title is made with a die cut (Sweet) and sticker (smile).
A close up of the layered pieces.
A close up of the title and wreath.
My second layout is about my eldest daughter loving to look our for her baby sister. I really wanted to feature that bold floral, but I couldn't make it work, so I used the B side of it (apricot colour). I layered some papers under my photo, and applied some gelato with a plastic bag and a spray of water. My title is handout from this gorgeous paper.
A close up of my title.
A close up of my paper layers. I popped up the flower border sticker on some dimensional adhesive.
My final layout is made with cutting a selection of the patterned papers with a manual die "Love" on my Cuttlebug. I also cut some leaves with plain white cardstock. I arranged them on my page, then stitched them down. I stuck my photos on vellum to provide some soft separation from the rest of the page, then just added some stickers and sequins.
The flower border is from the sticker sheet.
A close up of the die cut words.
You can purchase XO in the shop here. Thanks for looking and see you again later on in the month.
Hello! It's Lisa here, with a couple of layouts featuring the cool Close Up range from Kaisercraft. The line was released back in November, and features cool retro graphics and colourways, along with great images of vintage cameras. As a photography buff, I absolutely love it. :)
My first layout uses kraft cardstock as the base, and I've used a selection of the Focus, Shutter, andLens papers, cutting around the Focus paper to highlight the curves of the circles. This helps bring a little softness to the otherwise fairly straight/hard-edges of the layout, and also echoes the lines of the piece of wire my daughter is holding in the photo.
(click image to enlarge)
To finish up, I used a selection of the Collectables (the vintage camera image and the quote tag) along with another text quote, a strip of glitter washi, a little veneer heart and a trio of gold glitter triangles. A little touch of bling goes a long way, and seems to have become a regular feature in many of my layouts lately. :)
***
The second layout has a mix of patterns and shapes, but they're all linked together through repetition, which is one of my favourite tricks to use to bring a layout together, even when using seemingly disparate elements. I started with a sheet of Kaisercraft Vanilla weave cardstock as a base, upon which I've lightly stencilled a dotted pattern in pale teal ink, which has been repeated when I layered some of the Shutter design paper (the reverse patterned side, this time, featuring more dots and a teal background.) I've also used the Focus sheet again, cutting around the curves of the graphics once more. I've echoed the curves/circles through the use of the Collectables in the top right, as well as in the arched border on the left (which also contains dots as well as more of the teal colour.)
(click image to enlarge)
The two large letters (ME) have a grid background, which is repeated in the "love this" Collectable on the right. The little heart in the kraft speech bubble in the bottom centre also has the grid pattern. Lastly, the stripes in the photo are echoed in the lines of the Focus pattern, and the three little bling dots repeat the same teal colour found elsewhere in the layout.
Lots of subtle repetition and mirroring of patterns, and nothing has to be too matchy-matchy for it to go together. :) Sometimes half the fun is picking out things that don't look as if they can possibly work in a layout and making it happen!
As always, thanks for looking, and be sure to check out the fabulously funky Close Up range!
Hi there, Christine S. here with you again for some "XO" inspiration. It's a collection with fresh & lovely line of papers filled with hearts, pretty flowers & prints…perfect for all your Valentine’s creations & more. The colors are lovely as it’s not all reds, pinks & whites. It’s also balanced with light blue & black. Today I’m sharing a double layout with you. It’s not a Valentine’s layout, & it fits perfectly for the little ones in your life:
I used the Kaisercraft corrugated cardboard for my base. I painted them with black gesso, but you can use any type of black paint (acrylic/chalkboard) or black mists/sprays. Once the paint has dried, I then used my Pearl Mist & Damask template to create my background. The aim is to create a subtle shadow, & it really gave it a nice effect.
Hi there, Christine S. here. Happy 2015 to you! First & foremost, I'd like to thank Liz for taking me on with this year's design team. I had a great time creating for the Christmas countdown & this year will be even better. I hope you're having an awesome holiday so far. Today I'm sharing with you a layout I've created with my daughter's artwork from preschool:
If you've been waiting for the right collection to document those school/art photos, then wait no more. Too Cool For School is available at the shop now, & there's 20% off for the full collection, & 10% off for the full paper collection. Enjoy your summer & I look forward to share with you more crafty creations. Have a great day!
Hi Everyone Bev here welcome to my first post as part of the permanent Design Team. Thank you Liz for inviting me - looking forward to being part of the team. Hope you all had a lovely Christmas and a great start to the new year.
Today I am showing you a layout using the stunning Blue Bay Collection by Kaisercraft. I have used a couple of the papers and some of the collectables too. The word strips are from stickers and from the cut off piece of the 12 by 12 paper. I had fun experimenting using stamps on my layout. The stamps I have used are from the Bow and Arrow Collection also by Kaisercraft.
I will be back with more inspiration during the month with this collection and more.
Thanks for looking and this collection is gorgeous and suitable for all sorts of occasions!
Hello and Happy New Year! I hope everyone has had a safe and happy start to 2015, and that this year brings nothing but happiness. :) I admit I'm still pretty much in holiday mode, which pretty much translates to the simple fact that most of the time I have no idea whatsoever what day it is-- only that it's sunny and warm and life is good.
So, just a quick post today, featuring a layout I made using one of Kaisercraft's latest releases: the lovely Blue Baycollection. Such a perfect range for these long, hot summer days, with shades of blue, turquoise and cream.
I used a sheet of white cardstock as my base, and cut out a selection of ornate doors and windows from the Sky Blue sheet, mixing in three of the Collectables-- also choosing doors and windows. You'll see why in a moment...
Using a craft knife, I carefully cut along the top, bottom and middle sections, leaving a small frame around the outside-- basically creating windows and doors that "open". To the back of these, I attached three photos, cut to size to fit. These can be glimpsed when the three little windows/doors are opened. :)
I added these three photo windows randomly amongst the doors and windows cut from the plain paper, leaving them half-opened to give a glimpse of the photo beyond.
To finish off the page, I added a couple of ornate paper borders from the small paper pad, along with a tag from the Collectables. A brad to attach the tag and a little wooden veneer heart, and that's it-- done! Simple and probably one of my favourite layouts to date. :)
Blue Bay currently has 20% offif you buy the full collection, so check it out soon for all those fabulous summer holiday snaps!
As always, thanks so much for looking, and I'll see you again soon. :)
To realize this Home Decoration, I used a file of the shop "Snap Dragon Snippets". HERE
To realize this box-pound, I used of " white Bazzil Cardstock " and papers of the new collection " Graphic45 ", "Twas the Night Before Christmas". Papers are inked to the ink "Distress Walnut Stain".
I used a rubberstamp " Crafty Sentiments ", "Christmas Helper" whom you can find HERE.
I colorized it in the following way:
- Ink "Distress Tattered Rose" and "Distress Vintage Photo" for the skin.
- Ink "Distress Antique Linen" and "Distress Brushed Corduroy" for hair.
- Ink "Distress Festive Berries".
- Ink "Distress Fayded Jeans".
- Ink "Distress Mowed Lawn".
- Ink "Distress Pumice Stone".
- Ink "Distress Spun Sugar".
Then, I added one " red Poinsettia ", a flower white "Prima", a brown rose (20 mm) (WOC) and red berries (WOC).
I also stuck a die-cut " Happy Holidays " of the same collection " Graphic45 " and a small red Christmas bauble.
On the back face of this box, I stuck a white doily. Above, I added chipboards of the same collection " Graphic45 ".
Here we are! I hope that my realization has you more and that it will inspire you.
I thank you for your passage and wish you an excellent day! Bye bye! :-)

.JPG)


.JPG)
.JPG)
.JPG)


.JPG)


