Hi Everyone. Lisa here - today I am sharing a fun little project I made using Kaisercrafts' Check In range.
I loved this range as soon as I saw it... that is the case for me for most of Kaisercrafts' ranges!
I also new as soon as I saw it that I was going to make a suitcase. You know how sometimes paper just screams a certain project at you. Gosh, I hope you know what I'm talking about...lol
I made the suitcase from an A5 card. I made the template up & it was extremely simple to come up with just with a ruler & pencil working with 1inch edges then going from there.
This for me is a purely decorative piece. It would be an ideal gift for someone going away as a farewell gift.
I used papers from the 6 1/2 inch paper pad to decorate the case. I inked all the edges to give it a finished & worn look. The handle was made from a scrap of the A5 card. I embellished with some pearls, a tag & a cute little pewter aeroplane charm I had in my stash.
Some close ups of what's inside....
I filled the suitcase with some collectables, some letters, maps & boarding passes etc from the paper pad, a little folder I cut using a die for the itinerary, some flowers, a cameo, a shell, some ribbon,a stamped camera, a key, a coin. Basically lots of little bits & pieces - to make it look like a traveller has collected treasures along the way.
This project is quite apt for me, as it will be one of my last posts for Artfull Crafts. I have thoroughly enjoyed my time on the DT with a fabulous group of ladies. BTP projects are a particular favourite of mine - as are lots of little bits and pieces. So, a suitcase full of sweet little bits and pieces bidding farewell.
Hi Everyone. Lisa here. Today I have some altered tags to share. I have decorated them using the gorgeous Sweet Day collection by Echo Park. This month at Artfull Crafts the focus is favourite colors. I have so many favourite colour combinations, there is no way I can commit to one! I do love the colours in this range, they are fun & so pretty!
I have used purchased luggage tags. You can usually get these from your newsagents or stationary store.
I love to alter them, they are 'my thing' at the moment.
I have decorated 3 as a set, you can add them to a layout, a card or just give them as they are.
I have layered elements from the sticker sheet, used some punched shapes, buttons, crushed seam binding & bling.
Inked edges help give a finished look.
I have used some flowers from the sticker sheet to replicate the images on the patterned paper. I cut a sweet little envelope using a sizzix die I have. Some more inked edges, ribbon, buttons & bling.
I used the gorgeous hot air balloon from the sticker sheet layering with foam tape & a sentiment. Some ribbon, twine & bling.
Hi Everyone. Lisa here to share some cards I have made using the gorgeous Bella Wedding range.
There are lots of beautiful papers and co-ordinating embellishments in this collection.
This is my favourite card of the set of three that I made using this collection.
I used a square base of white card stock, then made a base from the beautiful Silver embossed card stock - Wedded words. I gently sanded over the embossed words so they would stand out.
Keeping in with the square theme, I punched out four squares of black card stock & inked the edges with silver ink. I used the white alphas to spell the word love...replacing the 'O' with a gorgeous Silver Heart Seal sticker. A red heart brad to finish it off & add a bit of colour.
I have used white card stock again for the base of this card, this time going for a slim rectangle. I layered with vellum with silver dots over the base to create a lovely soft look.
It is important to note the quality of this vellum is AMAZING! I have not used anything quite like it before!
A strip of Silver paper lace (which is adhesive - got to love that) A punched square with a heart seal to complete.
This is a smaller card, that I rounded the corners of then embossed the card stock using Swiss dot embossing folder in my cuttlebug. I gently rubbed silver ink over the embossing. I have used three of the Heart shaped Wedding tokens. I gently scored the hearts in the centre & stuck some tape between each layer only along the score to create a layered effect. A Pearl sticker, heart seal & bling to complete.
I made all three cards from one sheet of card stock. This is fun & easy to achieve by making different sized cards in one set.
I think these cards are suitable for Wedding, Engagement or perhaps just for someone you love.
Hi Everyone. Lisa here. Today I have a layout to share using Kaisercrafts' Great Southern Land range.
If you haven't seen this range yet, you should really check it out! It is such a versatile range. It is ideal for Australian themed projects, travel projects, masculine projects to name just a few. In my last post I focused on the gorgeous greens & browns in the range to team up with my Rain forest & flora photos. Today I focused more on the rich reds & browns to work in with my Autumn themed photos & the absolutely gorgeous leaves from the shop.
I have used a rich red/brown patterned paper from the range as my base paper. I gently distressed the edges then inked with Tim Holtz distress ink.
I then chose a lighter piece of patterned paper & created a large scalloped circle die cut using my new toy...a Lucky 8 punch from We R Memory Keepers. Basically these punches allow you to create a large die cut just by punching each corner or your page, you then flip your page & punch four more times.
At this stage we don't have these in the shop, but I can tell you Liz loves them too! So, watch this space!
I used Tim Holtz Distress ink -Walnut stain & Antique linen to darken the die cut to help bring it all together.
I kept this layout pretty simple, I added my photos, a journal tag, a rub on, some pearls & the gorgeous Autumn leaves.
I also gently sanded the edges of my photos. I like to do this sometimes, as the photos can look to crisp against all the warm tonings.
I have made a couple of gift tags using the tags from the Specialty paper die cut sheet. Sometimes you need a little tag for a gift that maybe for a male or someone who isn't in to pretty or fussy bits & pieces. So these are perfect. I just layered the die cut tags on to patterned paper, some more distress inking, some gorgeous ribbons, pearls & staples.
Hi Everyone. Lisa here. Today I have a simple mini album to share, using Kaisercrafts 'Great Southern Land'. This is such a versatile range, yes I know I always say that...but its true! Not only is it great for Australian projects, its great for any Flora & Fauna pics, masculine projects, gardening projects just to name a few.
This the front view of the album when it is closed.
It is a very simple design using only 1 sheet of card stock, I have used the beautiful Bazzil card stock aptly named Rainforest. Just cut your card stock in half so that you have 2 pieces at 6x12. Then score each of those pieces at 4 then 8 inches so you end up with 6 smaller sections (3 on each half piece). You need to fold on the scores alternating, Mountain & Valley folds. Then overlap (adhere with glue or tape) two ends so you have a continuing piece.You should be left with five sections on each side, with your Mountain & Valley folds continuing...Gee hope this makes sense, its harder explaining that is actually doing it!
The flower is handmade using lots of layers of flowers from this pack....Yes it's a Christmas embellishment pack! I wet them with glimmer mist, dried them inked the with Tim Holtz Tim Holtz distress inks & pinned them all together with a brad.
I was lucky enough to have a holiday in Port Douglas, Queensland recently. I was amazed at the beautiful flora we saw along the way & the sheer beauty of the Rainforest.
I have so many photos, too many to count...so this mini just holds a sample of some of my favourite shots.
These are the photos that are inside my mini. As you can see they take up pretty much the entire page. After all, the photos are the focus. As the pages measure 4x6 you need to trim the photos down slightly.
I don't think it matters if you use photos of different orientation, as long as they are both the same direction on the same page opening.
Thanks for stopping by. Don't forget to enter our Monthly Challenge...details here.
Have a great day.
Hi Everyone. Lisa here. Today I have some pretty cards to share made using an absolutely gorgeous range from Authentique called 'Delightful'.
This range is very pretty & whimsical at least that's my take on it! Christine recently made some fabulous Easter cards with this range & it would also be great for any spring themed projects. Now that's a versatile range!
My first card is a Centre step card, so easy to make! Decorated with lots of layers of patterned paper from the range, pieces from the sticker sheet, punched borders, flowers, ink, string & bling.
Next up is the ever reliable Easel card, great for when you just want something a bit fancier than your standard card. Decorated with lots of layers of patterned paper from the range, pieces
from the sticker sheet, punched borders, flowers, ink, ribbon, string &
bling.
A close up on a different angle, so you can see the embellishing.
I couldn't resist making some sweet little tags with some of my leftovers! So quick & easy and great to add to your stash when giving just a little something.
I die cut some layered hearts using my cuttlebug. I inked the edges for definition, added ribbon string & bling.
Make sure you check out the fabulous range of ribbons we have in store,the beautiful pink & green snippetes you can see on my cards today are Green Tara ribbons.
Hi Everyone. Lisa here. Today I have a sweet Little mini album to share. I have used Authentiques' fabulous 'Genuine' range.
For those of you in NZ I have sent this mini to Liz to display in store, so if your in the shop check it out!
This is the album all closed up neatly with a co-ordinating ribbon that is attached to the mini. Decorated with some bling.
When open the album has 8 pockets for tags or secret messages.
Luggage tags which I purchased from my local newsagents fit perfectly in to the pockets. You could certainly make your own. I die cut some hearts for extra tags & embellishing.
I had fun experimenting with my stamps on this project. I used white ink which comes up really well. The stamp set I used was Kaisercraft 'Tigerlilly' - such a great set of butterflies & a flourish.
I embellished with scraps of paper, stickers from the sticker sheet, bling, seam binding & I even cut some quotes & the title 'Authentique' from the bar code section of the patterned paper!
This is such a quick and easy mini to make. You only require one sheet of 12 x 12 patterned paper!
I don't have a tutorial for this mini, but you can find plenty of tutorials online just search for mini tag album using 12 x12 paper. You'll be amazed what great ideas you can find when you start looking.
Hi Everyone. Lisa here. This month at Artfull Crafts 'Authentique' is taking Centre Stage. WOW - what fabulous paper, the quality is amazing!
Today I have a layout & decorated gift bag to share using the 'Genuine' range lots of blues paired with yellow in this range. It reminds me of denim in fact.The range is great for feminine or masculine projects, due to the varying prints.
The colours & style of this layout are very different than my usual style. It was fun to do something completely different - to challenge myself. I love this photo of my son with our cat. Blue & yellow are apparently the 'in' colours this year...however I can find yellow hard to work with (I'll have to work on that..lol). So, I put some red in the mix & this is what I came up with. A bit of stamping, doodling, layering & embellishing. My journalling is hidden on the little note peeking out from the top of the photo.
Well, by now you probably know that I have to make something else whilst I have a range of goodies out. So this time I decided it would be fun to decorate a plain Kraft gift bag. A few layers - of punched edged papers, some ribbon,string & bling & your done.
Make sure you check out the full range in the shop. The sticker sheets that are in the range are a fabulous way to get those projects done quickly!
Hi Everyone. Lisa here. Today I have my last post for the month focusing on Echo Park. Oh how I have enjoyed working with Echo Park products. Today is no exception in fact I will go as far to say that the 'This & That - Graceful' range comes very close to be some of my most very favourite paper to date! I love the soft, vintage feel of the range & the colour combinations are fabulous.
Make sure you scroll to the end of this post to see how you can WIN a new Echo Park Mini Theme Collection Packor the kit used to create these projects.
First up I want to share a layout with you. I had this layout planned out in my head as soon as I saw the papers...dreamy...Yes obsessive, I know. I used a Chocolate brown piece of Bazzill card stock as the base of the layout. Hard to photograph! lol. Looks lovely in the flesh though, dramatic yet soft with the softer greens & pinks.
Lots of layering, inking & prettiness.
A couple of pretty cards...I have used the fabulous Bazzill card stock that Liz put in the kit as the card base. The colour is called Flamingo - so pretty!
I also made this project with contents from the kit. You may have seen this mini album/card on our recent blog hop we did with Echo Park.
I have still lots of bits & pieces left over from the kit - even after making all of these things! This kit was so well put together, I only added a little bit of string from my stash & used some punches & inks! We are hoping to be able to have this kit in the shop, watch this space. If not we have lots of other great kits for sale.
YOU COULD WIN a new Echo Park Mini Theme Collection Pack
or the kit used to create these This and That Graceful projects by
leaving us a comment on either this post or on Guest DT Linda Auclairs' post - telling us YOUR favorite Echo Park Collection of
all time! (Please comment by Midnight NZ time - this Friday to qualify for the draw)
Hi Everyone. Lisa here. Today I am sharing some cards made using Kaisercrafts' gorgeous Tigerlilly collection. This has been quite a popular collection as who doesn't love butterflies! Not to mention the lovely combination of Pink & Orange.
My first card is actually a mini fold out concertina card. (Totally made up name...that's what happens when you make something up as you go!) Liz sent me some of the gorgeous new mini envelopes from Kaisercraft, so I based this around them.
The concertina folds out & I stuck some of the collectable tags on alternating folds, then stuck three envelopes & filled them with pretty journal tags & notes from the collection. I have also used the fabulous seals that come in the set as decorative seals for the envelopes. You can also see that I used bits & pieces from the sticker sheet here & there as well. I wrapped a piece of seam binding around it to gently hold it all together. Did you notice the seam binding has a tie died look? A gentle spritz & scrunch with Glimmer mist is the answer.
This card is a simple square card, where I really wanted to focus on the orange & black with one of the beautiful large butterflies from the Collectable packs. The papers I have used for both cards are from the paper pad.
My last card for today has more of a focus on the black & more muted tones in the collection. I really like this too as you aren't always aiming for a bright card. Sometimes its more about the soft prettiness. Its great when a collection is so versatile that you can achieve more than one look!
Hope you all have a great day. Stay tuned for the Echo Park blog hop, which we are all very excited to be a part of at Artfull Crafts. Watch this space for a chance to win some great prizes!
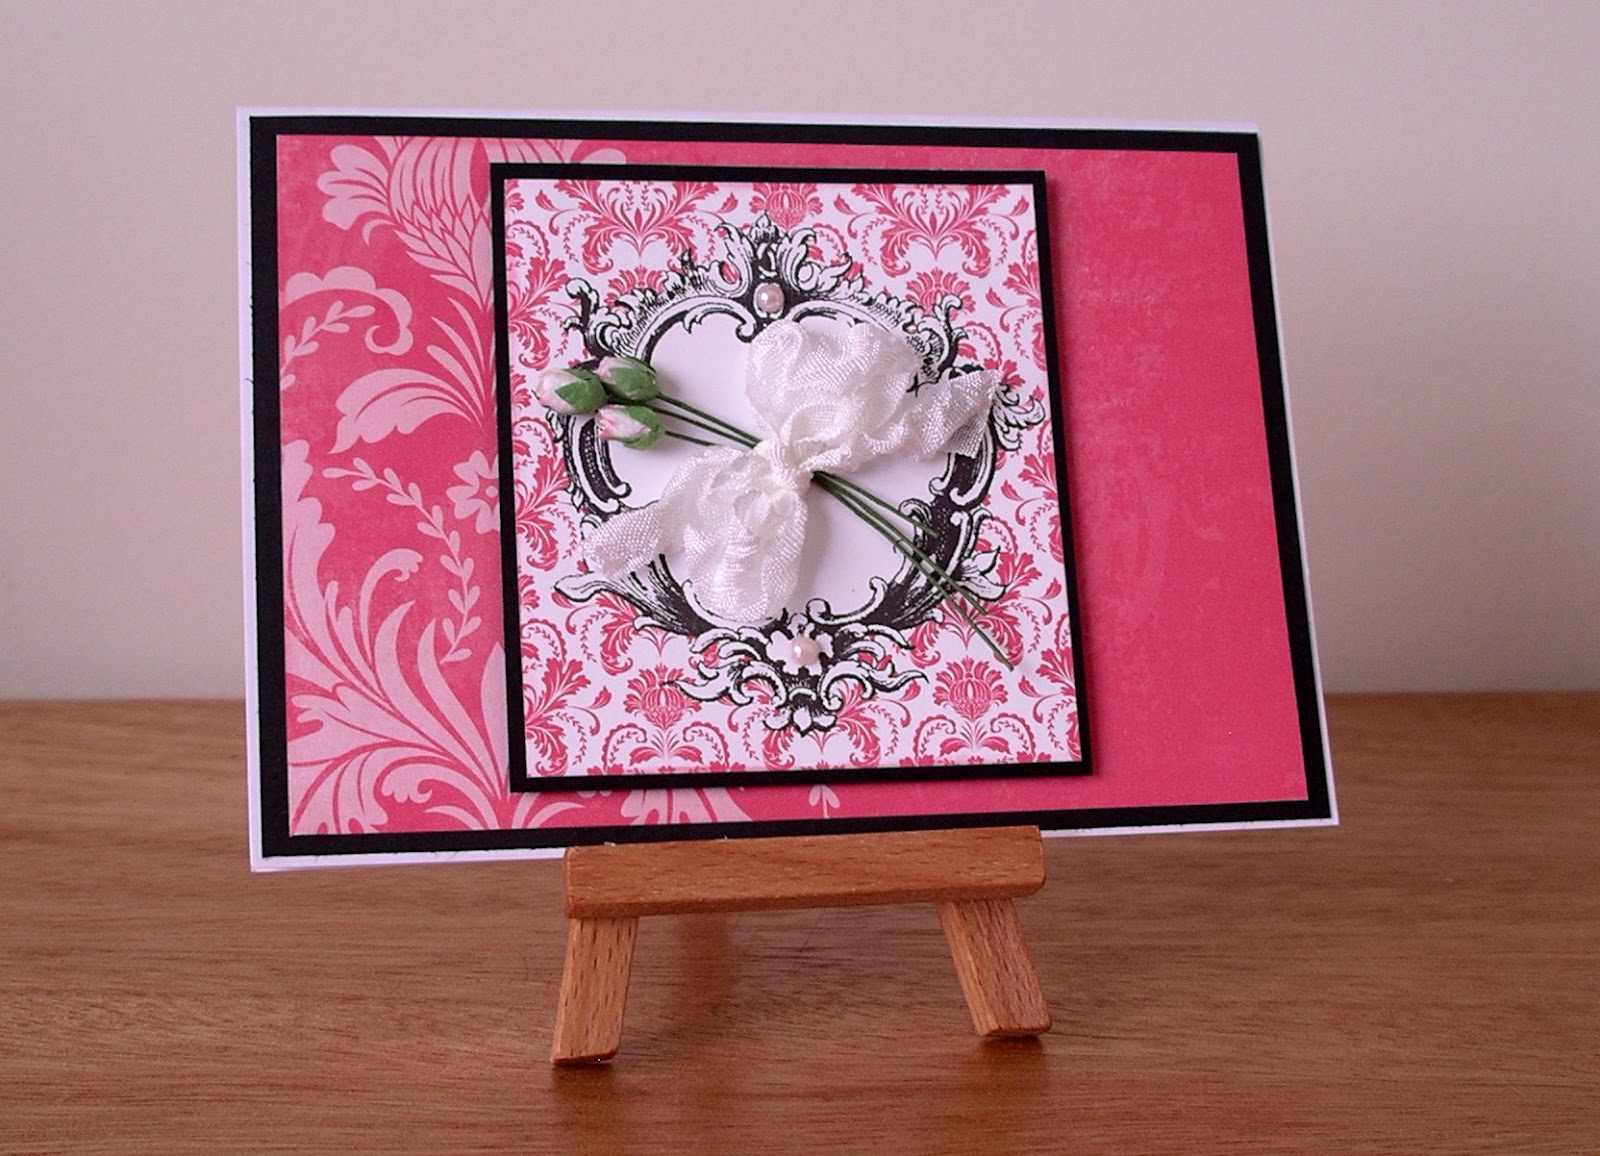
Hi Everyone. Lisa here. Today I have some cards made using one of Echo Parks' ranges called "Victoria Gardens". Do you ever find that you really love a particular range so you order it (well in this case ask Liz for some..lol) then you get it & try to create & it just doesn't happen for you? Well that happens to me sometimes. As frustrating as it is it's not about the beautiful paper its about finding out how YOU work best with this paper! I know its not the gorgeous paper as thousands of other people around the world have created gorgeous projects with it! I know - I googled it! Hmmm.....I hope someone knows what I'm on about, I'm not just a crazy lady!
Here is my first card. For me getting the paper to work for me was was about adding black, yes black as a base & contrast! Why didn't I realise that earlier...I don't know. But, when I did finally figure it out I loved the look. I have made this a centre opening card & then the extra panel is stuck on to one side but sits central when closed.I kept the card pretty simple by layering & mounting, slipping the black in between. A flower, some wire, tag & a pearl.
My next card I started with landscape base then mounted by alternating the black card & pink patterned paper. I added some flowers,pearls & seam binding to complete the card.
Next up is an even simpler card, lately the simple clean look is my thing. Maybe a bit hard to see in the photo but I embossed the black base using a embossing folder in my cuttle bug. A Swiss Dot folder which is my favourite. It adds texture to the card without too much fuss. A pink panel of patterned paper, a piece from the journal sheet, some bakers twine, a brad, pearl & simple sentiment stamp.
Here are some small gift tags I made whilst I had the paper out, I hope you like them.
I very rarely get my scrapping stuff out & just make one card or layout, I need to make the most of all the bits & pieces whilst they are out. Otherwise they get put away perhaps never to be seen again.
When you're stuck where do you go for inspiration? For me its the internet & magazines. Do you have paper in your stash that you have struggled to create with? What works for you? We love to read your comments.
Have a great day.
Lisa
P.S. Don't forget about Centre Stage If you don't know what I'm talking about you better check out the link!