Merry Christmas here from Nichole! Christmas is coming fast, only 2 weeks left! Moving right along with our Christmas Countdown - I have a tag for you today using the Echo Park This and That Christmas collection.
Echo Park has once again released a collection that is cheerful, bright, and just ever so slightly retro using classic colours, fun imagery, and whimsy!
I take a No 8 sized, regular manila shipping tag and cover it with Echo Park's This and That Paper Ornaments B-side, a lovely rich woodgrain pattern. I then cut a doily in half and adhered each side to opposite edges.
Detailed shot of the layered chipboard piece. Chipboard piece was edged with Scotch Quick Dry adhesive and Twinklets Diamond Dust. Diamond dust gives any piece a vintage glittery look - almost like ice crystals. Chipboard piece is adhered with hot glue for stability.
Love this classic icons and bright colours!
This bright red organza ribbon is the perfect red to compliment the vintage green hues in this collection. Ribbon was cut and sealed using the Imagicut Ribbon Cutter and Sealer - cuts and seals ribbons in one easy step! Such a breeze with organza ribbon - no frays/
Ribbon was double-bowed using a bow template and adhered using hot glue.
This tag is studded with bling! I used the i-Rock tool and Hot Rocks Compact to give this tag some sparkle and cheer.
Mini button detail from this collection is so cute, I couldn't pass it up.
Hope your holiday season is filled with Magical Delight too!
Ho Ho Ho! It's Nichole - and Santa is here with a fun way to keep track of the days until Christmas!
This block Advent Calendar was made using the Echo Park This & That Christmas Collection. This bright, witty collection mixes bright tones and vintage imagery for a fun Christmas!
This pattern was cut using the Silhouette Cameo with patterns from Samantha Walker's Block Calendar, purchased from the Silhouette Store. I've deviated from the pattern and used strong patterns in red and green to contrast the numbers and make them stand out.
Here it is! This woodgrain pattern was too beautiful to pass up, and used it as the dominating pattern as the background for these blocks.
And here's the man of the season, Santa! White Gel pen gives highlights on his boots, belt, and gloves. His hat sparkles and his beard is a snowy white.
Thanks for reading and looking, hope your Christmas Countdown is inspiring you to craft along with us and bring in the Christmas Cheer!
Hi Everyone. Lisa here. Today I have some altered tags to share. I have decorated them using the gorgeous Sweet Day collection by Echo Park. This month at Artfull Crafts the focus is favourite colors. I have so many favourite colour combinations, there is no way I can commit to one! I do love the colours in this range, they are fun & so pretty!
I have used purchased luggage tags. You can usually get these from your newsagents or stationary store.
I love to alter them, they are 'my thing' at the moment.
I have decorated 3 as a set, you can add them to a layout, a card or just give them as they are.
I have layered elements from the sticker sheet, used some punched shapes, buttons, crushed seam binding & bling.
Inked edges help give a finished look.
I have used some flowers from the sticker sheet to replicate the images on the patterned paper. I cut a sweet little envelope using a sizzix die I have. Some more inked edges, ribbon, buttons & bling.
I used the gorgeous hot air balloon from the sticker sheet layering with foam tape & a sentiment. Some ribbon, twine & bling.
Hi Everyone. Lisa here. Today I have my last post for the month focusing on Echo Park. Oh how I have enjoyed working with Echo Park products. Today is no exception in fact I will go as far to say that the 'This & That - Graceful' range comes very close to be some of my most very favourite paper to date! I love the soft, vintage feel of the range & the colour combinations are fabulous.
Make sure you scroll to the end of this post to see how you can WIN a new Echo Park Mini Theme Collection Packor the kit used to create these projects.
First up I want to share a layout with you. I had this layout planned out in my head as soon as I saw the papers...dreamy...Yes obsessive, I know. I used a Chocolate brown piece of Bazzill card stock as the base of the layout. Hard to photograph! lol. Looks lovely in the flesh though, dramatic yet soft with the softer greens & pinks.
Lots of layering, inking & prettiness.
A couple of pretty cards...I have used the fabulous Bazzill card stock that Liz put in the kit as the card base. The colour is called Flamingo - so pretty!
I also made this project with contents from the kit. You may have seen this mini album/card on our recent blog hop we did with Echo Park.
I have still lots of bits & pieces left over from the kit - even after making all of these things! This kit was so well put together, I only added a little bit of string from my stash & used some punches & inks! We are hoping to be able to have this kit in the shop, watch this space. If not we have lots of other great kits for sale.
YOU COULD WIN a new Echo Park Mini Theme Collection Pack
or the kit used to create these This and That Graceful projects by
leaving us a comment on either this post or on Guest DT Linda Auclairs' post - telling us YOUR favorite Echo Park Collection of
all time! (Please comment by Midnight NZ time - this Friday to qualify for the draw)
Hi Everyone. Lisa here. Today I have some cards made using one of Echo Parks' ranges called "Victoria Gardens". Do you ever find that you really love a particular range so you order it (well in this case ask Liz for some..lol) then you get it & try to create & it just doesn't happen for you? Well that happens to me sometimes. As frustrating as it is it's not about the beautiful paper its about finding out how YOU work best with this paper! I know its not the gorgeous paper as thousands of other people around the world have created gorgeous projects with it! I know - I googled it! Hmmm.....I hope someone knows what I'm on about, I'm not just a crazy lady!
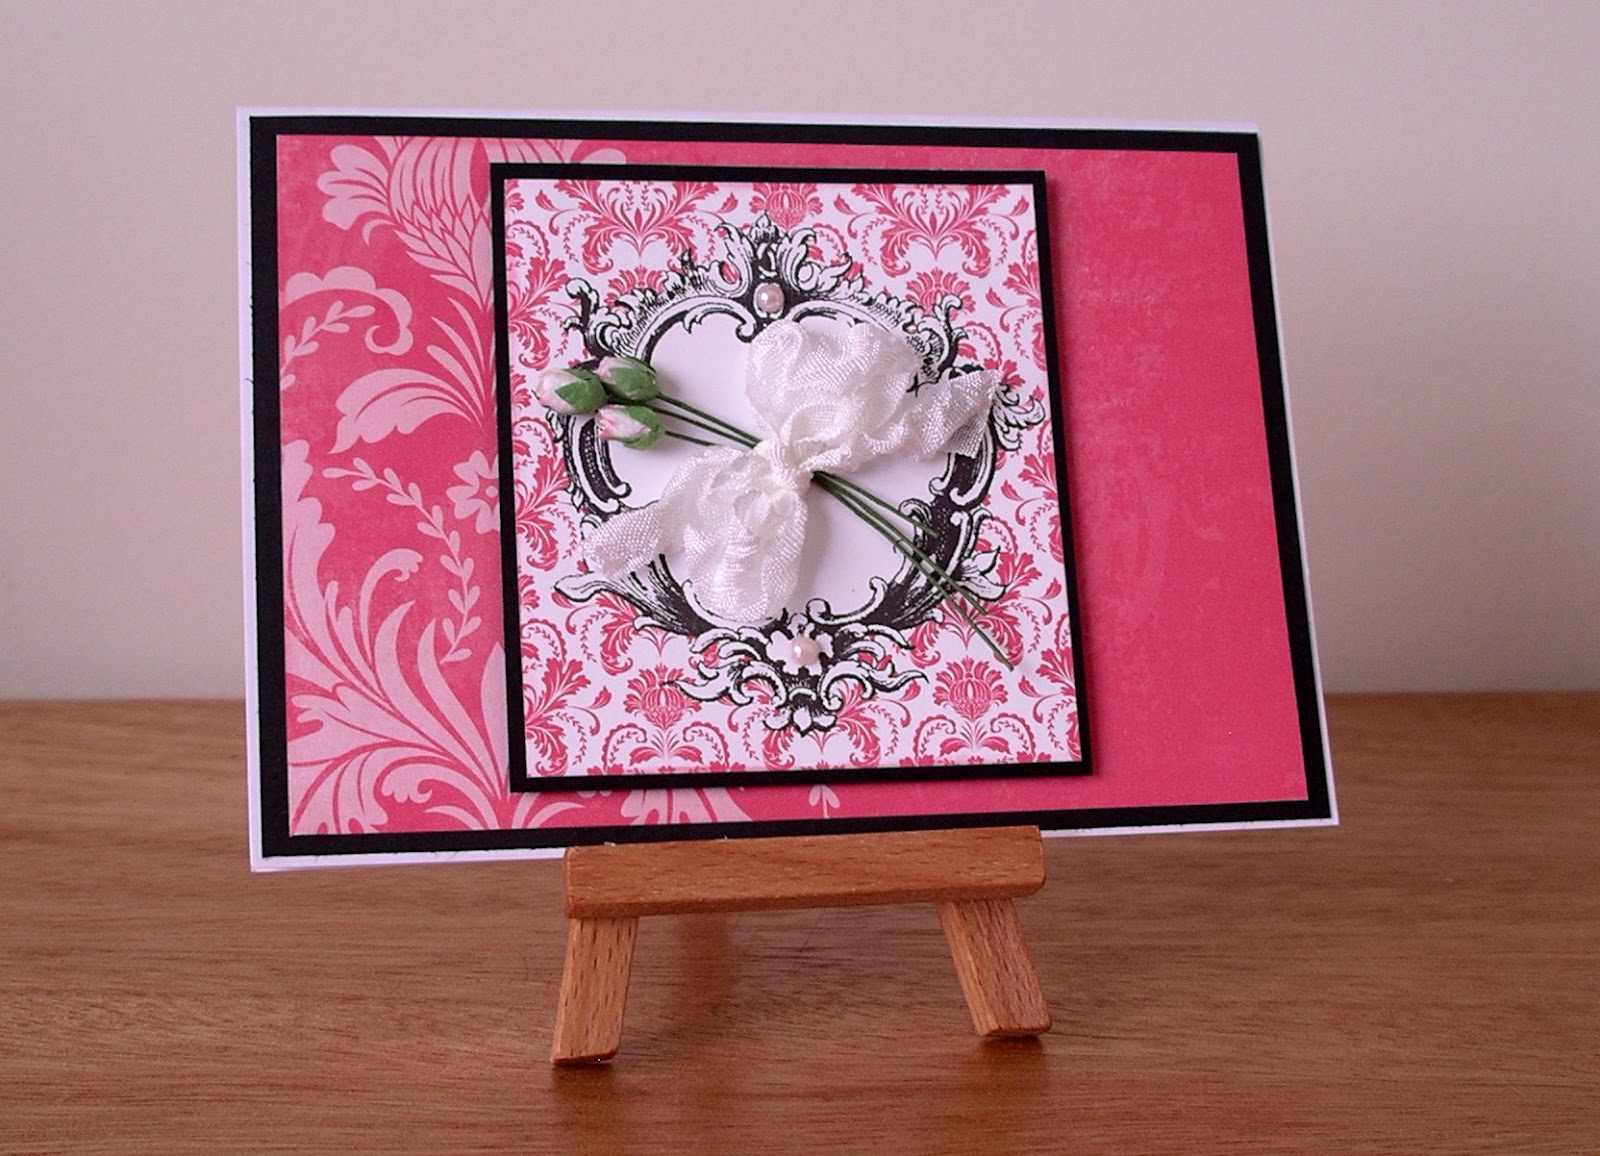
Here is my first card. For me getting the paper to work for me was was about adding black, yes black as a base & contrast! Why didn't I realise that earlier...I don't know. But, when I did finally figure it out I loved the look. I have made this a centre opening card & then the extra panel is stuck on to one side but sits central when closed.I kept the card pretty simple by layering & mounting, slipping the black in between. A flower, some wire, tag & a pearl.
My next card I started with landscape base then mounted by alternating the black card & pink patterned paper. I added some flowers,pearls & seam binding to complete the card.
Next up is an even simpler card, lately the simple clean look is my thing. Maybe a bit hard to see in the photo but I embossed the black base using a embossing folder in my cuttle bug. A Swiss Dot folder which is my favourite. It adds texture to the card without too much fuss. A pink panel of patterned paper, a piece from the journal sheet, some bakers twine, a brad, pearl & simple sentiment stamp.
Here are some small gift tags I made whilst I had the paper out, I hope you like them.
I very rarely get my scrapping stuff out & just make one card or layout, I need to make the most of all the bits & pieces whilst they are out. Otherwise they get put away perhaps never to be seen again.
When you're stuck where do you go for inspiration? For me its the internet & magazines. Do you have paper in your stash that you have struggled to create with? What works for you? We love to read your comments.
Have a great day.
Lisa
P.S. Don't forget about Centre Stage If you don't know what I'm talking about you better check out the link!
Hi Everyone. Lisa here. Have you heard about Centre Stage here at Artfull Crafts? Well if you haven't, then check out this post! Lots of fun, competitions, with a huge focus on Echo Park. I'm loving this as Echo Park is one of my very favourite manufacturer's. Today I am using a range called 'Happy Days' it is a really fun, colourful range.
I have made a cute little set that consists of a standard sized card, small square card & a sweet little milk carton that I decorated.
Here is a closeup of my first card. I used a standard card base, then added two co-ordinating patterned papers. I then added a simple clean white border that I gave a decorative edge by using my Martha Stewart Doily lace punch. I have had some bottle caps in my stash for a while & have finally decided to have a play with them. 'Happy Days is such a fun & funky range - I think they suit the range. I put the bottle caps through my cuttlebug to flatten them, punch out a circle of patterned paper, glue it in place then coat it with dimensional magic. How cute? Then a piece of twine to brighten it all up & your done. A really quick & easy simple but stylish card.
My next card I decided to make a small square card (measuring 4x4 inches), mostly because I think there cute...lol and I also like to mount with squares of patterned paper. So I used two different patterned papers taking advantage of the trendy yet vintage news print paper. A simple banner across the card hand cut & inked then mounted on foam tape. I then added a mini paper doily and another bottle cap. I love the look of the pretty floral cap with the other patterned papers, bringing the reds & blues out.
Ive had a template saved on file to make one of these cute little milk cartons. You can find free templates online just search for 'Free printable milk carton template' I printed mine straight on to patterned paper from the range. A simple graph style print. Very easy to construct. I decorated mine with bits & pieces from the sticker sheet. Kept it fairly simple by adding another bottle cap, inked edged & twine. I used a brad than can be opened with ease. Dare I say it these little cartons will be perfect to fill with Easter eggs!
I hope you have enjoyed my projects today, be sure to join in Centre Stage & our Challenges!
If you haven't used Echo Park paper make sure you check out our fantastic range of products.
Hi Everyone. Lisa here. Today I have made some cute little gift tags and a matching gift box using one of Echo Parks' Christmas ranges' "Seasons Greetings". This is a fantastic range that is a little different from the usual traditional or brights ranges available. It has a vintage/retro feel yet still traditional in theme. I really love it and it was great fun to work with. As I made this set of gift tags for a friend as a present, I have decorated a recycled chocolate box to store them in.
Here is a photo of the box when it is open. This particular recycled box has a slide out tray. I cut all separate pieces of patterned paper for each side of the box. Cut the pieces of paper slightly smaller than the box walls so that there is no overhang and no need to trim or sand down. Glue all your pieces to the box. Once dry, ink or sponge paint on to the edges. The Merry Christmas embellishments are chipboard stickers from the same range.
To make these sweet little gift tags cut a piece of card stock 2x4 inches - I used vanilla coloured card stock. Fold the rectangle piece in half to create a 2x2 square card.
I then cut a square piece of card stock slightly smaller than 2x2 square, which I embossed to add a bit more interest. I used a swiss dot & an ornament embossing folder in my cuttlebug to do this. Ink the edges & layer the embossed square on to the gift card. I then decorated the gift tags using various pieces of chipboard from the pack. I also punched out elements from the patterned paper using various sized square punches. I added some bling, mini alphas & twine to complete.
How are you all going with preparations for Christmas? It's very crazy at my house....I'm sure my husband would tell you that its me that's crazy! lol. Lots of shopping, cleaning, planning and catching up with friends for the silly season. I am so time poor at this time of year. However I really do like to be able to make a homemade gift or two. Have a great day.
I just received these this week and I was instantly inspired by them! I love this range by Echo Park which is called "Seasons Greetings". I really like to make handmade decorations, but as it is a busy time of year I don't always have time. These are perfect. They are very quick and easy to make & also quite cost effective. You get lots of chipboard shapes in the pack. Even after making seven decorations, I still have lots of bits & pieces left over to make more decorations or embellish other projects, cards or layouts. The possibilities are endless.
So here is what I came up with......
When using this type of product to make decorations it is important to retain the look that appealed to you in the first place, while adding your own personal touch to jazz them up.
Start by gently pressing the shapes out from the packaging. You can either retain the sticker backing on the individual pieces, or peel it off then rub baby powder on the reverse to remove the stick.
I inked all the edges of my shapes with silver ink using a sponge. I used a paper piercer to make a neat hole in any pieces that did not already have a hole for ease of threading ribbon or string through. I pulled out all my Christmas ribbons, embellishments, embossing powder, stickles, & bling from my stash and decorated away.
Use your embellishments to replicate what is already on the image. For example add dimension by using bling to replicate the berries on the holly. There are lots of great choices in the shop for embellishing with trinkets, buttons & bits & pieces. You must check out the little gingerbread men & holly...too cute!
Handmade decorations are a great gift idea and can become a family tradition that you can all get involved in...even the kids! Its also great way to build up your collection of decorations.
Hi Everyone – Lowri here with Sunday Scrapping (a day late – sorry!)
Liz has also sent me some great Challenge Entries from last month. Big apology to ladies who missed out on being featured on the blog - it was such a crazy time with SENZ BUT I will be doing a feature post on them later in the week as well as loading them up to our Competition Gallery which is now all up to date with entries back-dated to the start of our monthly Challenges. Head on over and take a look :-)
Another Echo Park “For the Record” project to share today and it’s a great way for using up scraps as well as a super cheap way to make some unique and stylish gifts. If you make some be sure to enter them into our monthly Challenge.
Tile Coasters
Not only fun, but this first one is super cheap and definitely one that you can do with older kids too. Take a look at these coasters - they look "designer" but in fact I reckon you could make a dozen of these for less than $20!
I was going to make a tutorial for these, but I quickly realized I could not possibly improve on the fabulous tutorial shown on the website where I originally saw this idea which was here at the Cottage Home Blog.
I have used papers from the Echo Park "For the Record" Collection (available here in the shop) and if you have not seen Echo Park's 6x6 paper pads I definitely suggest you check them out. They have the scaled-down designs like many manufacturers BUT they are also double sided which gives you many more options for use.
I followed the instructions shown on the tutorialabove, with a couple of exceptions. I used Spellbinders squares to cut my squares (I am somehow challenged when trying to cut squares with a paper trimmer!) and instead of felt pads I bought a pack of cork circles to adhere to the bottom ($2.99 from any hardware store)
The steps are basically:
Cut squares of paper to right size
Mod-podge the squares to the tiles making sure to get right to the edges
Apply 3 coats of Mod-Podge over the top of the paper
Spray with acrylic sealer (from hardware store - about $10)
Here are some close-up shots. These were supposed to be "rustic" looking so I was not concerned with the unfinished edges of the tiles, but you could of course paint them if you wanted a more even look.
Folded Mini Album
I have shown this type of album many times before (album made from one single sheet of paper - see here for my tutorial) but this time I wanted to demonstrate how the "Noteworthy" Paper from the For the Record Collection was perfect for creating a special little notebook
I am a listmaker - so these little titles from the Element Sticker Sheet were perfect for accenting the front of the album! The elements from the Noteworthy paper fit perfectly inside the 4"x3" size of the finished album
Each page has a spot for a list, note or little photo