Showing posts with label Joanne Care. Show all posts

Monday, June 20, 2011

Party Animals with Joanne

Hi Everyone, Joanne here with a couple of very simple scrapping ideas!

What I really love about the Kaisercraft Party Animals range is how it could so easily work for a boy or a girl. It would be great if you were preparing a baby album in advance (either for yourself or as a gift) and didnt know if the baby would be a girl or boy!

First up I have a super simple layout to share with you.

(Sorry about the badly lit photo - I quickly photographed it then dropped it off at the post office to send to Liz for SENZ without checking the photographs first, whoops!)


And a little close-up of the animals all handcut from one piece of paper.


Lastly here is a party invite that could very easily be mass-produced. The Giraffe is this stamp stamped onto patterned paper and handcut.


The invite is one piece of cardstock, on the back there is room to put all your party information which could be done by printing on a normal printer and cut to size.

Joanne :)

Tuesday, May 24, 2011

Tuesday tips with Joanne

Hi Everyone - Joanne here. Today I've got a few simple little tips to share that I have learnt over the years that have helped me a lot!

First up - Babywipes! These things are amazing! I always keep a packet on my desk to clean stamps mainly but they clean a lot more! I use them to clean down my desk also - they remove glue and paint with ease. Ive also heard they work wonders on things like GlimmerMist and even Vivids!

Nail files - If you are working with chipboard and don't have sandpaper or sanding files available try your trusty nail file. They also work great for distressing.

Problems with new clear stamps not stamping nicely? Try rubbing an eraser over the stamp, then ink and stamp on scrap paper. Repeat this a couple of times and you should have a lovely nice impression.

And last, but not least, if you don't have an block big enough for a clear stamp try using your Cuttlebug plates! I find the bottom one works the best because its large and doesn't warp in the Cuttlebug.

If you have any simple little tips that you love please comment and let us know!

Joanne :)

Friday, May 6, 2011

Quick and Simple Layout - Joanne

Hi Everyone, Joanne here. Today i've got a very quick and simple layout to share with you using the Echo Park Little Girl collection kit.

Once again, please click on the photos for a larger, clearer view. Im not sure why only my photos show up blurry when smaller...


My journaling will be typed, cut into strips and put opposite the title - once I get our printer set up again!

And heres a little close-up:


All products used apart from the white Bazzil cardstock and the Kaisercraft rhinestones were from the Little Girl collection.

Thanks for looking, hope you all have a great weekend :)

Thursday, April 28, 2011

Double Layout based on our Sketch - Joanne

Hello All! Joanne here with a two page layout inspired by Tanya's sketch!

Ive just noticed the new look for the blog - do you love it? I sure do! Such a gorgeous shade of pink!

First of all, here is the original sketch:
And here is how I rotated it to make it a two-pager:

Please excuse me for the bad, slightly blurry photos - Ive tried a few times to get nicer ones but with all this bad weather we have been having it hasnt worked :( Please click on any of the pictures to view larger.


Instead of the clustered embelishments along the bottom I used strips of paper and border punches:
And a couple of close-ups:


Supplies I have used are:
Echo Park Springtime Papers
Echo Park Springtime Element Stickers

Thanks for looking!

Joanne :)

Friday, April 22, 2011

Occasion Planner - Joanne

Hi everyone! Joanne here. Hope your all enjoying the long weekend. Its sunny up here in the Manawatu for a change!

Ive had this Occasion Planner sitting here for a few months now and I wasnt quite sure what to use it for. I realised this week that I rely on Facebook to remind me of friends and familys birthdays and thats when I decided I needed somewhere to have them all written down!

I have used some Echo Park Springtime papers to create this Planner. To be honest, none of the paper I used were whole sheets - all of them had been cut into to make the layout I will be sharing next week :)


For the front cover I used part of the scene on the Spring Day paper. and added a sticker from the Element Sticker sheet.


I know the titles for each section might seem a little unusual - I was trying to make-do with what I had left in my Bella packet! The info secion will be for things like account numbers etc, Months is for birthdays and anniversarys, and contacts is pretty self-explanitory.


If your looking for a project to make for Mothers Day what about one of these Occasion Planners? Theres pleny of ways to use them - party planners, wedding planners, a way to showcase your favourite photos....

Thanks for looking! Enjoy the weekend :)

Joanne

Thursday, March 31, 2011

Cupcake Cards - Joanne

Hello Everyone - Joanne here! For my first post of our new theme, Travel and Treats, I have gone along with the Treats theme and made some cupcake cards using the new Kaisercraft Bubblegum Hills 6.5" PadPapermania mix and match cupcake stamps and this awesome Spica Glitter Pen.


Now I'm not a stamper by any means but I loved using this little cupcake set! So many different possibilities and you can make a cupcake for any occasion! I stamped mine onto patterned paper from the Bubblegum Hills pad so that I didn't have to colour them in.


Unfortunately the Spica Glitter pen doesn't photograph very well but it gives a gorgeous effect in real life! I have used it on all three of these cards to highlight the lines on the cupcake holders and on the icing.


With this last card I wanted to show that although the paper pad is very girly and pink, you can make a more boy themed cards using it and the cupcake stamps. The paper I used for the cupcake holders on this card is the same striped paper I used in the above card on the background - I was very careful where I stamped the image so I only got 'boy colours'.

Thanks for looking :) Hope everyone has a great day!

Saturday, March 5, 2011

My take on the Sketch - Joanne

Happy Saturday everyone, Joanne here with my take on the sketch designed by DT member, Tanya.

To refresh your memory, here is the original sketch:


Because I had a verticle photo I rotated the sketch.


And heres what I came up with:


Ive had the white doilies stiting on my desk for a couple of months now and was too aftraid to use them. I thought I had read somewhere that you can cut them and they wouldnt fall apart - but I was wrong (or maybe it was the way I cut them...). I cut this one so it wouldnt be so bulky underneath my title block and it did start to unravell - so to easily fix this I just put tape on the part I had cut since it wouldnt be seen :)

Theres one more doilie sitting on my desk, I might just have to try using some mist on it to give it a different look.

Hope everyones having a great weekend!

Tuesday, February 15, 2011

Tuesday Tip with Joanne

Hi everyone, Joanne here with the Tuesday Tip for the week. 

Over the last week or so I have been on a little personal mission to find easier ways to get journaling on my pages. Most of the time I dont seem to incorporate it into the design then when I'm finished I cant find the right place to put it on the page. My stack of 'finished but not journaled' pages is getting a little big for my liking! I'm sure there are alot of you out there that are having or have had the same problem - so if you have any ideas please comment and let me know!

So I would like to share with you a few little tips that have helped me get more journaling onto my pages.
Hand Journaling
I know it might sound really simple but Ive heard that a huge amount of scrapbookers are too scared to handwrite on their pages for fear of making a mistake or 'ruining' their layout. I used to be one of them until I was watching a presentation online that spoke about leaving pieces of yourself for your family for after you have gone - and handwriting is a big part of who you are. Imagine if you had just a paragraph of your great-grandmothers handwriting - I know I would treasure it, as most people would. Handwriting your journaling is also the easiest and quickest way to get it done. Heres an example I made a few months ago:


Banners are a huge trend at the moment and here I have used the banner to anchor my hand written journaling.

If you just cant bring yourself to write on your layouts or dont like the look of it - write on the back of them. Ever since I had my daughter I found my memory just hasnt been able to keep up and Im scared of forgetting all the little things - so now when I complete a layout I write the journaling in pencil on the back of the page. That way when I get around to typing up all the journaling its right there for me, and also if I never get around to doing that the journaling is still there on the layout.

Computer Printed
This is one of my favourite ways to journal but it can be quite time consuming. The time it takes for me to do it this way is why my stack of to-journal pages has gotten so high! I dont have access to our printer via my laptop, I have to use my parters computer if I want to print, which can be quite a hassle (hence the influx of hand-journaled pages recently!).

Heres a little sample of typed journaling that I have cut into strips:


Products and Other Ways
There are alot of products available to help you with your journaling. If you like to make your own embellishments there are alot of stamps on the market that can help. These new Kaisercraft stamps are perfect if you have school aged children - but if you dont have kids at school you could be very creative when you ink the stamp and use a baby-wipe to remove the ink off the parts like where the middle stamp says "Subject, Grade, School" etc.

You could also write on these tags and either incorporate them into your layout or hide them behind pictures and other elements.

My post is getting a bit long now, but there is alot of other product in the Artfull Crafts store that would be great for journaling so I will just link a couple more up incase your interested!

Kaisercraft Clear Stamps
Kaisercraft Rub-ons
Die-Cuts (there is alot of different designs of these by Kaisercraft)
Basic Grey Label Stickers and Die-cut Pieces

Oh, and before I go, one last thing :) If you just cant find the words for your journaling - ask someone else to write it for you (like your partner or your children). Its great to have someone else's perspective on an event/photo. And it might also just connect them into your memory keeping just a little bit more :)

Thanks for reading!

Joanne

Thursday, February 10, 2011

Joanne - Love Projects

Happy Thursday everyone! Joanne here with a couple of projects I've made with some Love themed products from the Artfull Crafts shop!

First up is a layout I have made of my daughter in her woolens handknitted by her Great-Grandmother.

Products used:
Making Memories Vintage Pearl Paper  (Top and bottom butterflys)
And a closeup....
I love love love the red Making Memories Glitter paper! It would be perfect for making your own embellishments with. Ive kept every scrap of the sheet I have and am planning on using it for little butterflys on cards.

My second project for today was a Kaisercraft Wooden Photo Display.

As Shirl mentioned in an earlier post (found here) Kaisercraft have been coming out with these neat sheets of blocked paper that are made for these frames. All of the paper I have used is from this one sheet of paper from the Love Notes Collection.

I made this for my daughter and she loves looking at it and trying to drag it around with her. One thing I do want to mention is when painting these white they do need lots and lots of coats if you using normal craft paint. When I asked some of the Design Team for some suggestions of how to paint it they mentioned these tips:
  • Use a foam roller.
  • Spray paint.
  • Do a coat of sealer paint or gesso first before you start the paint.

Thanks for reading and I hope you all have a great day! Enjoy the sunshine!

Sunday, January 30, 2011

All About Love Challenge - and meet Joanne!

Hi Everyone – Lowri here and welcome to our first Sunday Scrapping feature and the launch of our first Blog Challenge.

Our Blog Theme and Blog Challenge for the next four weeks is:

♥♥♥ALL ABOUT LOVE♥♥♥

We don’t just want to see your Valentines projects (though we want to see them too) we want to see anything and everything that you love! 


For example, what about..
  • Layouts about LOVEd ones
  • Cards made for someone you LOVE
  • Maybe you LOVE to do BTP projects
  • A layout about how your kids LOVE pizza
  • Maybe you LOVE Cosmo Cricket 
  • Or you LOVE the colour orange...
You get the picture!! To enter the challenge - send a picture of your project to artfullcraftsdt@gmail.com You can send us as many entries as you like. We will be featuring entries and there will be a prize for the Challenge Winner!

The Design Team will be coming up with heaps of inspiration to help you along.

Here are some Valentines Cards I made using Cosmo Cricket's Circa 1934 Collection. I have more pictures and details on my blog


SUNDAY SCRAPPING -
Meet The Design Team


This week we are meeting Joanne Care - a talented scrapbooker from Feilding. 

Joanne has a beautifully clean, simple and graphic style of scrapbooking. We asked her the following questions and we asked her to share three of her favourite projects.

How were you introduced to scrapbooking?
About 5 years ago I was working in a call centre and we weren't busy so on my break I went to the supermarket to find a magazine to read. I ended up getting a three pack of Scrapbooking Memories, not having a clue what it was really all about - little did I know that I would be hooked! I used to make some really bad pages every now and again for a couple of years, and it wasn't until I found out that I was pregnant that I really got into creating rather than just reading about it!

What inspires you for layouts, projects, cards?
At the moment its the Internet. I find lots of inspiration through sketches and online galleries.

What other project types do you like to work on besides scrapbook pages?
I haven't branched out from pages apart from a couple of cards. One of my goals for the year is to build up a stash of cards ready for birthdays etc.

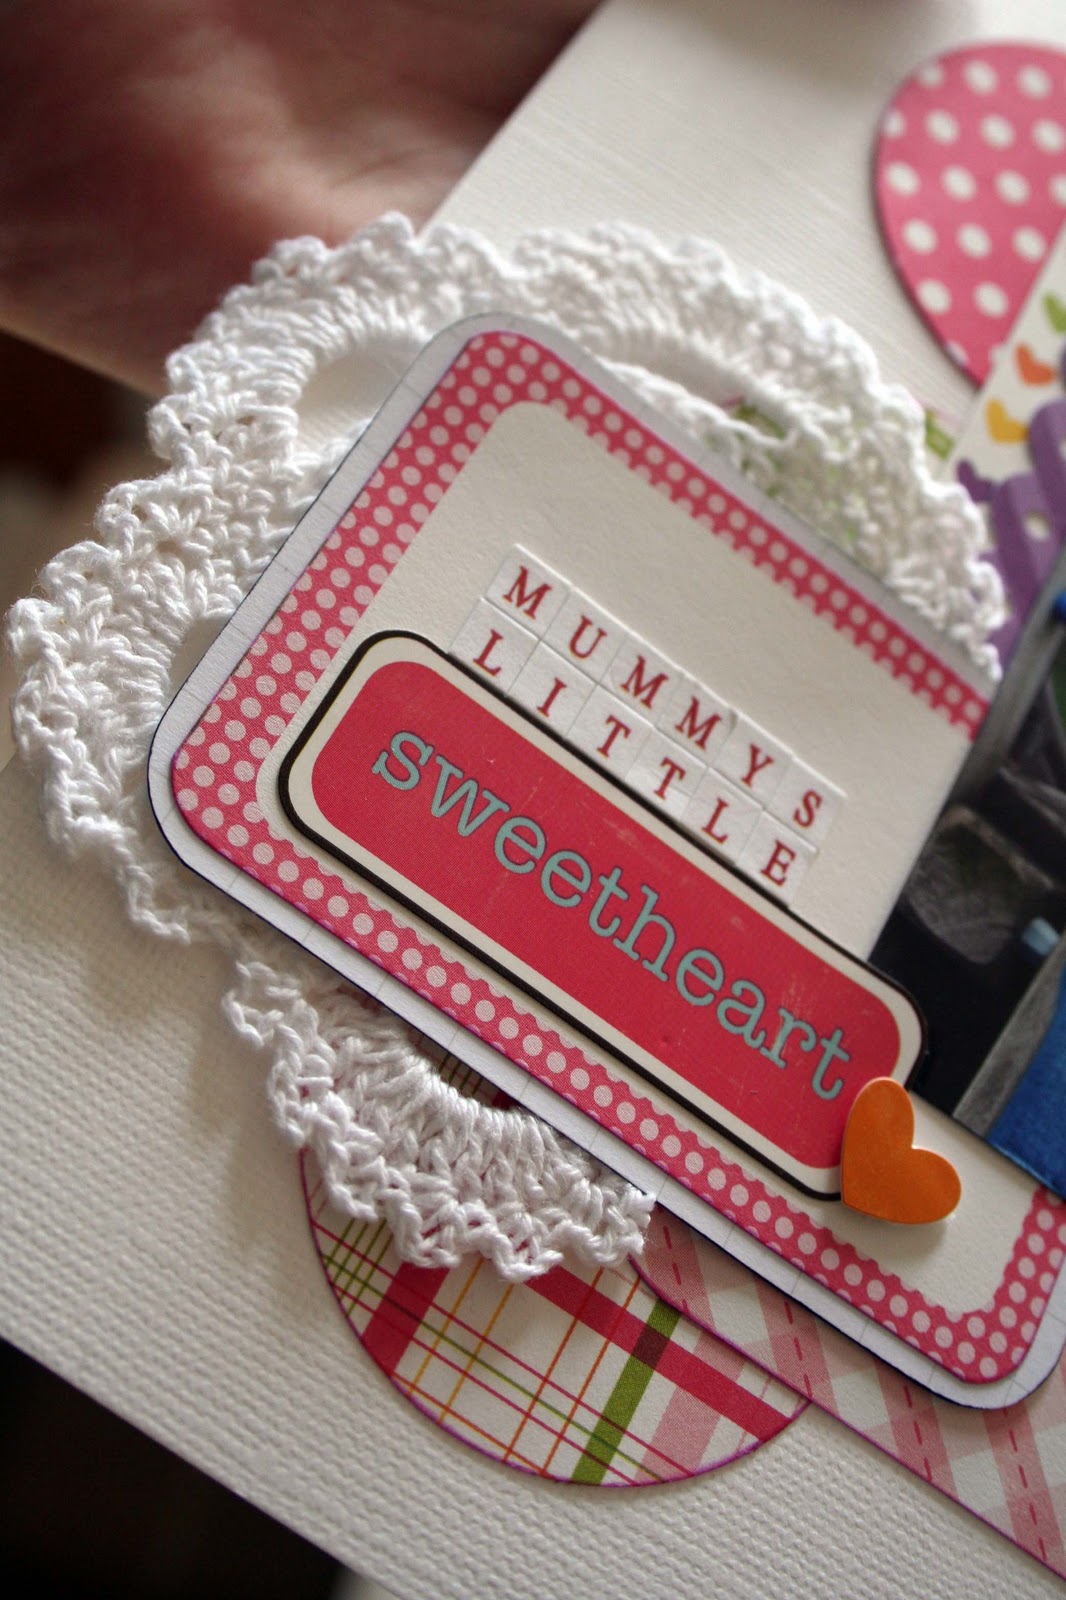
"Adore Love"
I have mixed emotions on this one - it makes me happy but also makes me want to cry. This is my Daughter and my Grandad (her Koko) the last time they were together. She was only 6 months old and already adored and loved him. I made this page as part of an online challenge. It was also the first time I had misted on a project, I used homemade glimmermist on the white doily to turn it blue. 


What is your favourite scrapbook brand and why?
There's too many to choose from! There hasn't been a Basic Grey release that has really hit it out of the park for me lately - but I'm holding out hope and they are still a big favourite. I love their wide range of embellishments. Echo Park has made a huge impact since they debuted - I really hope they continue! Ive seen their Little Girl line online and cant wait to get my hands on it. Ive also started using a lot of My Minds Eye, their recent releases have been perfect for photos of my little girl.

What scrapbooking tools/products can you not do without?
Border punches! Ive got a couple of 'standard' designs (scalloped etc) and find they fit any theme.


"At 9 1/2 Months"
My Mum was going to be looking after Hannah for a few days so I wrote a little bit about how we usually do everything, things she likes to eat and play with etc for her. That's when I thought it would be the perfect topic for a layout and would show a little snapshot of her life at this age. Reading the journalling she has already changed a lot and its only been a few months! The patterned paper behind the photos are strips that I have cut and layered together. Basic Grey's Basics line is perfect for pages with lots of journalling!


What is your current favorite technique or embellishment?
I'm not a very technique-y person. I do love the rolled fabric flowers though, but find them a little bulky for my pages.

What do you hope to try or improve on this year?
I want to finish the pages I've yet to do of my daughters first year. I'm working on Project Life this year so I'm not planning on doing any 'normal' scrapbooking pages of 2011 (With the exception of a couple of pages mixed into my Project Life album) so this will (hopefully) give me some time to catch up. Also, as i mentioned above, I want to build up a stash of cards. I'd also like to try a mini-album or two as I haven't been very successful with them in the past. Oh and really give Glimmermist a proper go - haven't been able to manage that yet! Any suggestions how to use them would be great!


"So Sweet"
This is one story I have wanted to document ever since it happened and I only just managed to do it after Christmas! Hannah and I were staying at my Grandparents for a week and Hannahs bedroom was further away than it is at our house so I never heard her wake up in the mornings. Even tho Hannah was far too heavy for my Nana to lift easily she still managed to pick her up, put her in bed with me and turn the TV onto cartoons! I would wake up and Hannah would just be sitting there smiling at me watching TV. Its little things like that that I just love.

What advice can you give to people just beginning to enjoy scrapbooking?
Start off small. The first thing I wanted to do when I started was an album of my 21st photos mixed in with my photos growing up - It was too big of a project to start with for me, and to be honest, Ive never started it. Find some other people that scrapbook if you can, in person or even online in a forum or gallery - you'll find a lot of ideas and inspiration through them and you'll also have people to talk about it all with! Non-scrappy people just don't understand sometimes :)

Do you have a blog?
Yes - but I don't update very often! I'm hoping to change that this year. http://twoandahalfcares.blogspot.com

Thanks Joanne - we are really excited about seeing more of your work this year!

Don't forget to start thinking about YOUR challenge entry - and please leave a comment with any questions.

Tuesday, December 21, 2010

Very Very Simple Gift Tags - Joanne

And Im not kidding! They are simple! At this time of the year everyone is so busy and getting a little stressed out, as I'm sure you know. In my opinion some people put far too much pressure on themselves at Christmas time so I decided to do something simple and no stress! :)


For this gift tag I have used one of the larger holly pieces from the Kaisercraft chipboard set, punched a hole in the top and tied some ribbon in it. The great thing about the chipboard that it is a plain kraft colour on the back so we can easily write on it!


Now this one is cut from an Echo Park Paper. Ive put a Kaisercraft rub on at the bottom and once again punched a hole and tied some ribbon in it. The size of this tag would also be great if you wanted to put pictures of the recipient on the tag (perfect for little children that cant read their name yet).


This one is also cut from the same Echo Park paper. The back is just a plain green so will also be easy to write on.


This one is a tag from the Kaisercraft Tag Book. Ive inked the edges heavily (which didnt show too great in the photo), put a small piece of holly from the same chipboard set as mentioned above and a small piece of bling onto the holly.


And this last one is also straight from the Kaisercraft Tag Book. All ive added is some bling to the top of the tree and the ribbon!

Ive just tied all of the ribbon in a bow as I havent yet decided how they will be attached to gifts. Some will be tied on and others will just have some adhesive on the back and stuck on. With the ones that are stuck on I will re-tie the bow nicely.

Thanks for looking! I hope ive inspired you to create some lovely tags with whatever is on your table at the time :) Merry Christmas everyone!

Thursday, December 2, 2010

Home Decoration - Joanne

Hi there everyone, hope December is treating you all well :)

Liz sent me this Kaisercraft Script word as part of my Christmas parcel. I love how it stands on its own!

My partner was kind enough to spray paint it metallic silver for me. I originally wanted to have it silver then stamp this or this on it in white ink - but by the time I went to create it I realised I didnt have any white ink that would work on the spray painted surface! Whoops! So its just been left silver. I can always peel off the bling and do that in future....Just a random thought, embossing the stamped design would look great too, Im just not too sure how the spray paint would react to that.


Ive added some Kaisercraft Bling to the M, Y, C and S. I would have loved to cover the whole thing in the clear bling, as I have seen somewhere online. Ive also added a large piece of bling for the dot on the i.


We dont decorate very much for Christmas so I think this will fit in perfectly on the mantle :)

Thanks!

Saturday, November 27, 2010

Joanne - Tree Decorations Kids Can Make!

Hi Everyone!!

This week I've decided to show you some decorations you can get your children/grandchildren involved in!

Microwaveable Salt Dough Decorations.

You will need:
  • 4 cups flour
  • 1 cup salt
  • 1 1/2 cups of hot water
  • Christmas cookie cutters
  • Rolling pin
  • Whatever you choose to decorate them with, paint etc
I have only used half on the mixutre here and I got over a dozen ornaments.

Mix the flour and salt, then add water and kneed into a dough. Roll it out and use cookie cutters to cut the shapes you want.

Dont forget to put holes in them for the string to hang them with. Make the holes a little larger than you think you will need as they tend to close up a little when cooked.


Now the directions I had found wernt very clear on how long to cook them in the microwave. I put about 5 flat on a dinner plate (dont put them on paper or plastic) and cooked them on high for 4 minutes, checked them, then cooked them for between 2-4 more minutes. Keep checking on them all the time.

One thing I must say is DO NOT leave the microwave while they are cooking please!! They burn very very quickly and I dont want any fires started. Most of mine were taking 4 minutes then another 4 minutes to cook but my last ones decided that 4 minutes and 2 minutes were enough and when I opened the door to check on them they were burnt and smoking, so please be very very careful!


After they are all cooked and cooled down you can decorate them however you wish! I havent decorated mine as I'm planning on giving them away as a little before Christmas craft :)


You could also use Embossing Folders to press a design into them before cooking and add food colouring to the dough.

Thanks for reading :)